1) Add Your Domain
Go to the product page for your plan in our billing area, click 'Manage Product', then 'Add New Domain'.
Pick the features you want enabled, hit 'Submit' and you'll be presented with your administrator login and a DNS TXT record to verify your domain.
2) DNS Verification (required)
You must add the TXT record that's presented to your DNS host.
The domain will be in a "Pending" state until our system sees this record created for your domain - we run checks about every minute.

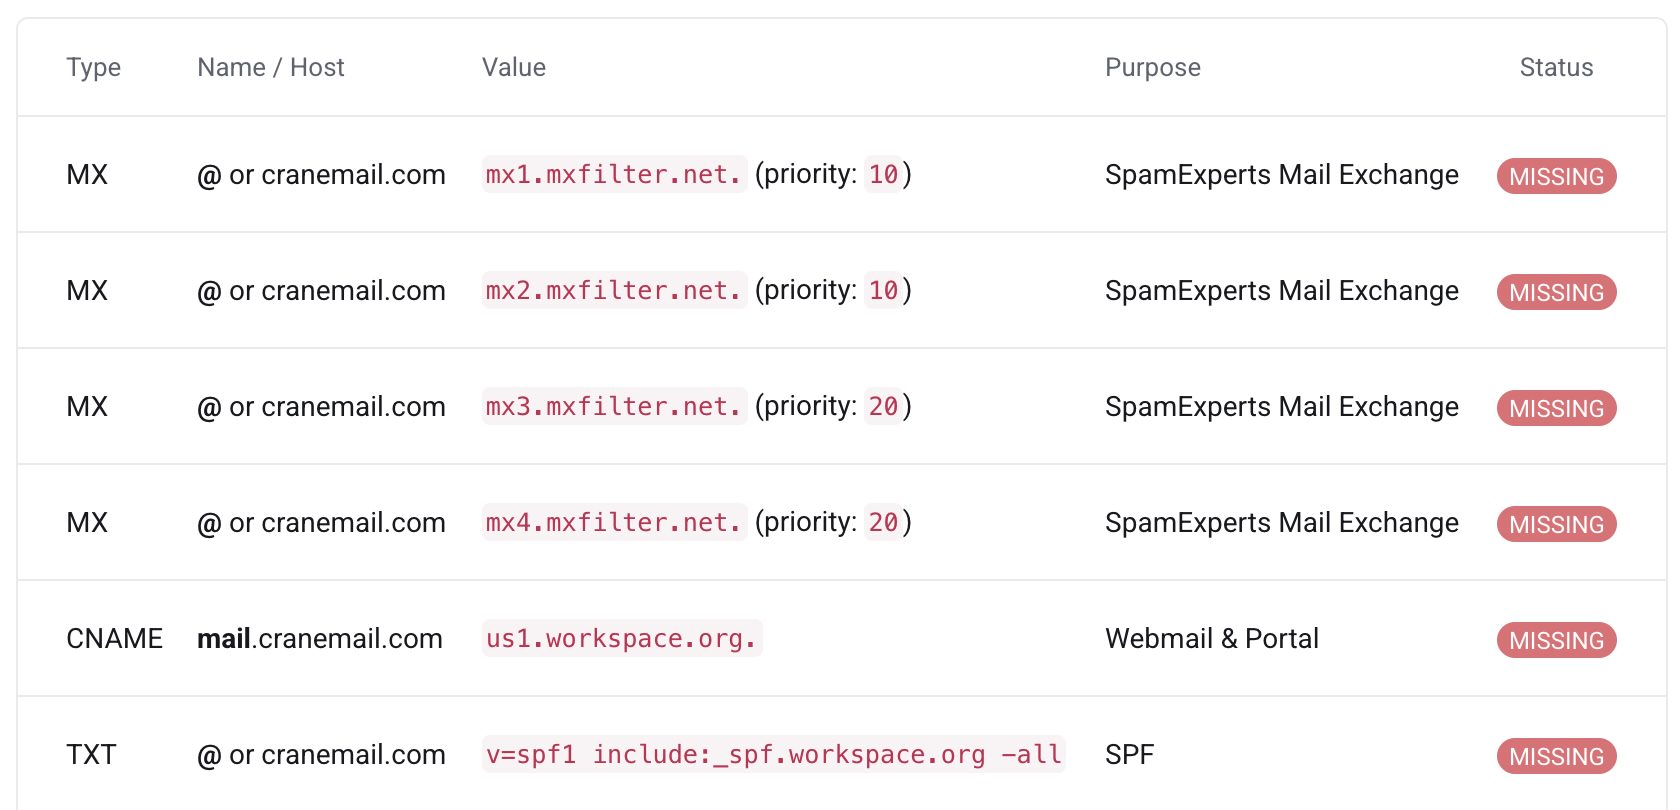
3) Configure Your Mail Records
The next page in setup is the DNS Setup Guide and lists all the records required for you to successfully send & receive email.
Please add all of these. You may need to modify the SPF record if you send mail from other services (newsletter platforms, hosting accounts, etc) - just make sure your add in `include:_spf.workspace.org` to your existing record in that case.
You will want to wait until after the verification completes to add these. If you're using a new domain/don't have an existing email setup, you can add them immediately.
4) Create Accounts/Aliases & Login
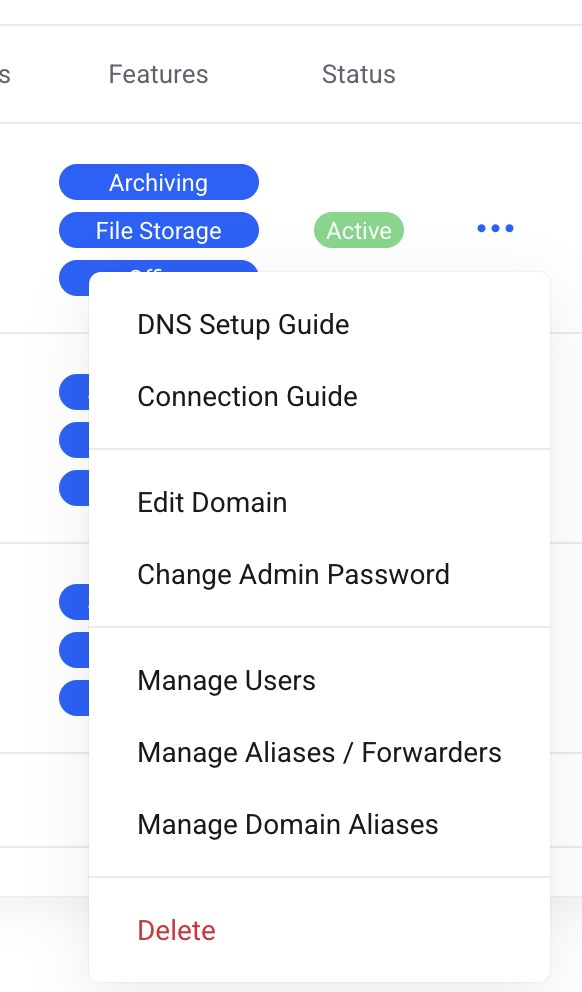
You can bulk add email accounts, aliases (forwarders) and more through the CraneMail portal in our billing area. Click the `...` menu next to your domain to access these tools.
You can also login to the server directly with your administrator details, navigate to the 'Domain Settings' menu bar item, then 'Accounts', and add/modify from there.
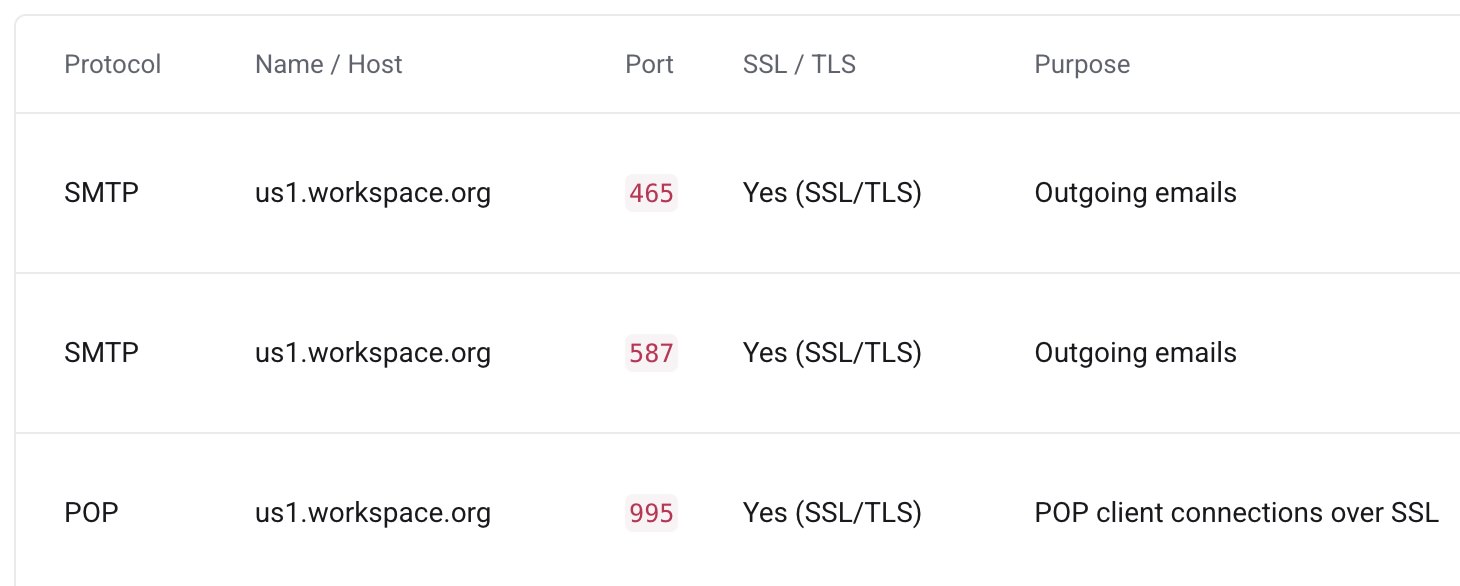
5) Connect Your Email Clients
Your account will be accessible via webmail on workspace.org, your custom hostname once DNS is pointed/an SSL certificate has generated (mail.yourdomain.tld), plus you can configure your favorite mail client directly.
Next to your domain click the menu drop down and hit "Connection Guide". This lists all the hostnames, ports and protocols to use when configuring your mail clients.