WordPress LiteSpeed Cache Installation Tutorial
1. Install the plugin
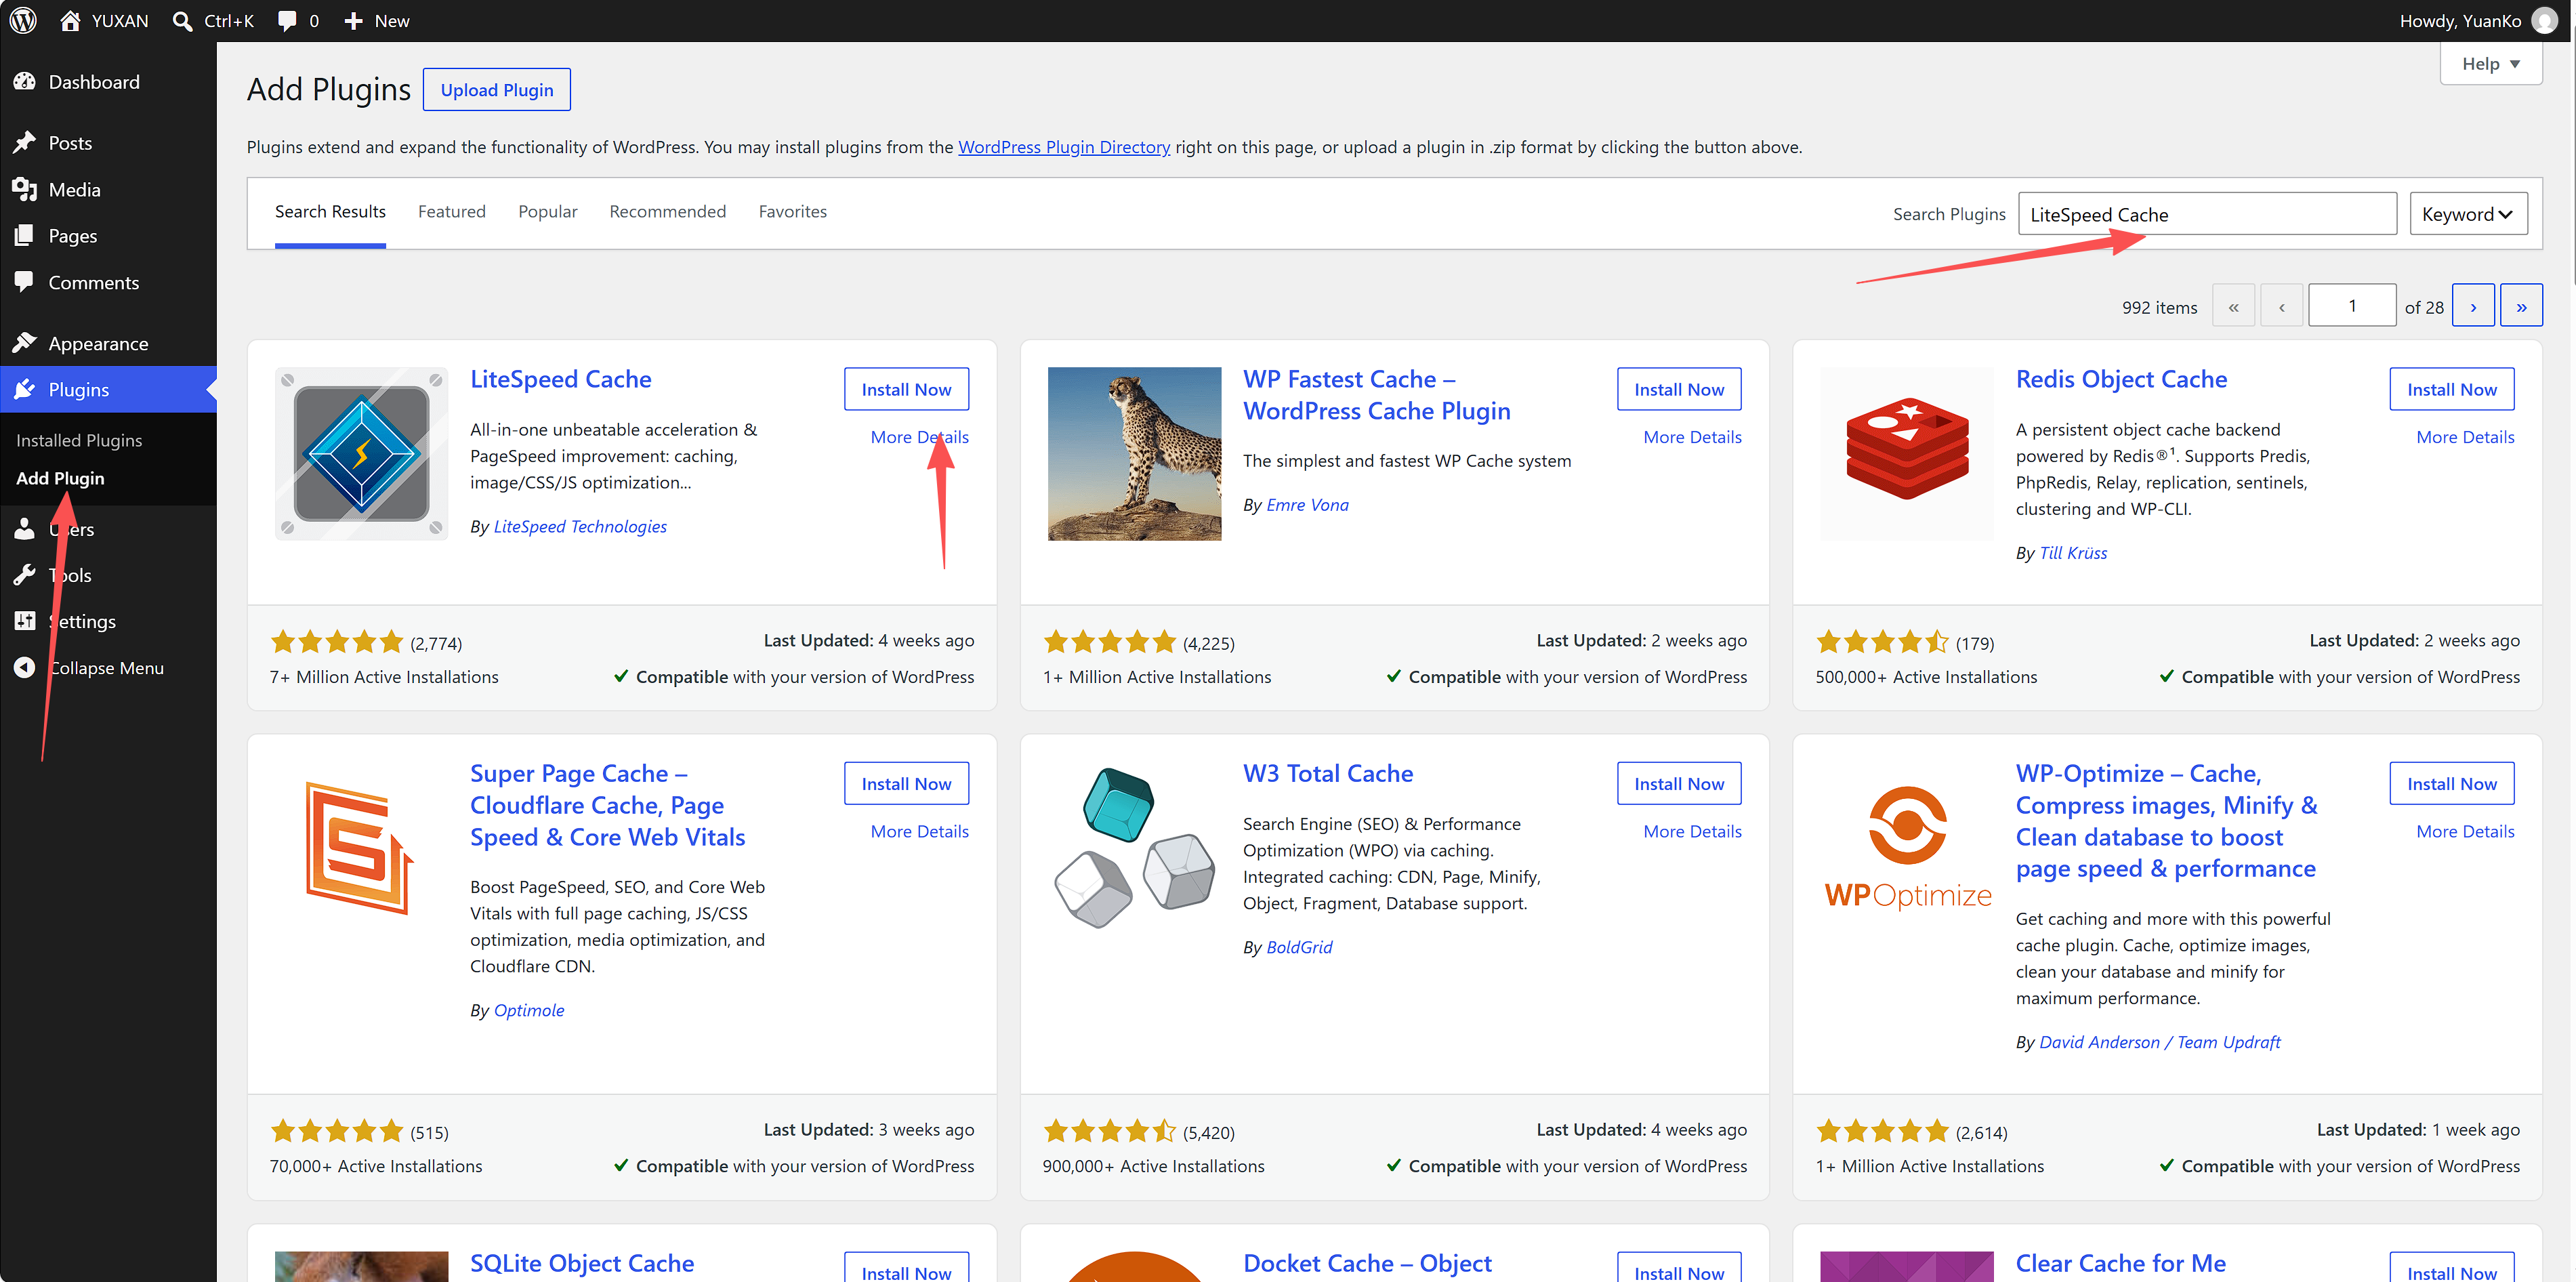
you can go to your WordPress admin panel, click Plugins - Install Plugins, search for LiteSpeed Cache, install and enable it.
2. Enable caching
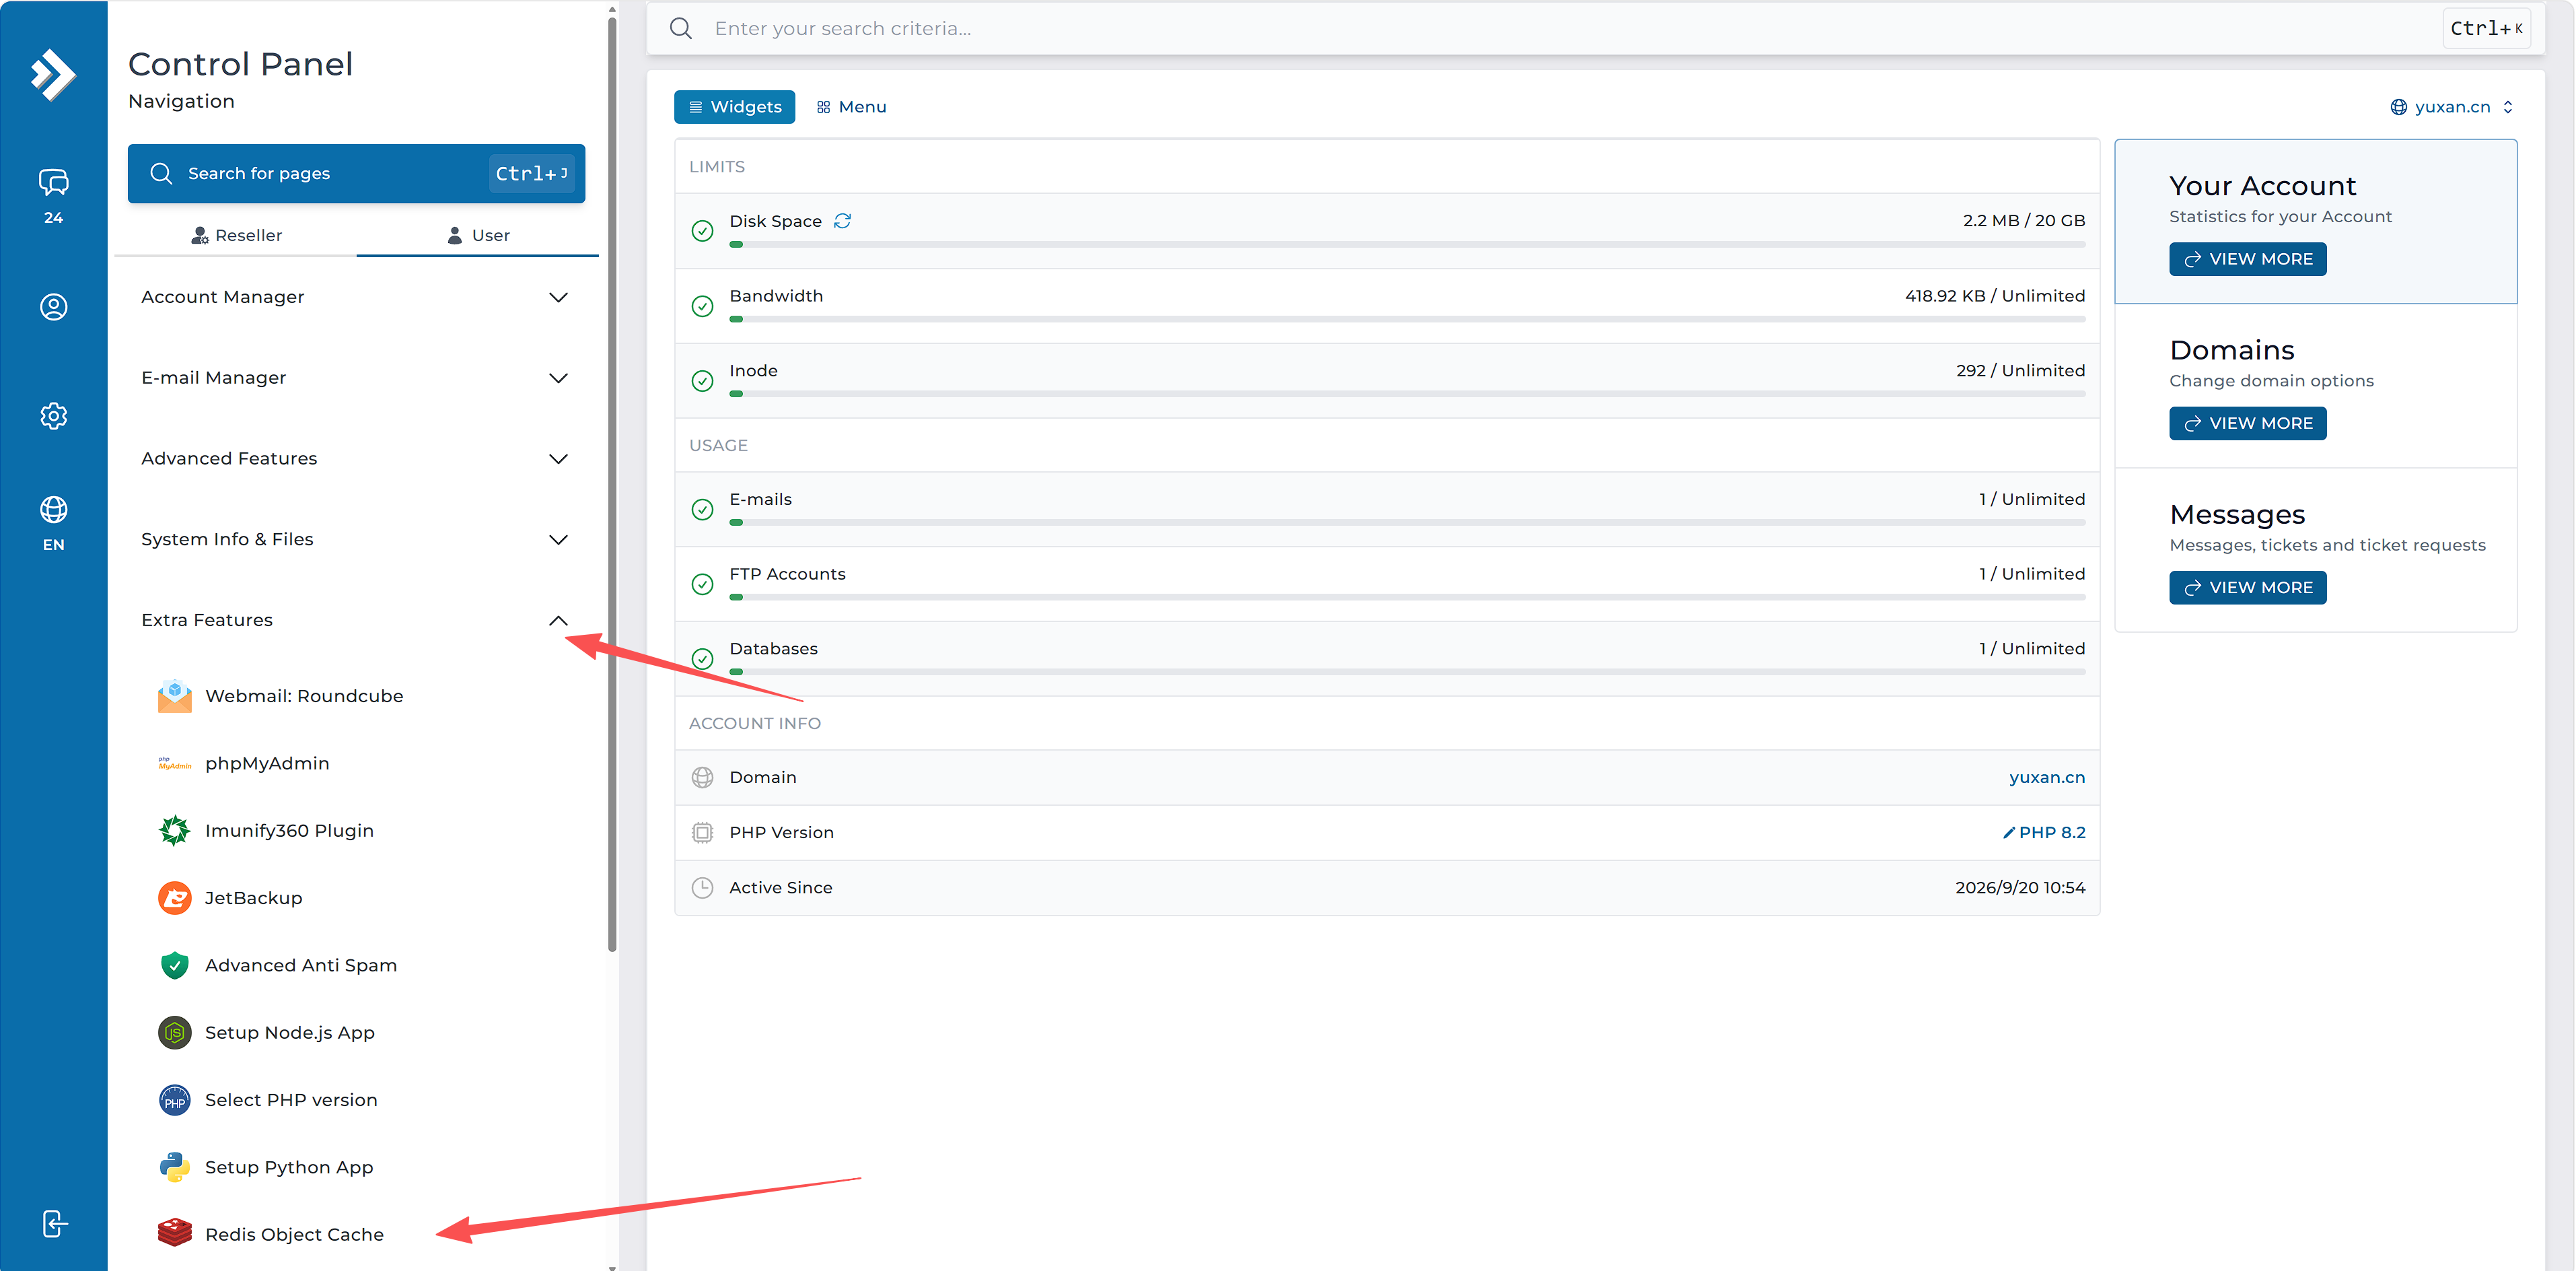
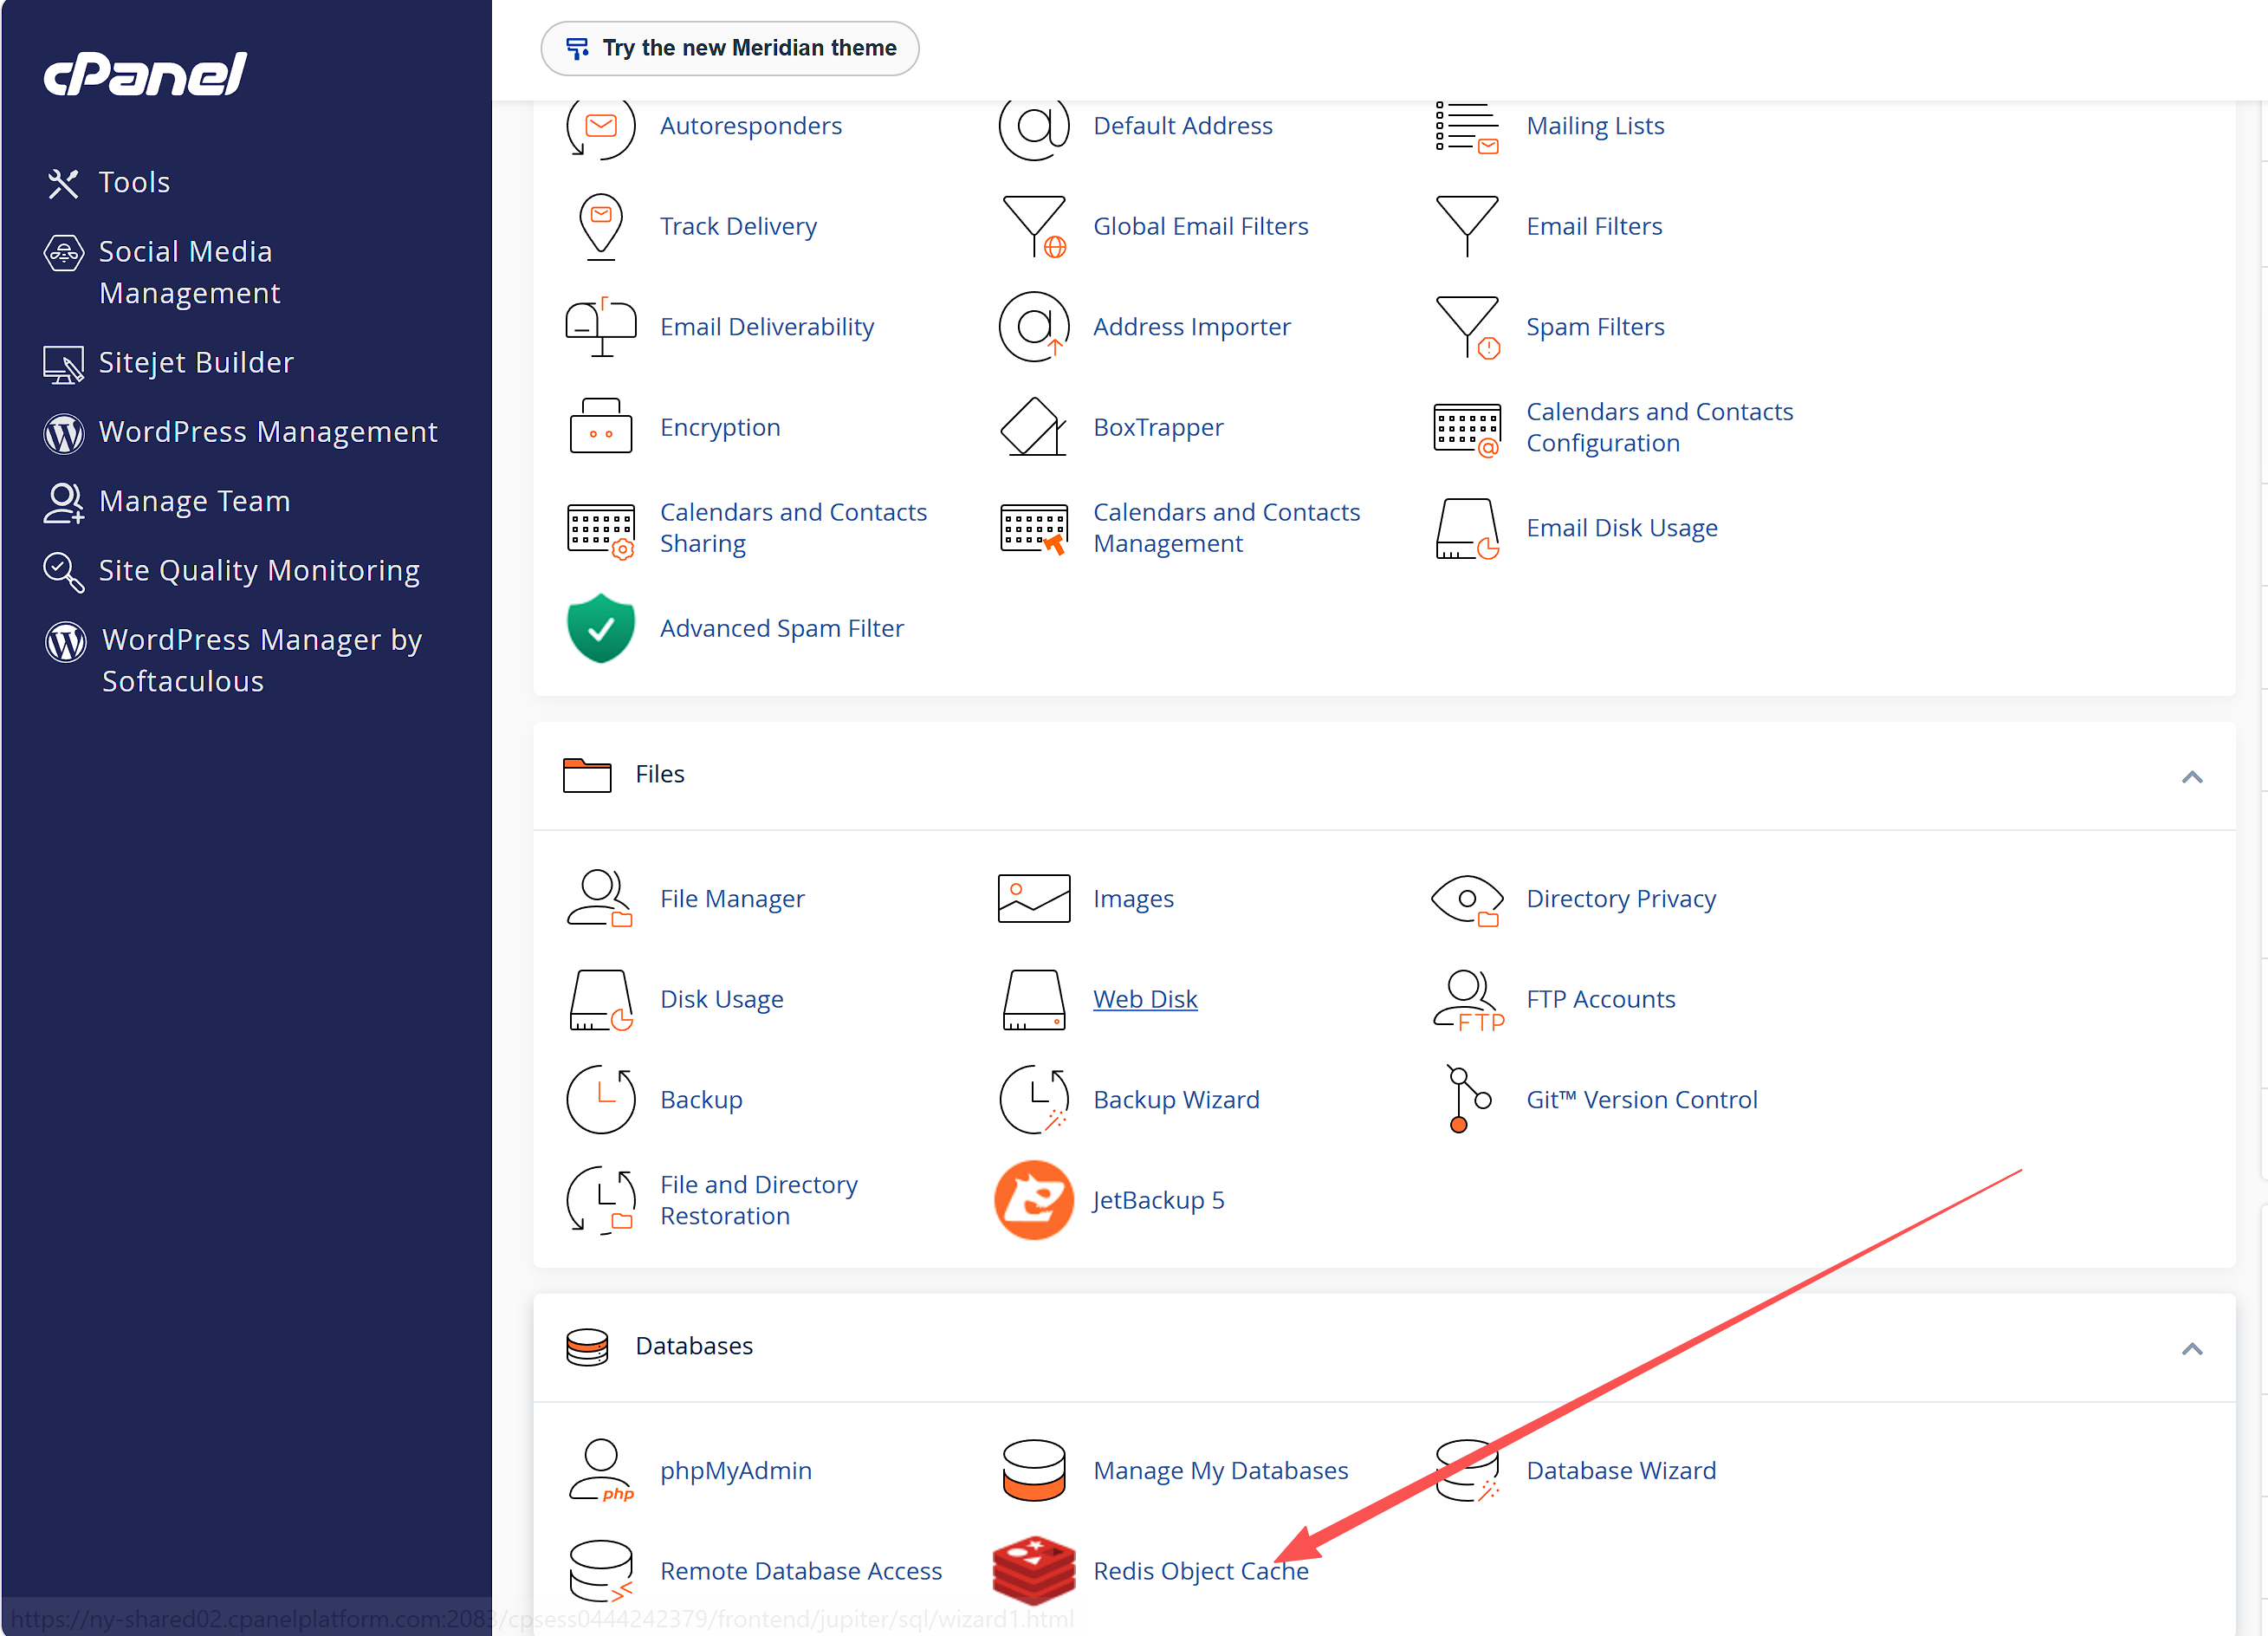
You’ll then see LiteSpeed Cache appear in the sidebar. Click it, select Cache, and then select Object. The first time you click it, it will recommend using QUIC.cloud CDN; click “Don’t show this again.” (Use as needed) The necessary Redis configuration information can be obtained from the following addresses:
DirectAdmin-Advanced Features-Redis Object Cache
cPanel-Database-Redis Object Cache
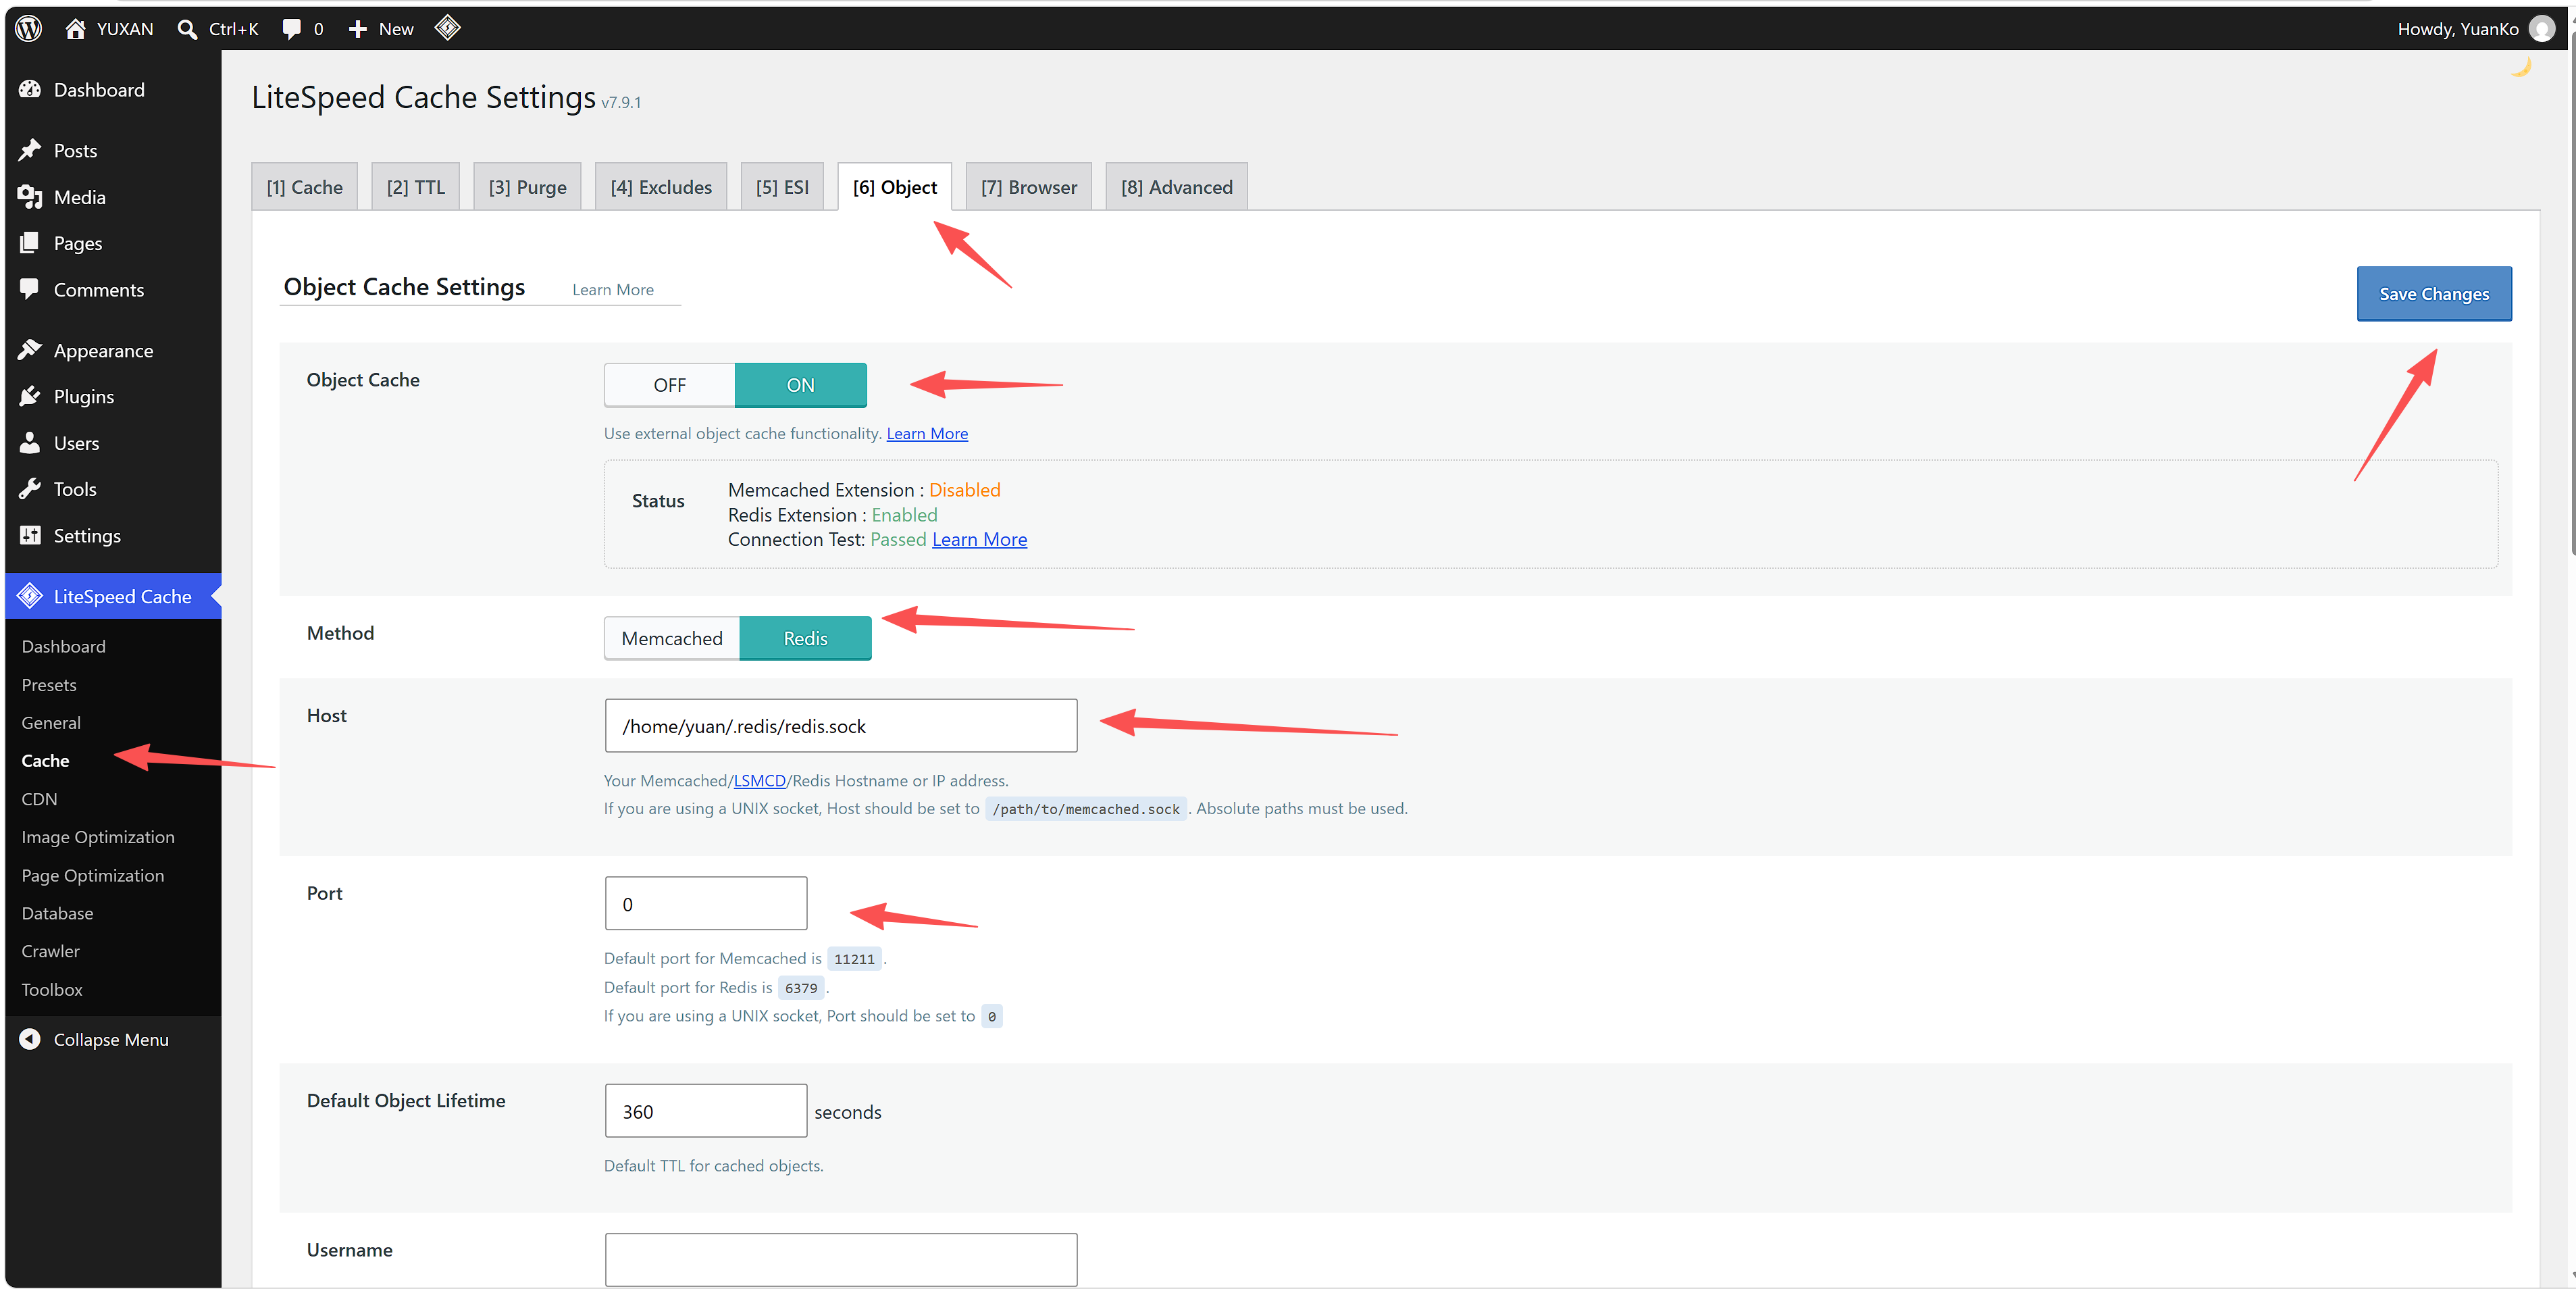
Select ON for Object Cache
Select Redis for Method
Enter the Socket Path obtained from Redis Object Cache for Host
Enter 0 for Port
Finally, click Save Changes, and LiteSpeed Cache deployment is complete.