How to Create a Subdomain in cPanel
Last updated Changelog
On this page
A subdomain is an address in front of your domain, such as blog.yourdomain.com or shop.yourdomain.com. It can run a separate website, for example a blog next to your main site, without registering another domain. In cPanel you create subdomains in the Domains tool.
Steps
-
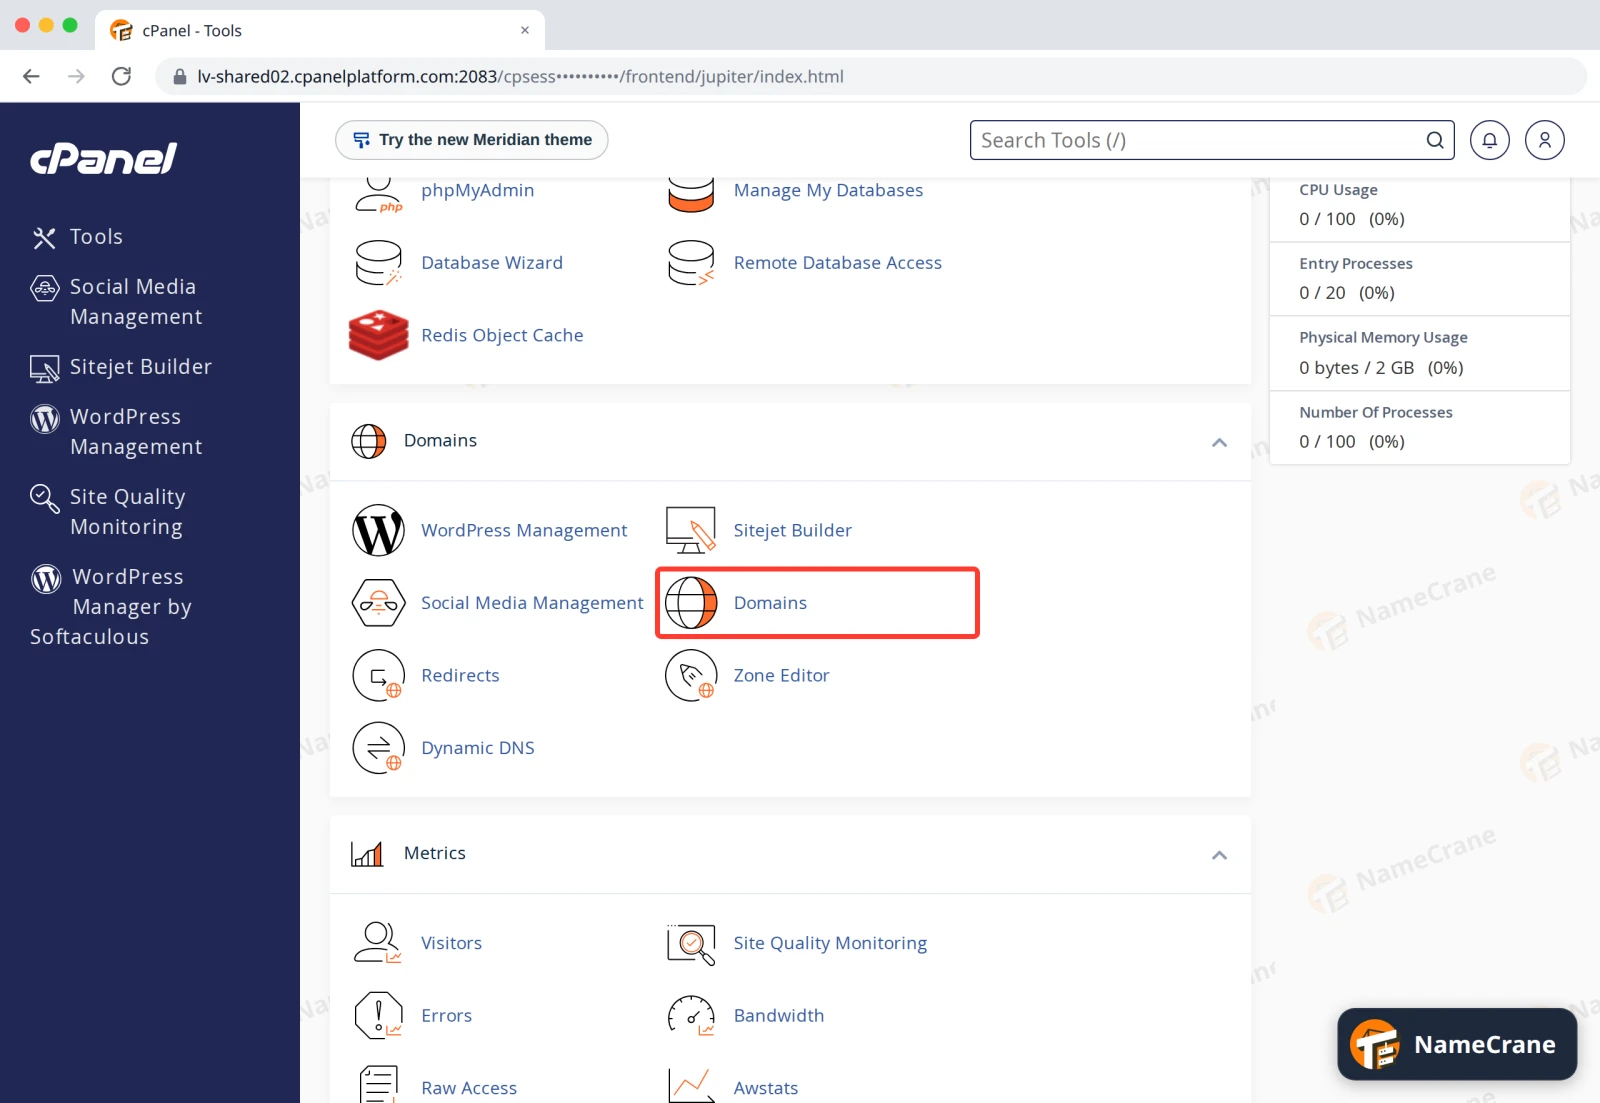
Log in to cPanel. In the Domains section, click Domains.
-
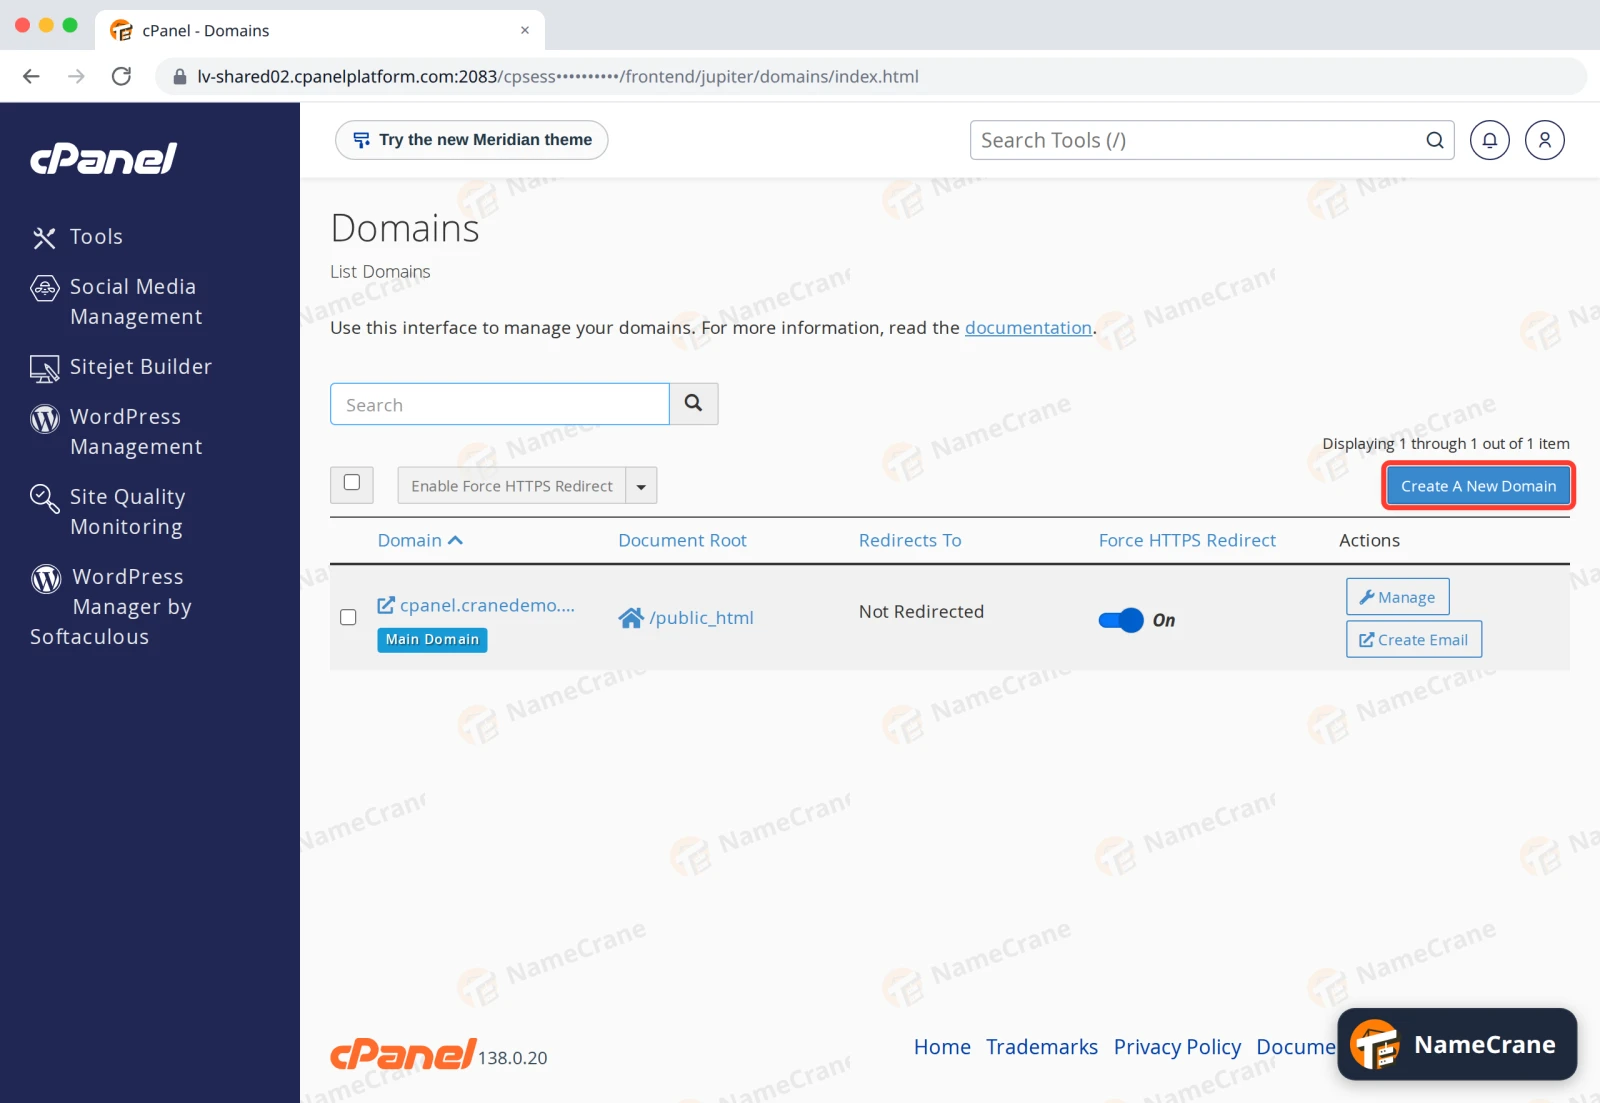
Click Create A New Domain.
-
In Domain, type the full subdomain, such as
blog.yourdomain.com. Untick Share document root so the subdomain gets its own folder: cPanel fills in Document Root for you (hereblog.cpanel.cranedemo.com). You can’t change this setting later. Click Submit.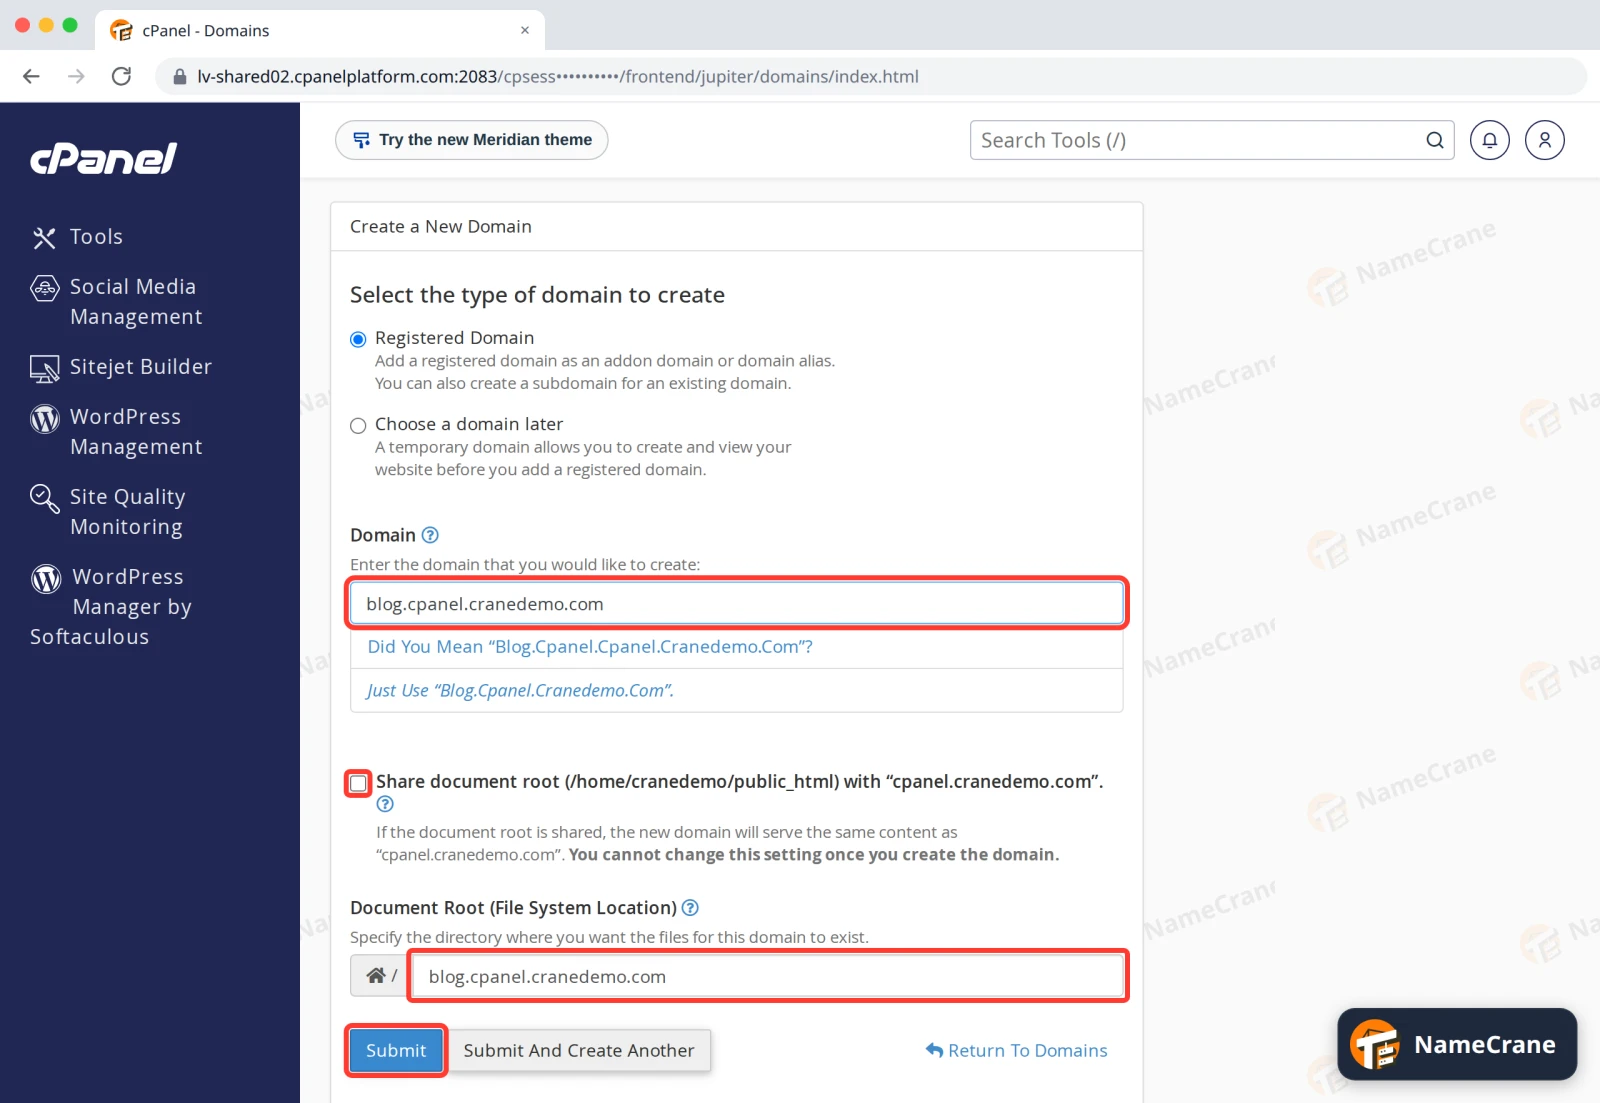
-
cPanel shows Success with the new folder’s location, and the subdomain appears in the list.
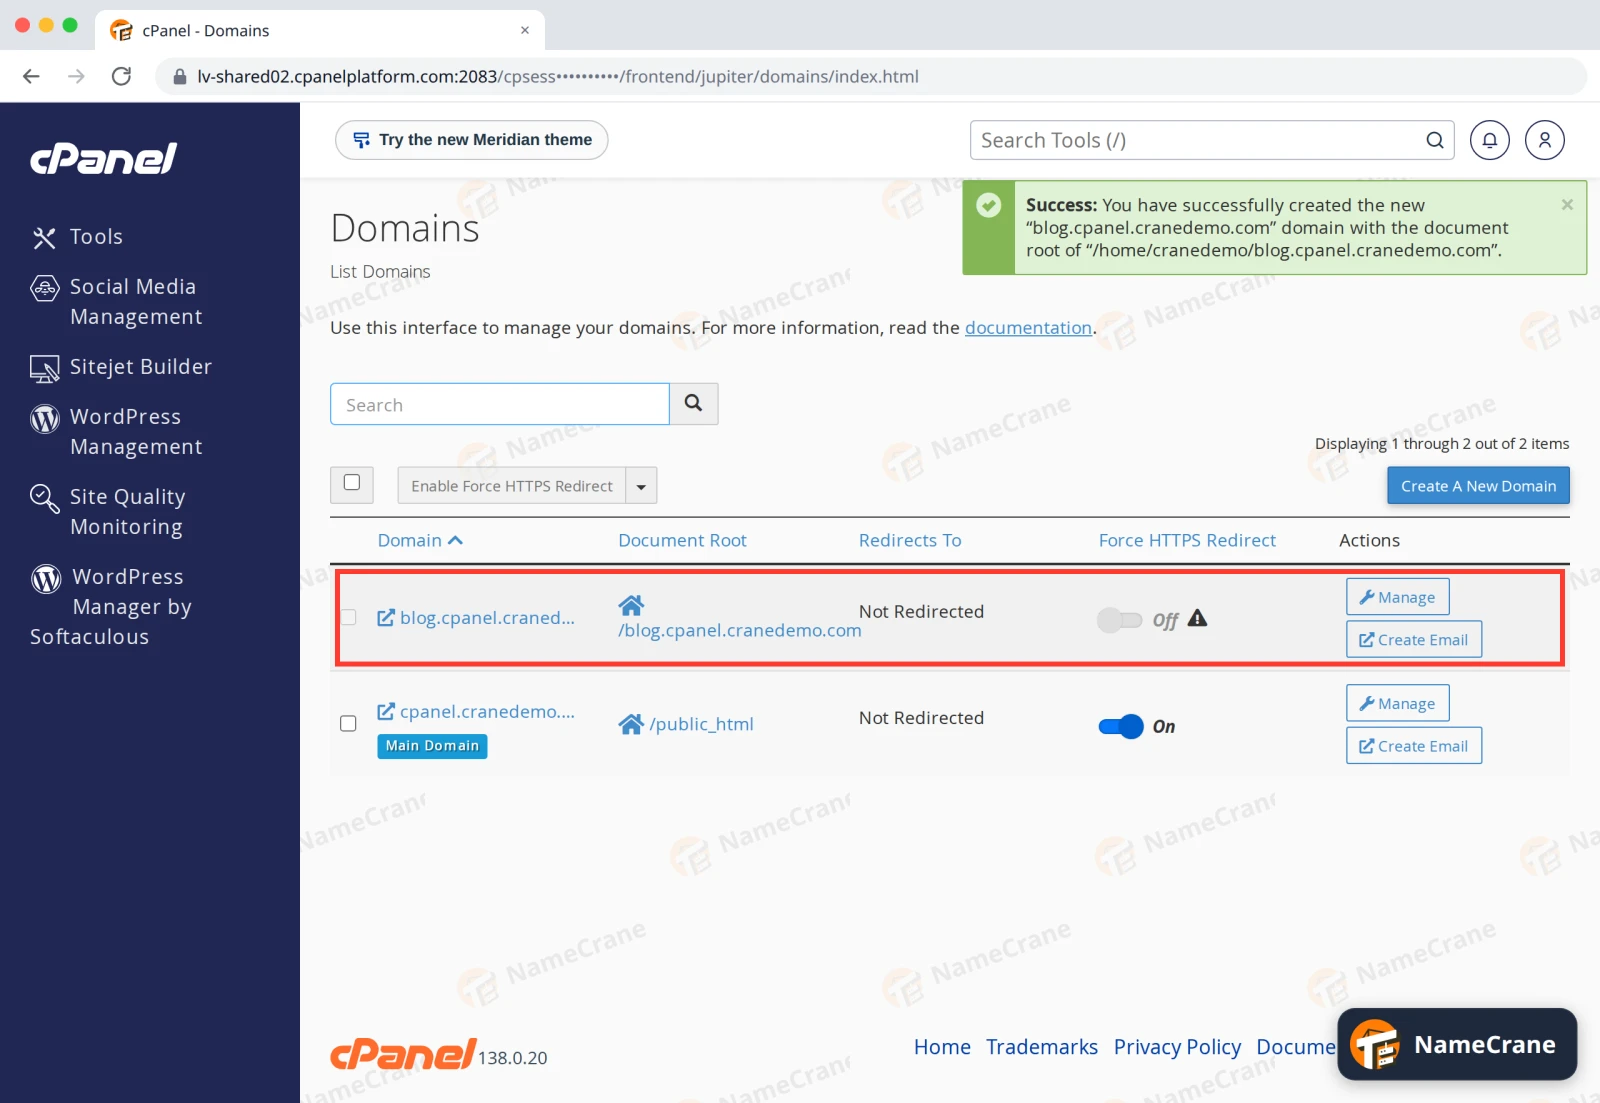
cPanel adds the subdomain’s DNS records for you. If your domain uses NameCrane’s nameservers, there’s nothing else to set up: in our test, the new subdomain’s record was in place straight away.
Upload your site to the subdomain’s folder with File Manager, or install WordPress on it.
Troubleshooting
| Problem | What to do |
|---|---|
| I left Share document root ticked by mistake | The subdomain shows the same site as your main domain. Delete it under Domains › Manage, then create it again with the box unticked. |
| It doesn’t work and my DNS is hosted elsewhere | If your domain uses other nameservers (such as Cloudflare), add an A record for the subdomain there, pointing to the same IP address as your main domain. |
| The browser shows a security warning | The free SSL certificate is added automatically, but can take a little while. See Free SSL. |
Snagged on something? Contact support and we’ll get you sorted.