How to Use DirectAdmin File Manager to Upload, Extract and Manage Files
Last updated Changelog
On this page
File Manager lets you work with your website’s files in your browser, with no FTP app needed. In DirectAdmin, your main website lives in domains › yourdomain.com › public_html. In this example we’ll upload a zip file, extract it on the server (much quicker than uploading many files one by one), and check its permissions.
Upload a file
-
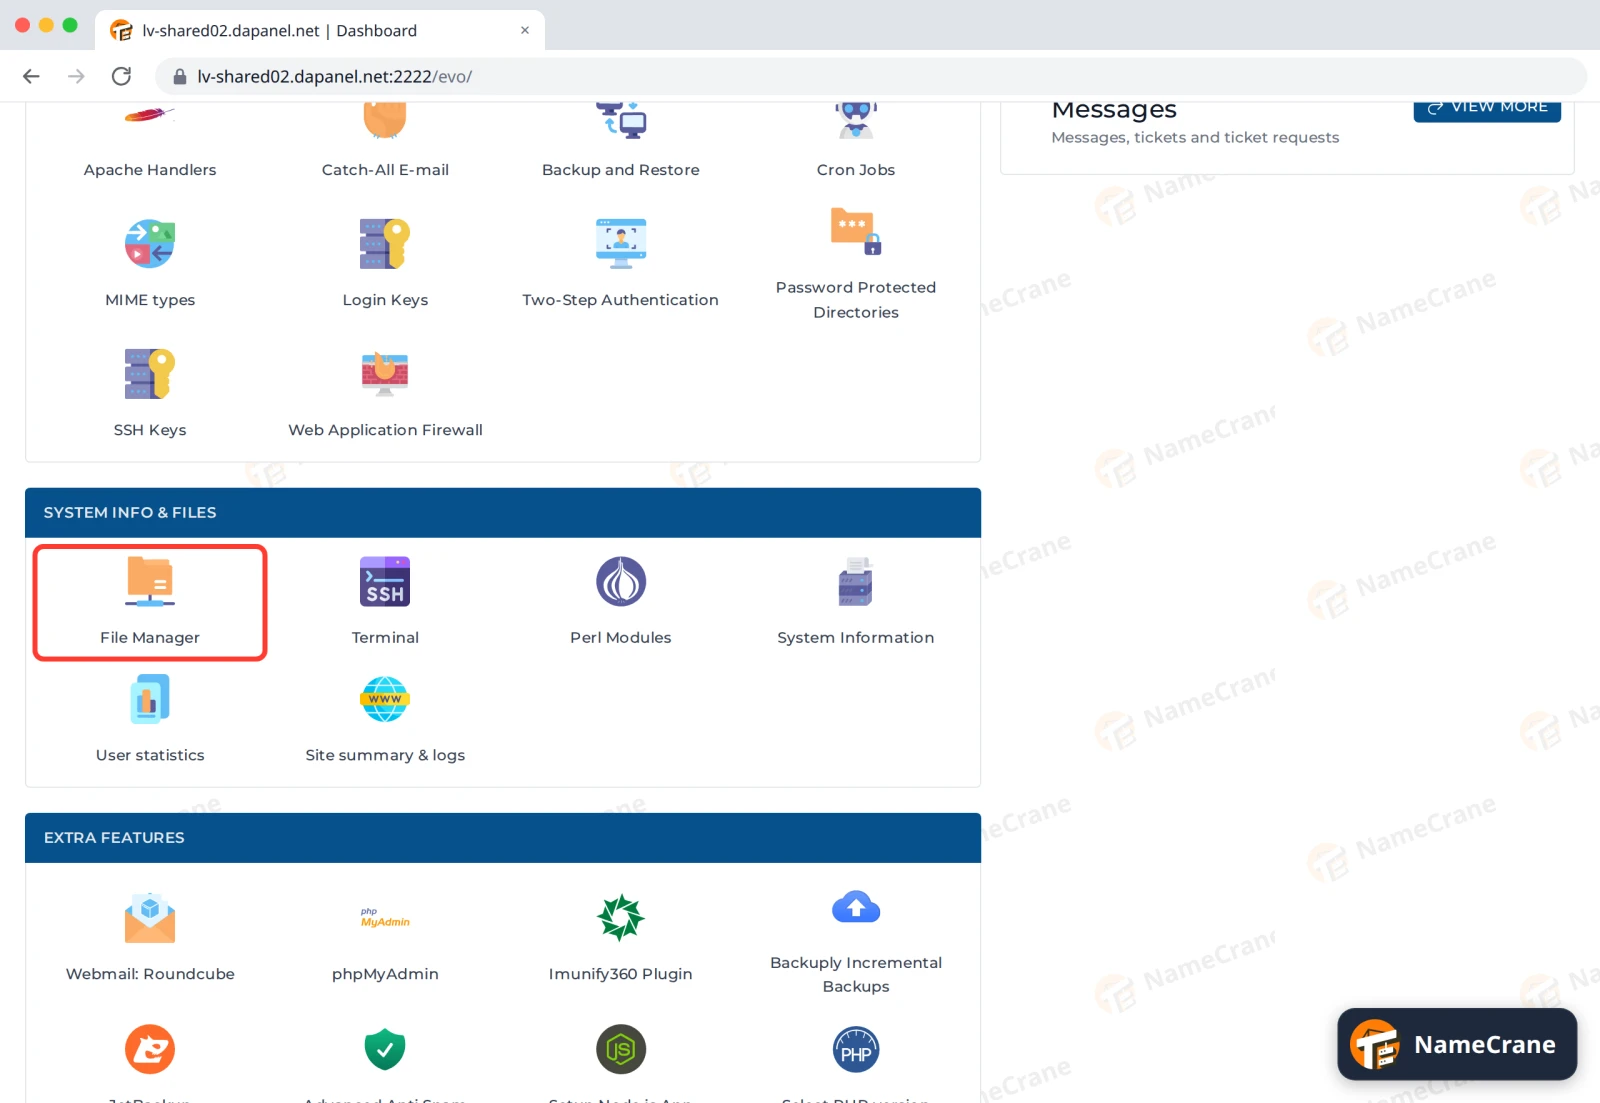
Log in to DirectAdmin. In the System Info & Files section, click File Manager.
-
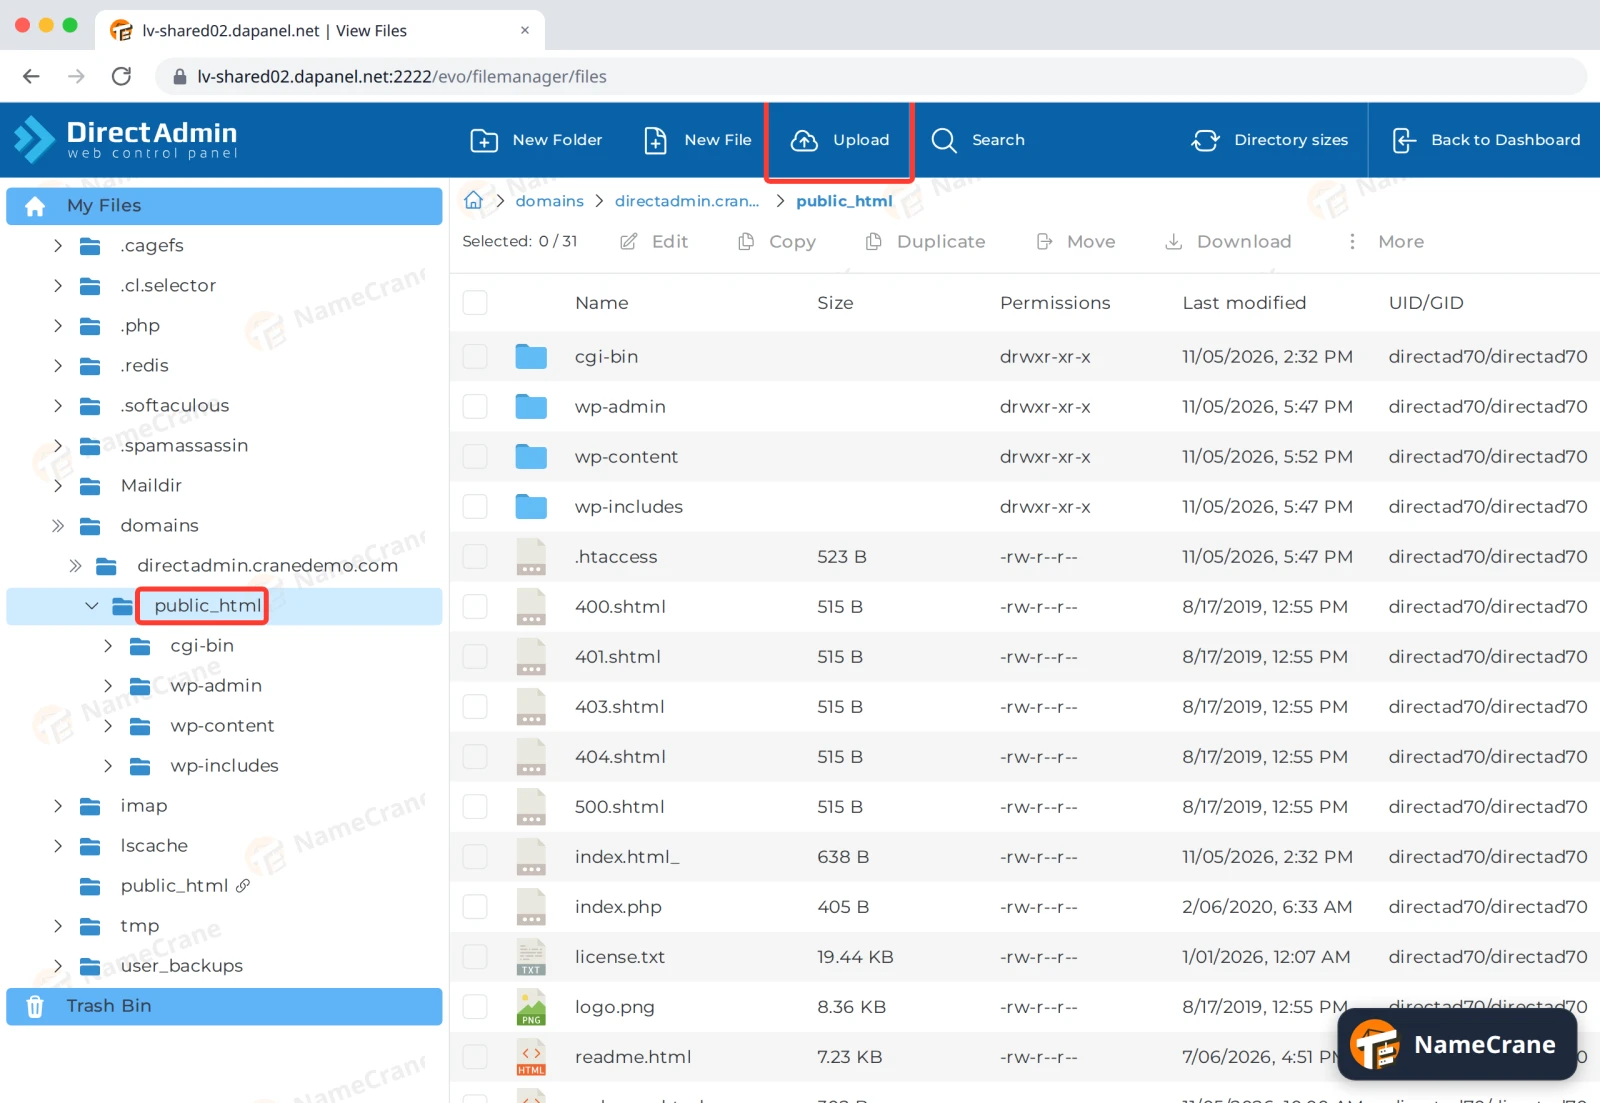
In the folder list on the left, open domains, then your domain, then public_html. Click Upload at the top.
-
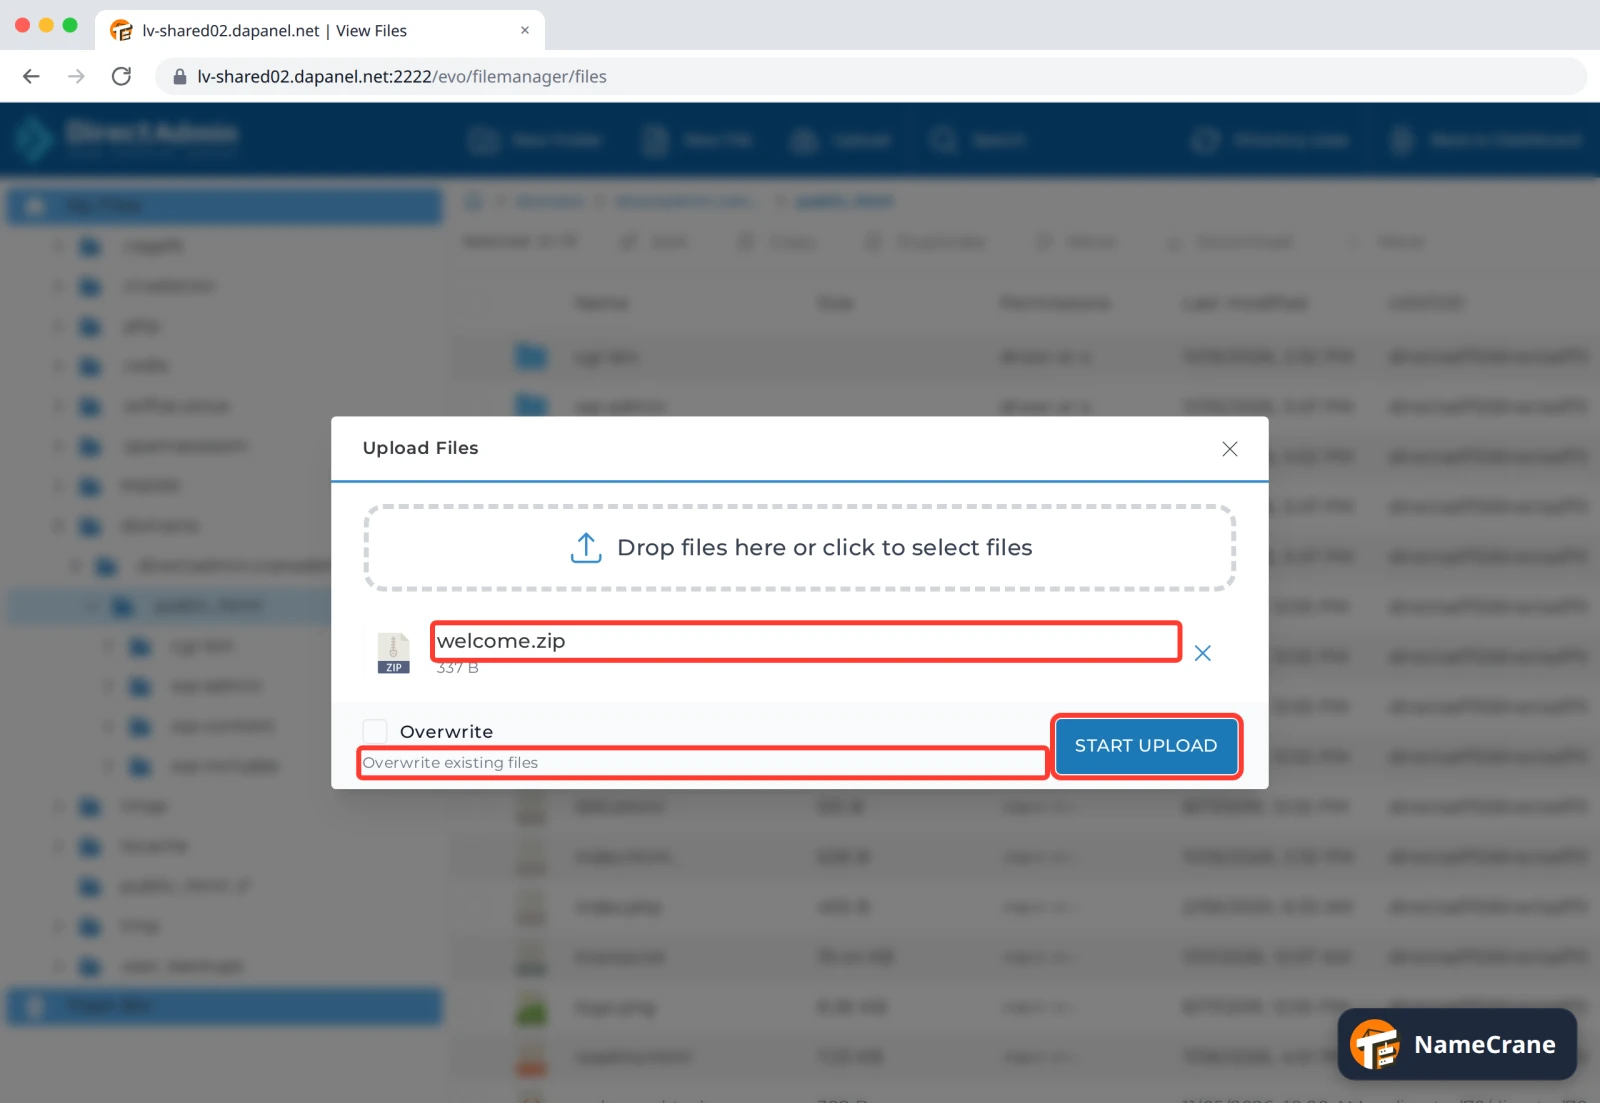
Drag your file into the box, or click it to choose a file. If you’re replacing something, switch on Overwrite. Then click Start Upload.
Extract a zip file
-
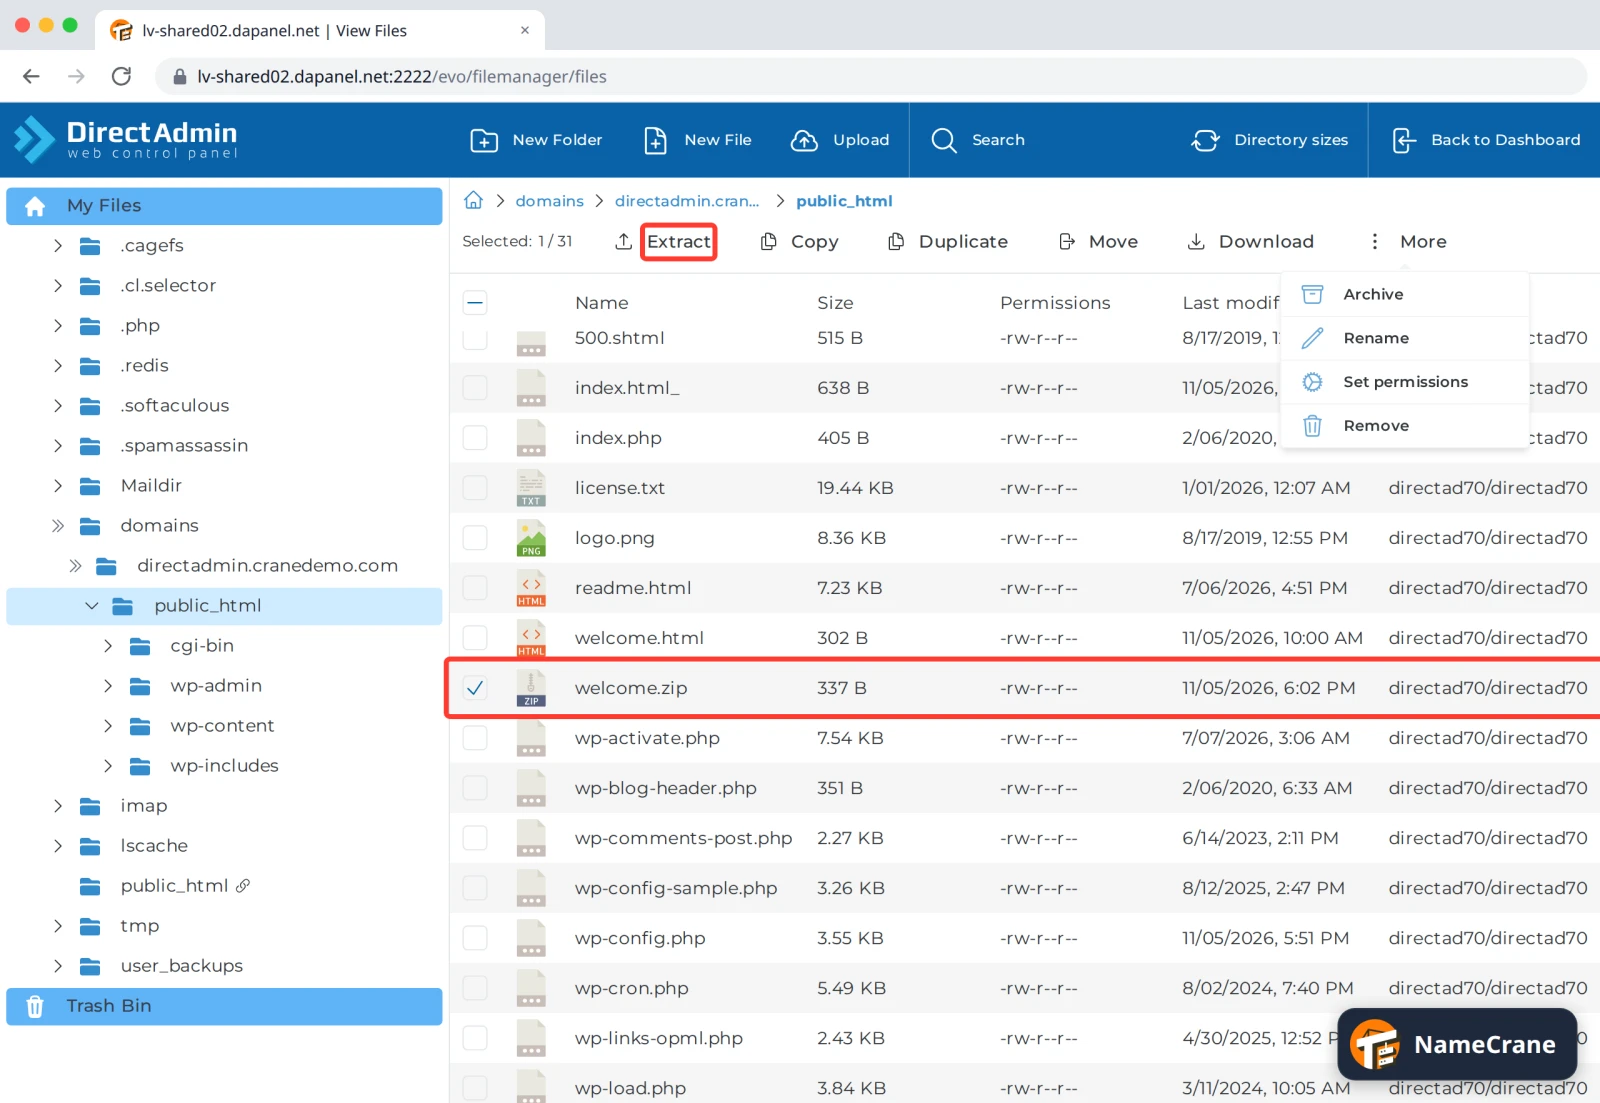
Tick the zip file in the list. An Extract button appears in the toolbar. Click it.
-
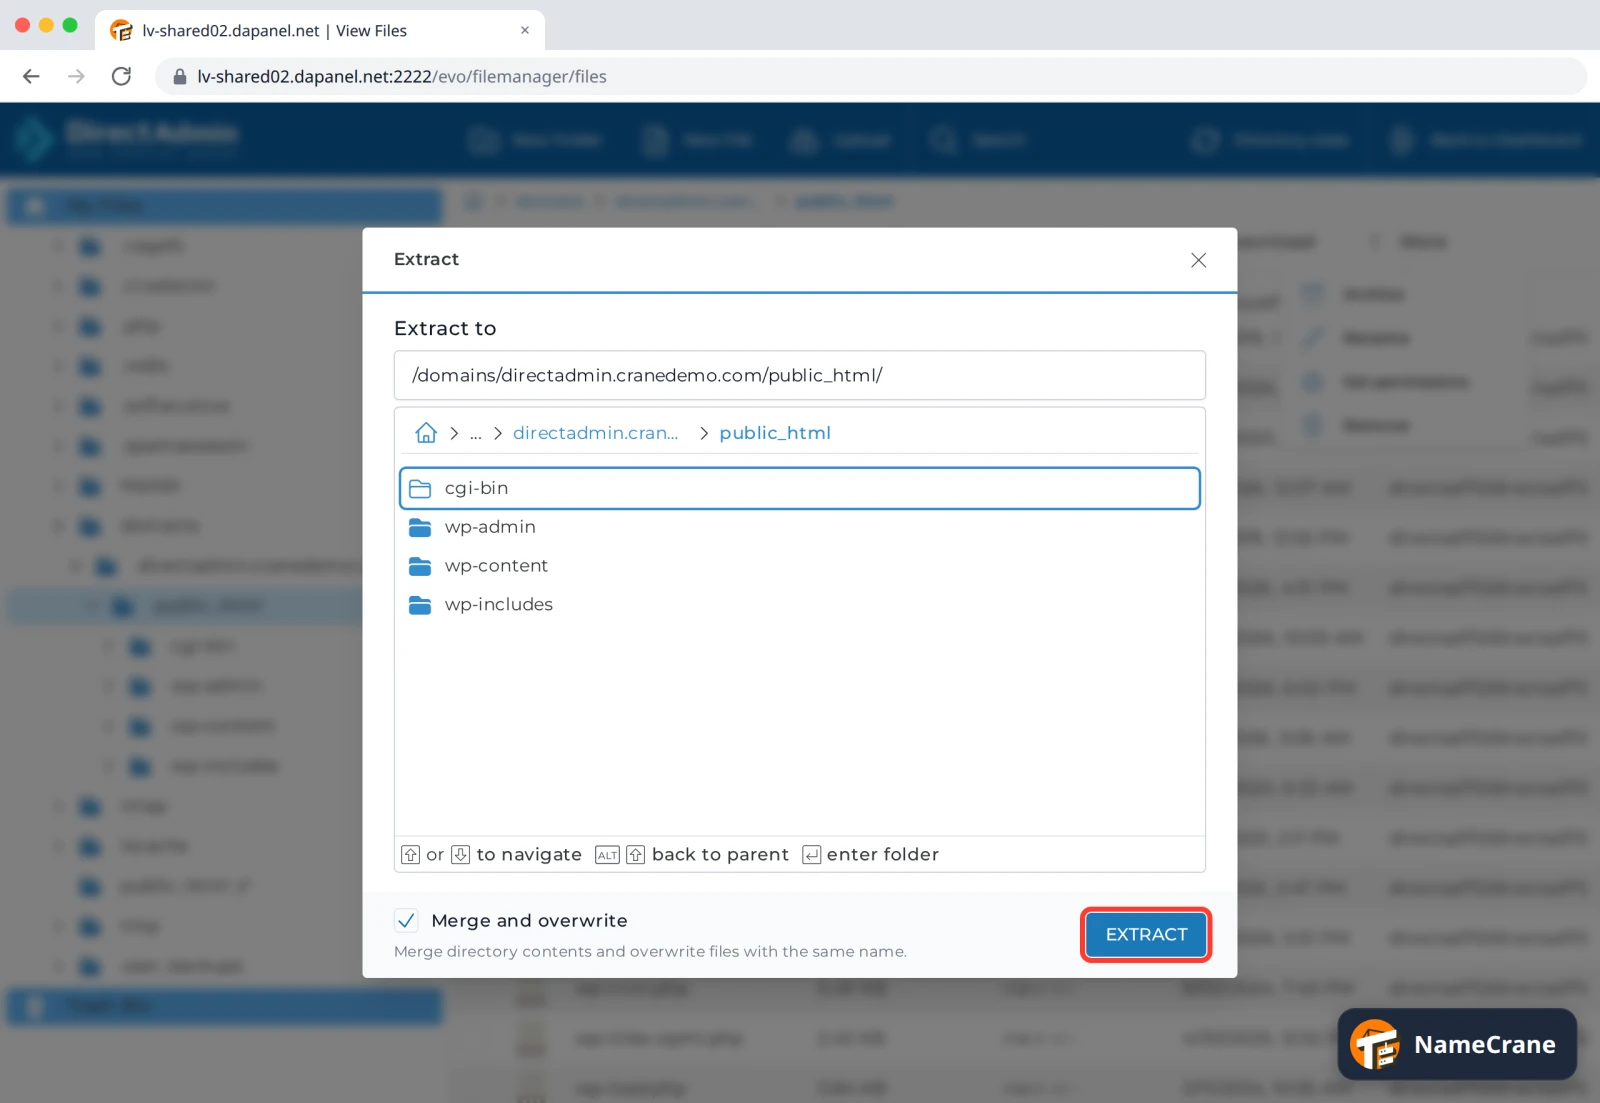
Check Extract to shows the right folder (it suggests the current one). Leave Merge and overwrite ticked to replace files with the same name, then click Extract.
-
The extracted files appear in the list. In our test,
welcome.htmlwas live athttps://yourdomain.com/welcome.htmlstraight away.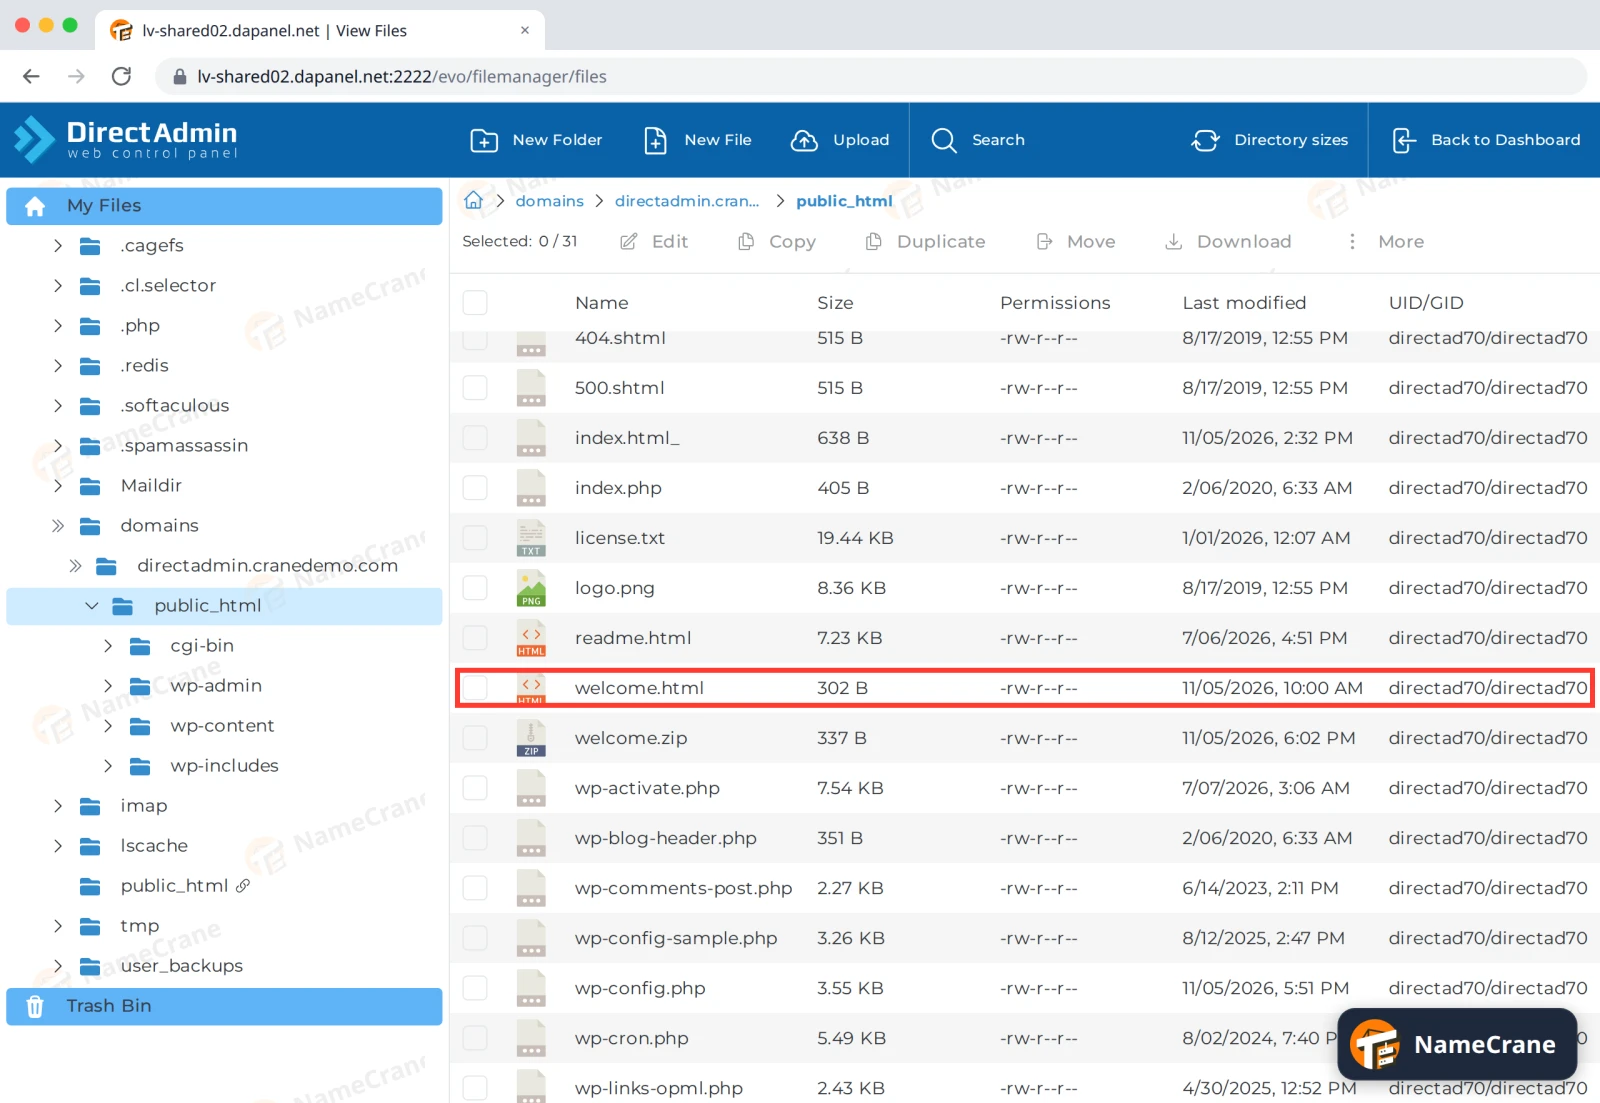
Tip: Once the files are extracted, you can delete the zip file to save space. Tick it and click Remove (under More).
Check or change permissions
-
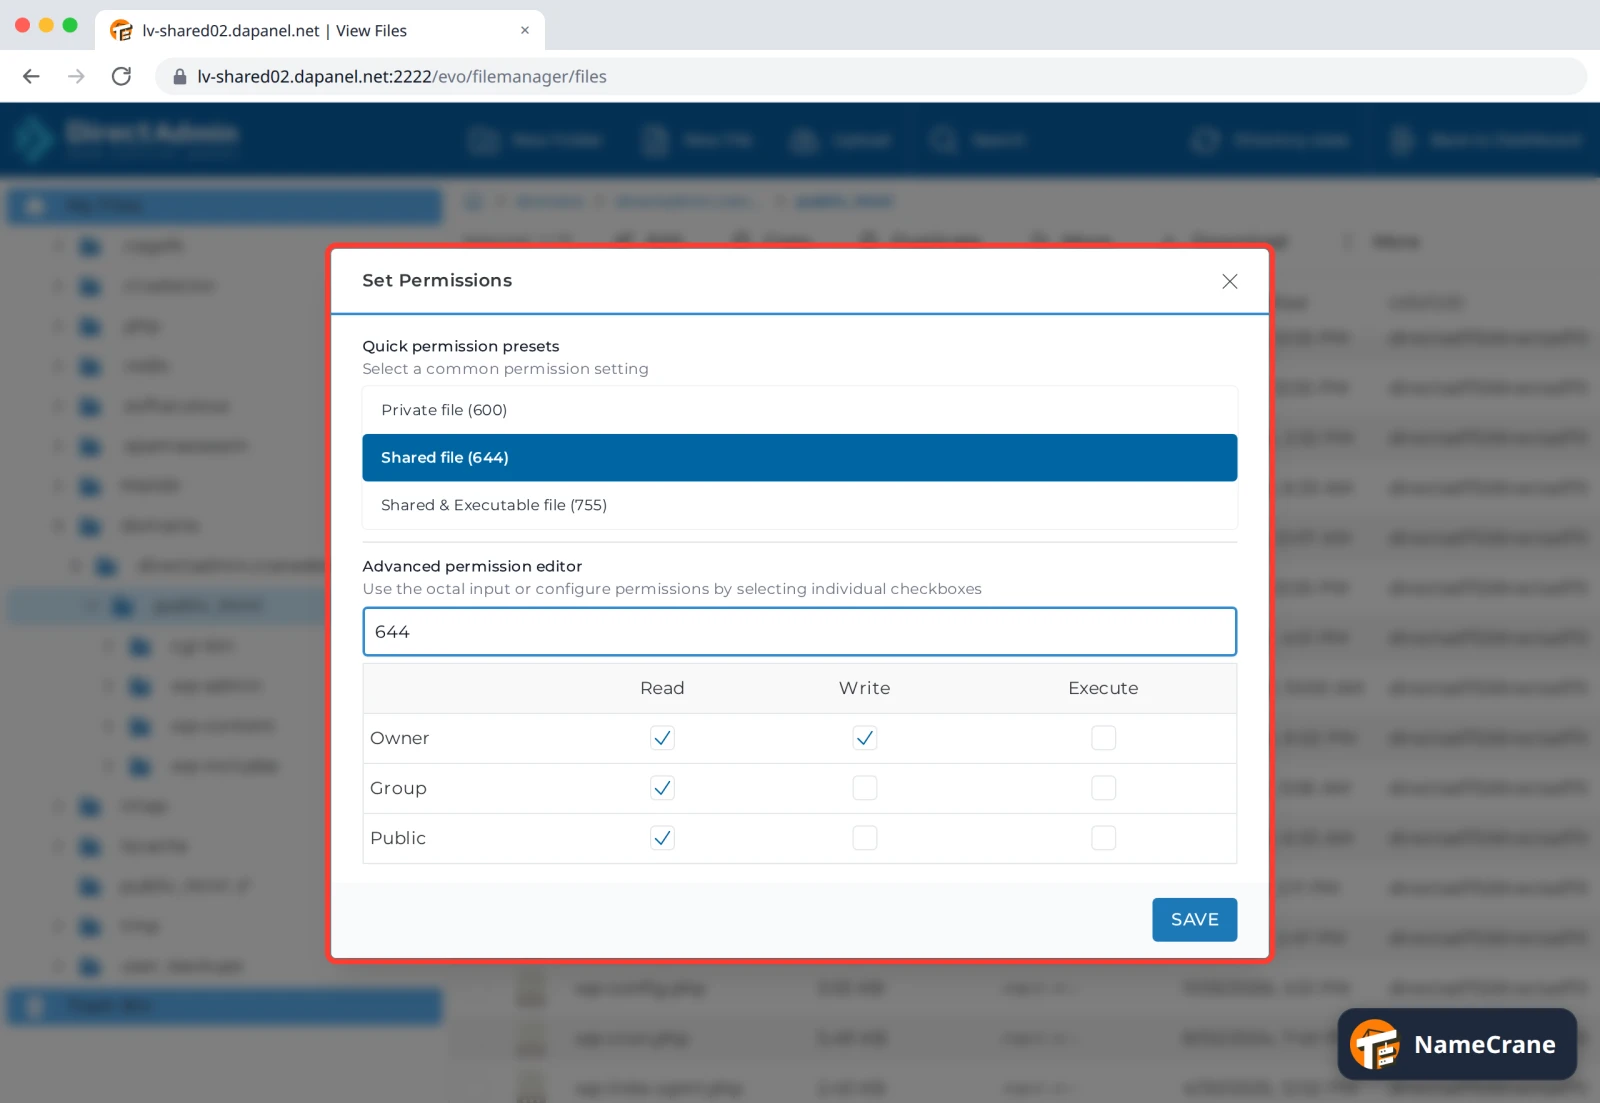
Tick a file, then choose More › Set permissions. Pick a preset: Shared file (644) for normal web files, or Shared & Executable (755) for folders and scripts. Or type a number in the box. Click Save. Don’t change these unless an app’s instructions tell you to.
Other things you can do
| Button | What it does |
|---|---|
| New Folder / New File | Create an empty folder or file |
| Edit | Open a text file (HTML, PHP, CSS) in the built-in editor |
| Download | Save a file to your computer |
| Archive | Zip up selected files |
| Copy / Duplicate / Move / Rename | Organise files and folders |
| Remove | Move items to the Trash Bin, at the bottom of the folder list, where you can restore them |
| Directory sizes | See which folders use the most space |
Troubleshooting
| Problem | What to do |
|---|---|
| My uploaded page shows “403 Forbidden” | Check its permissions are 644, and 755 for folders. |
| I can’t find my website’s files | They’re in domains › yourdomain.com › public_html. The public_html at the top level, with a link icon, is a shortcut to your main domain’s folder. |
| The upload is very slow or fails | Zip the files first, upload one zip, then extract it here. For very large sites, use FTP. |
| I removed something by mistake | Open Trash Bin and restore it. If it’s gone, restore it from a backup. |
Snagged on something? Contact support and we’ll get you sorted.