How to Install an SSL Certificate You Bought in cPanel
Last updated Changelog
On this page
Your site already gets a free SSL certificate from cPanel’s AutoSSL (see Free SSL). Follow this guide only if you’ve bought a certificate from an SSL provider, for example one with your company name checked.
It takes two parts: you create a CSR (certificate signing request) for your provider, and then you install the certificate they send back. In this example we install a certificate for blog.cpanel.cranedemo.com. We got it from Let’s Encrypt for the test; certificates from any provider work the same way.
1. Create a CSR
-
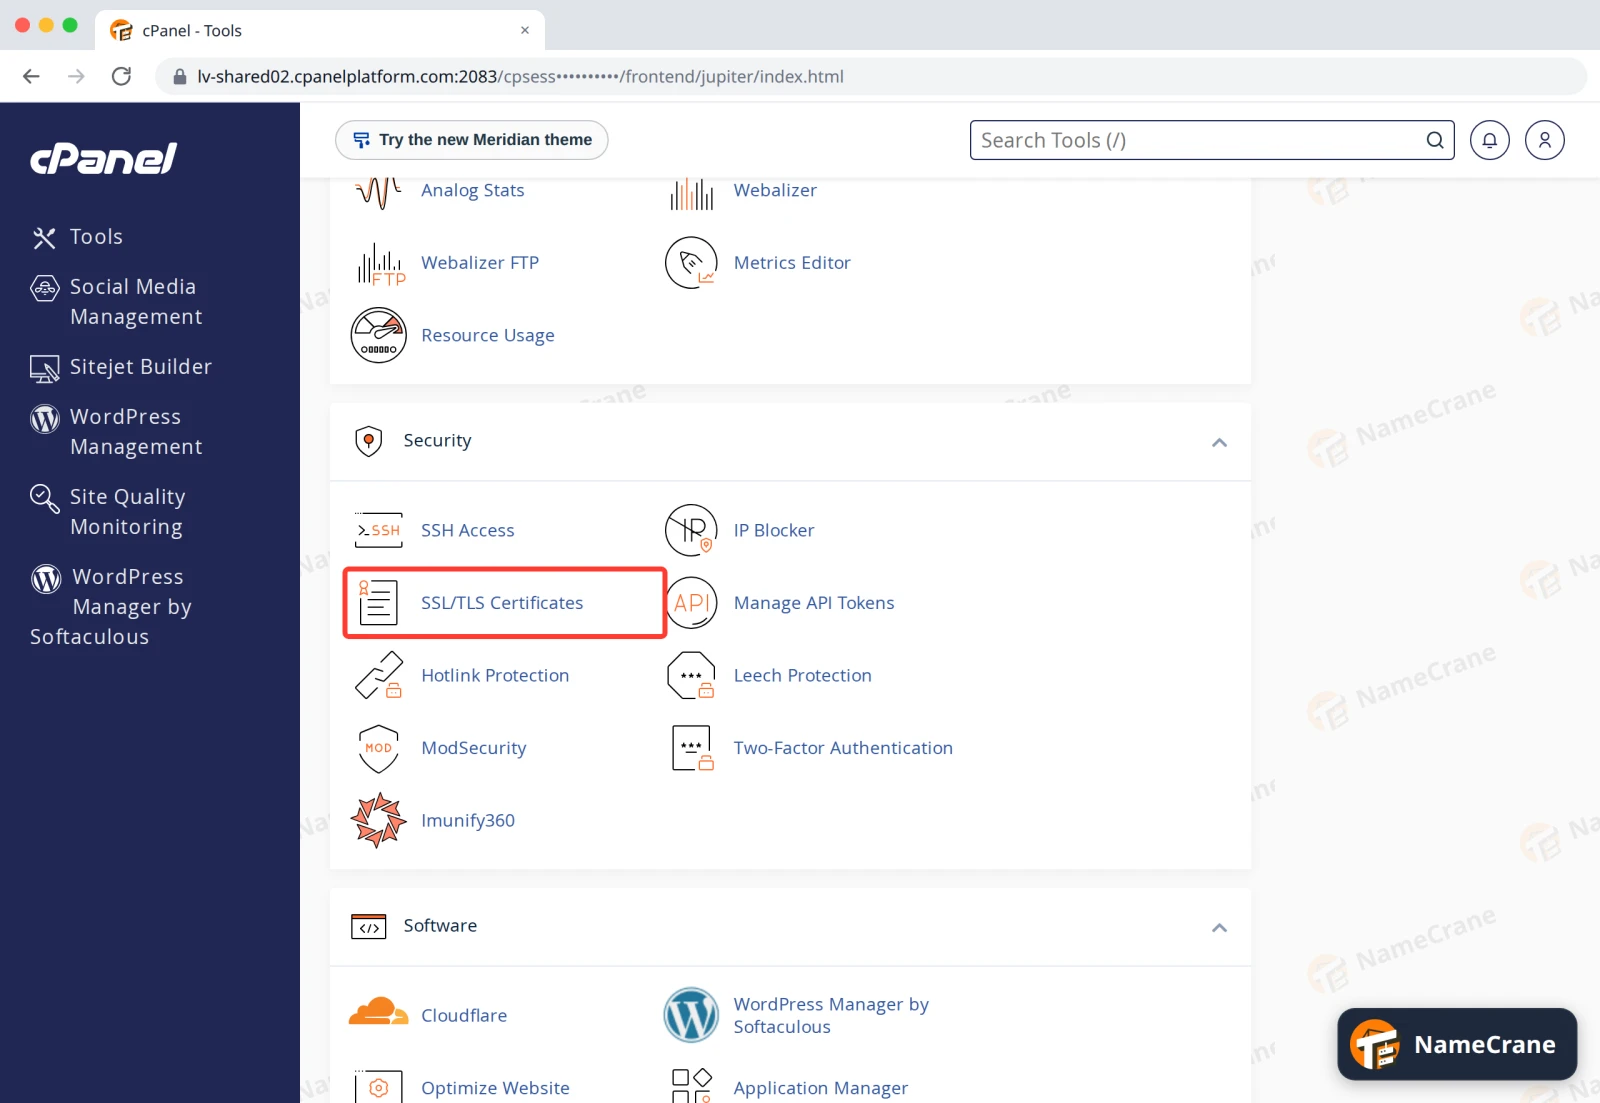
Log in to cPanel. In the Security section, click SSL/TLS Certificates.
-
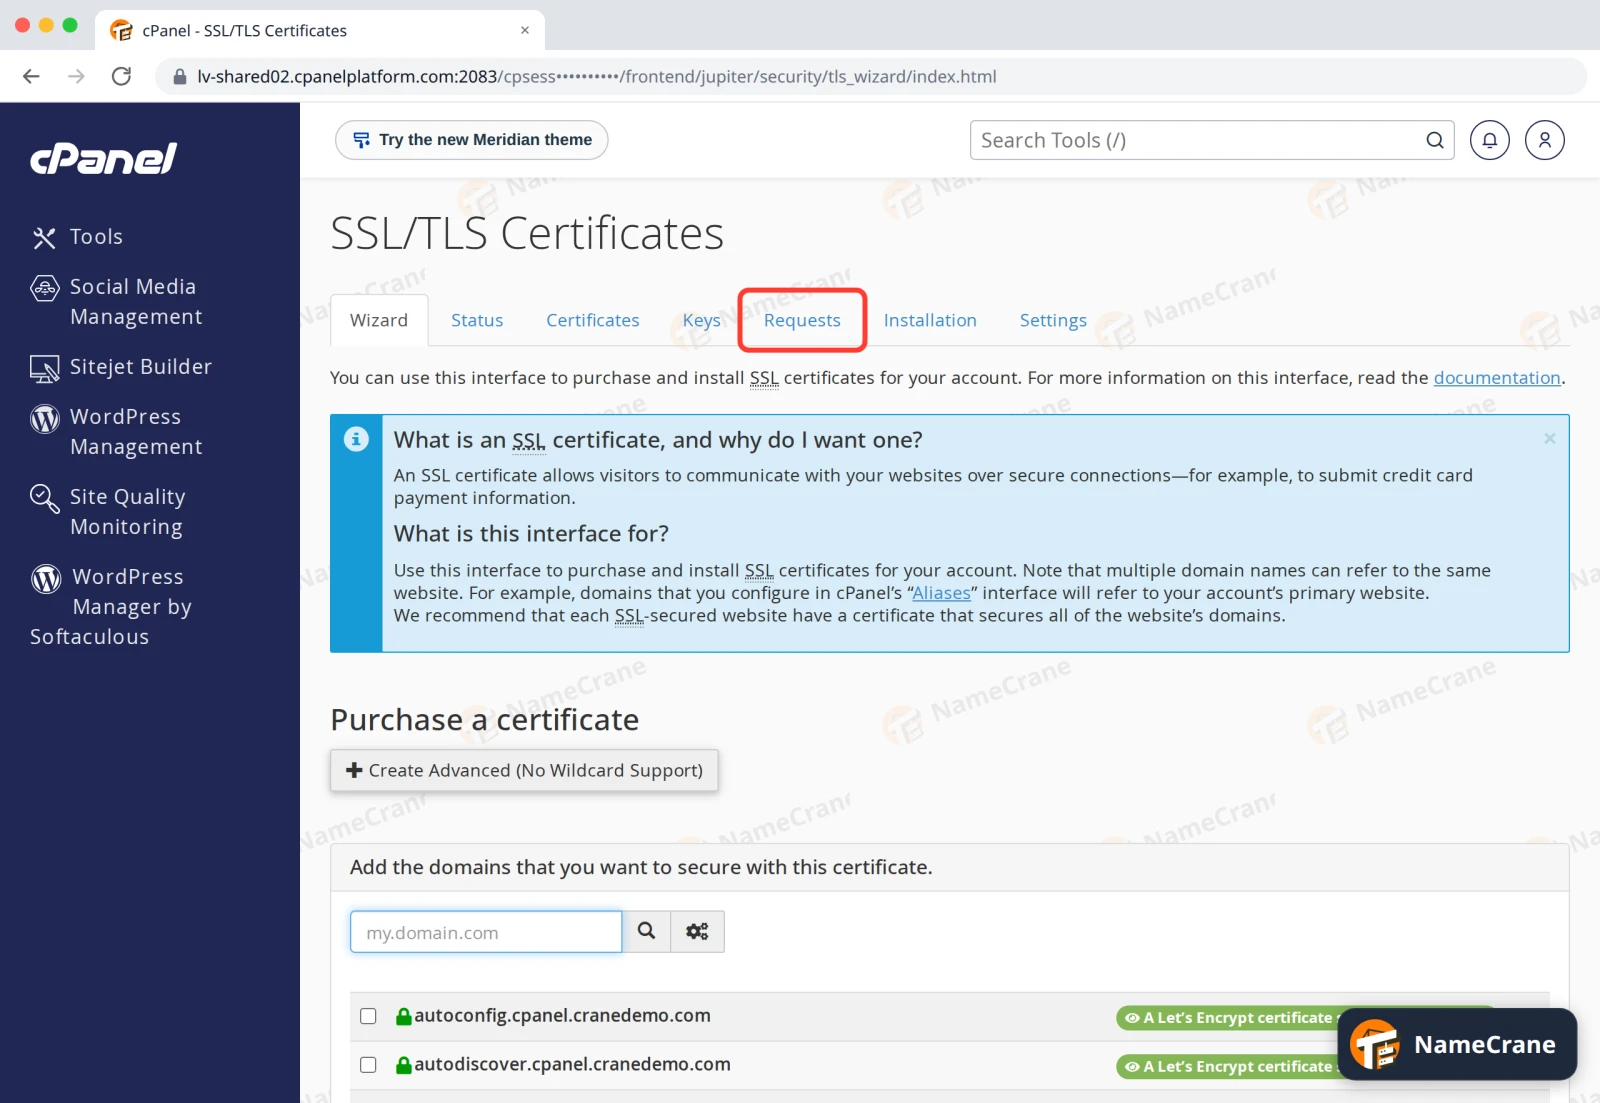
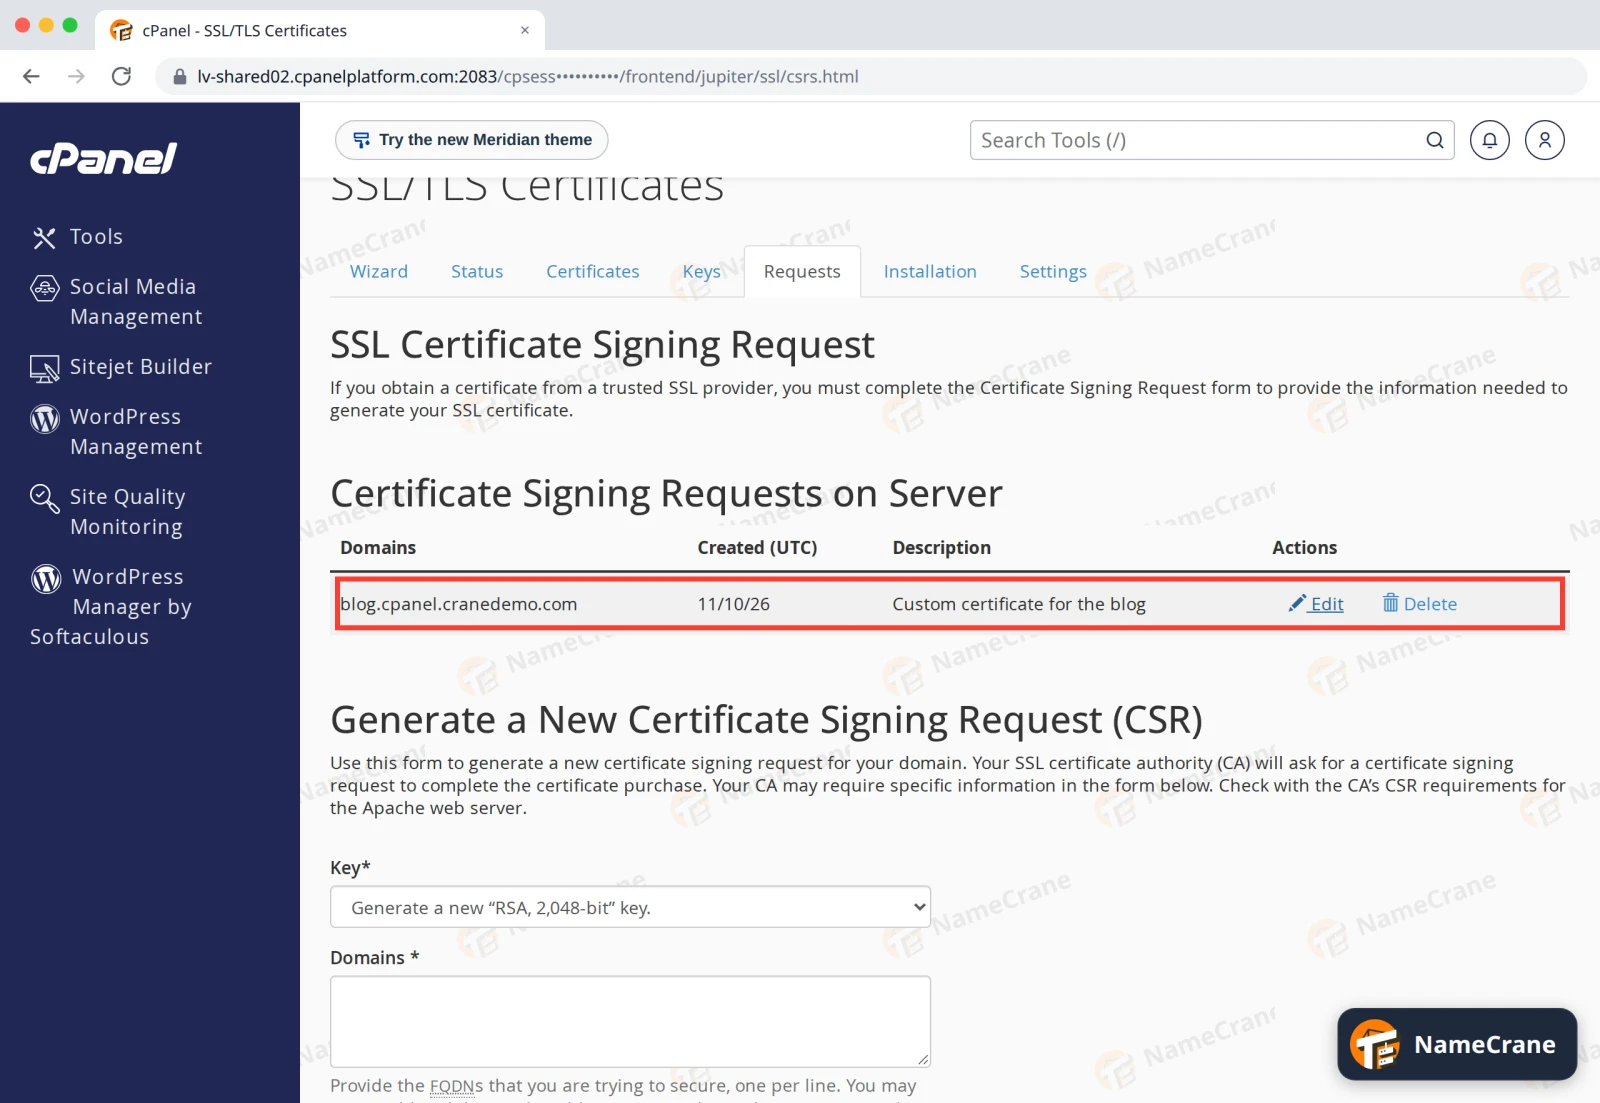
Click the Requests tab.
-
Under Generate a New Certificate Signing Request (CSR), leave Key as it is. Type your domain in Domains; if your certificate should cover
wwwtoo, addwww.and your domain on a second line. Fill in City, State, Country and Company, the way your provider asks.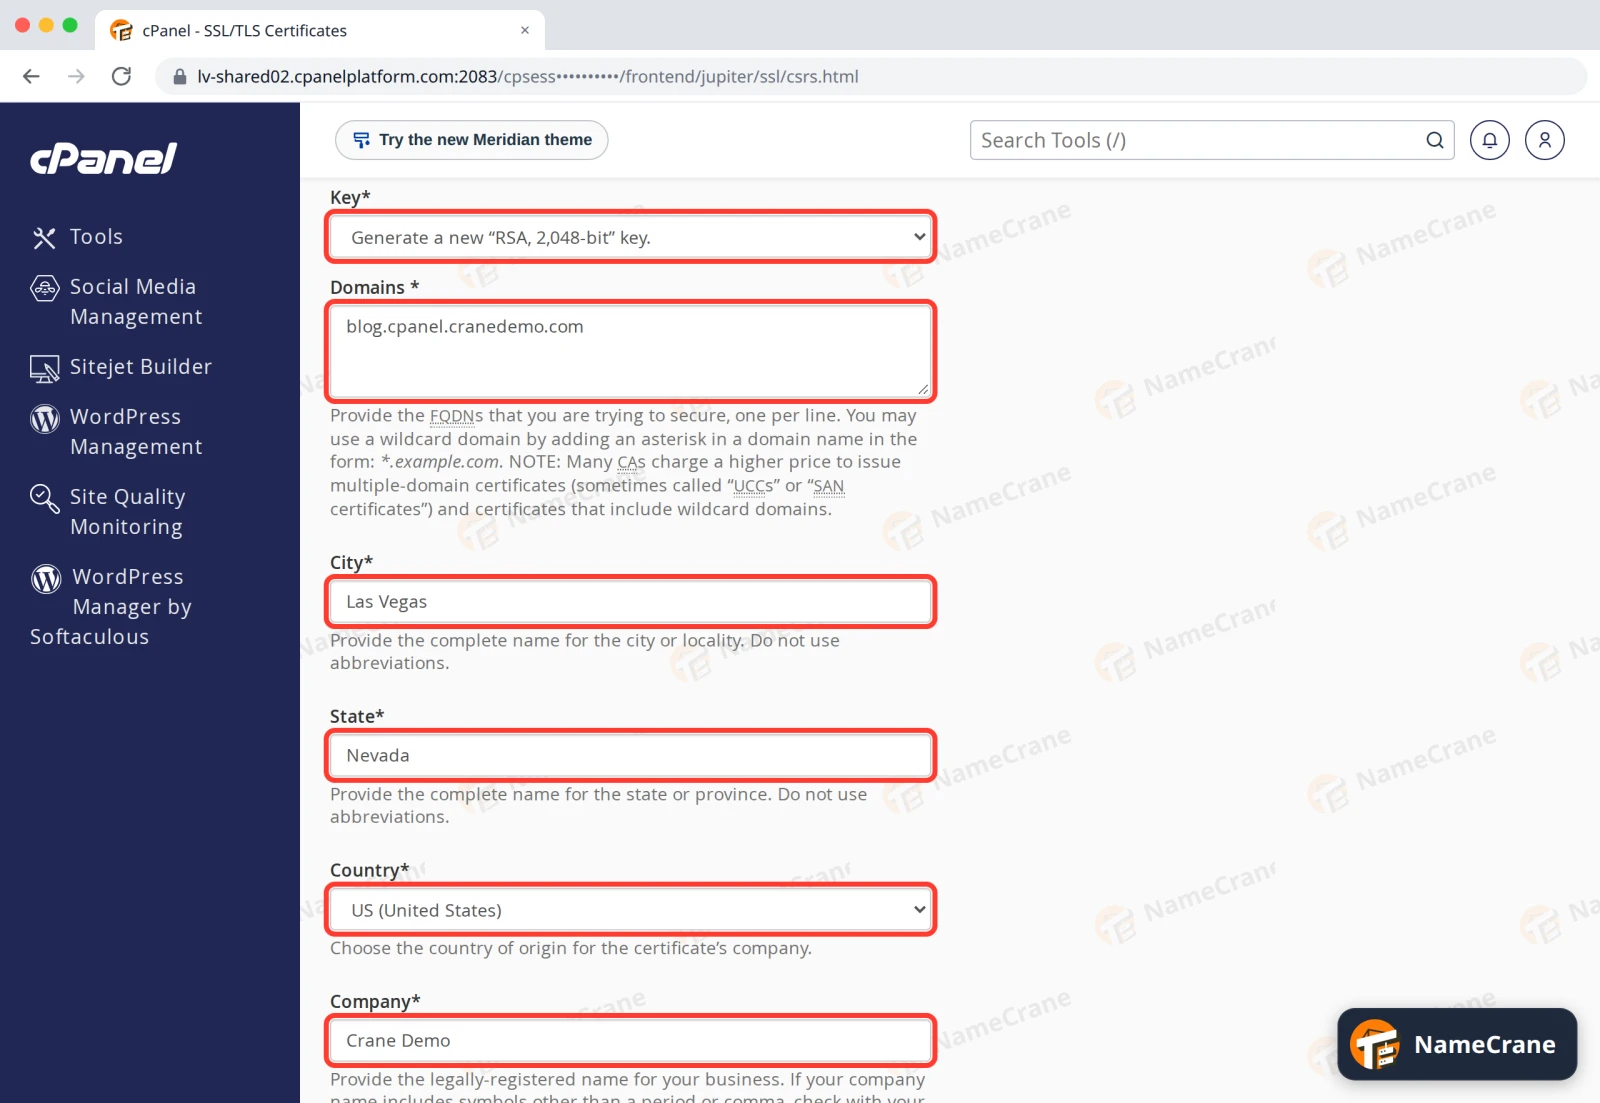
-
Optionally, add a Description to recognise it later. Click Generate.
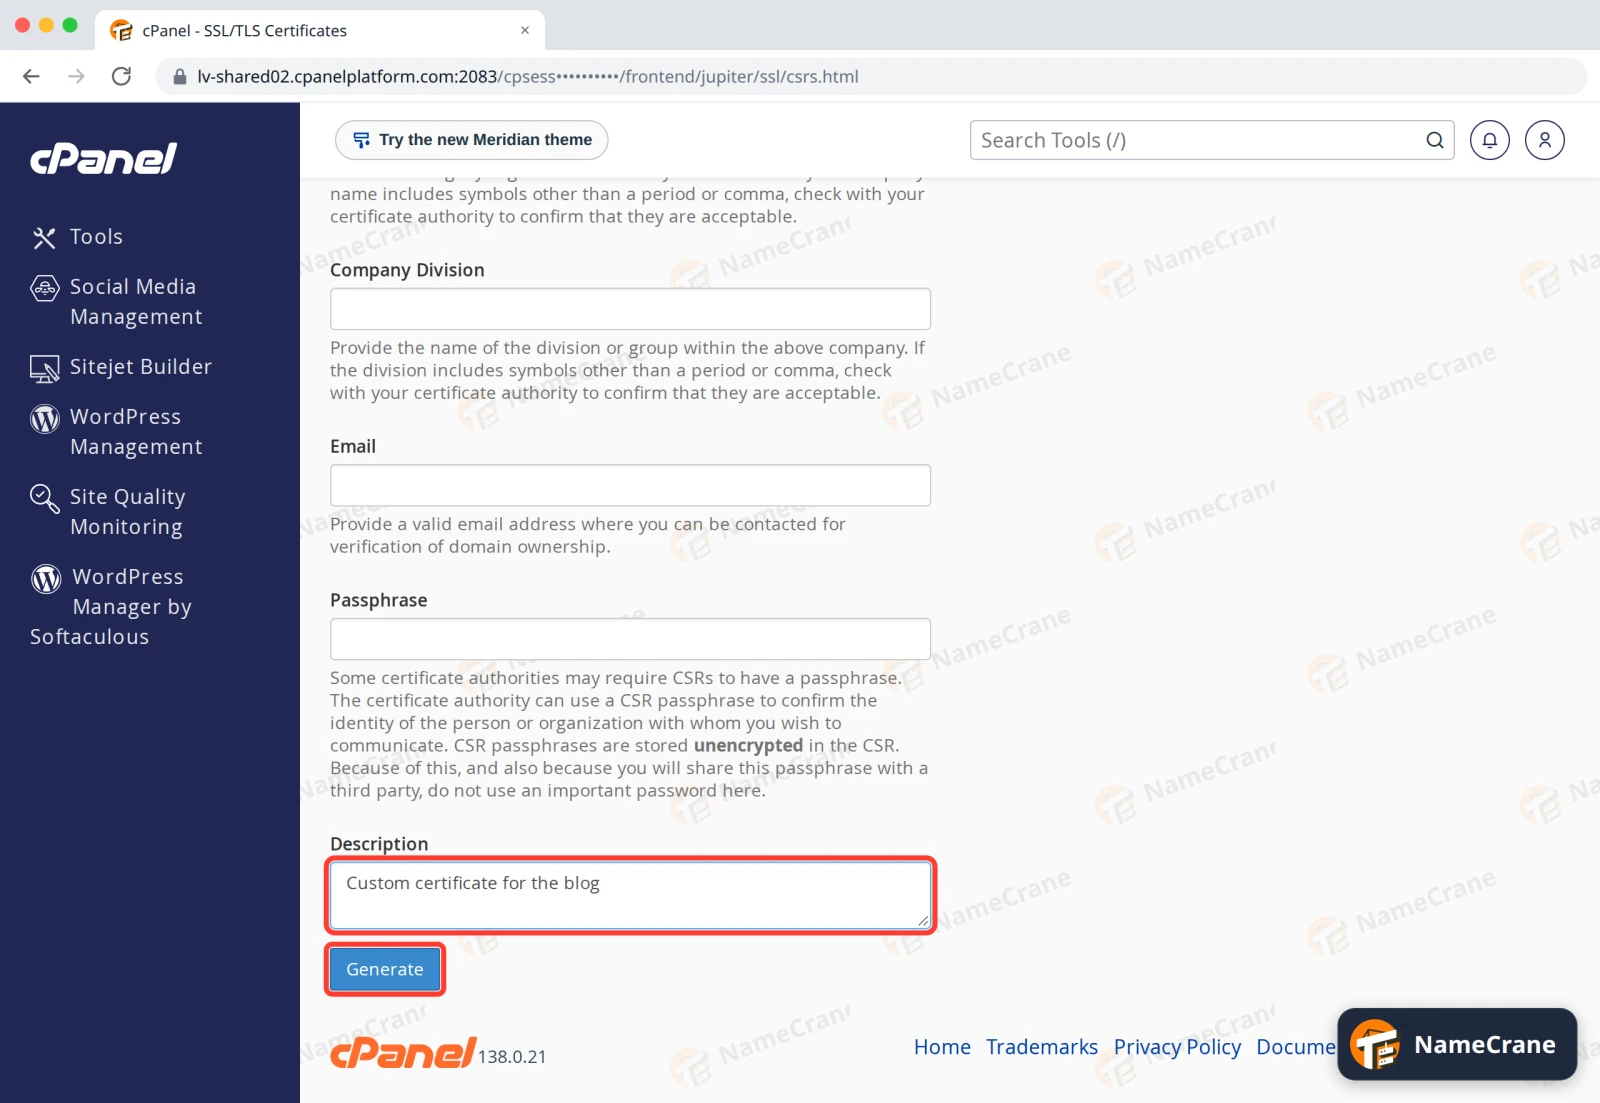
Warning: The next page shows your new private key as well as the CSR. Never send the private key to anyone, your SSL provider included. cPanel keeps it safe for you.
-
Your CSR is now listed under Requests. Click Edit next to it to open it at any time.
-
Copy everything in Encoded CSR, including the
BEGINandENDlines, and give it to your SSL provider.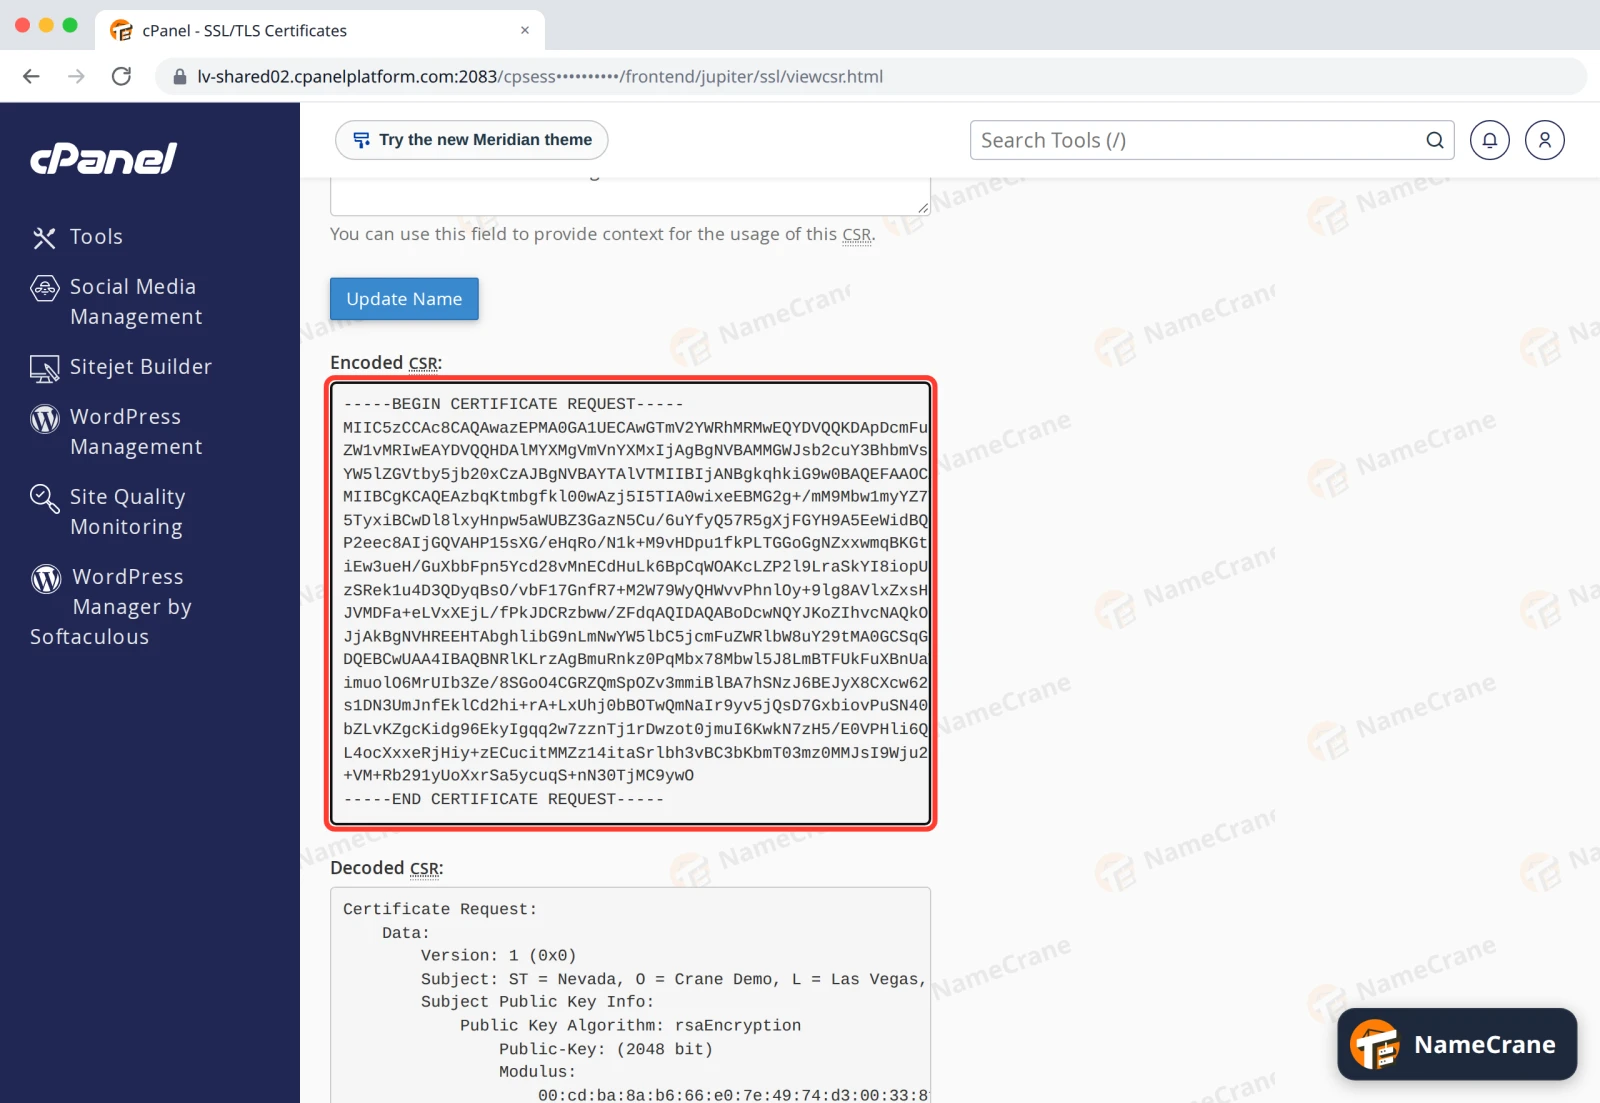
2. Install the certificate
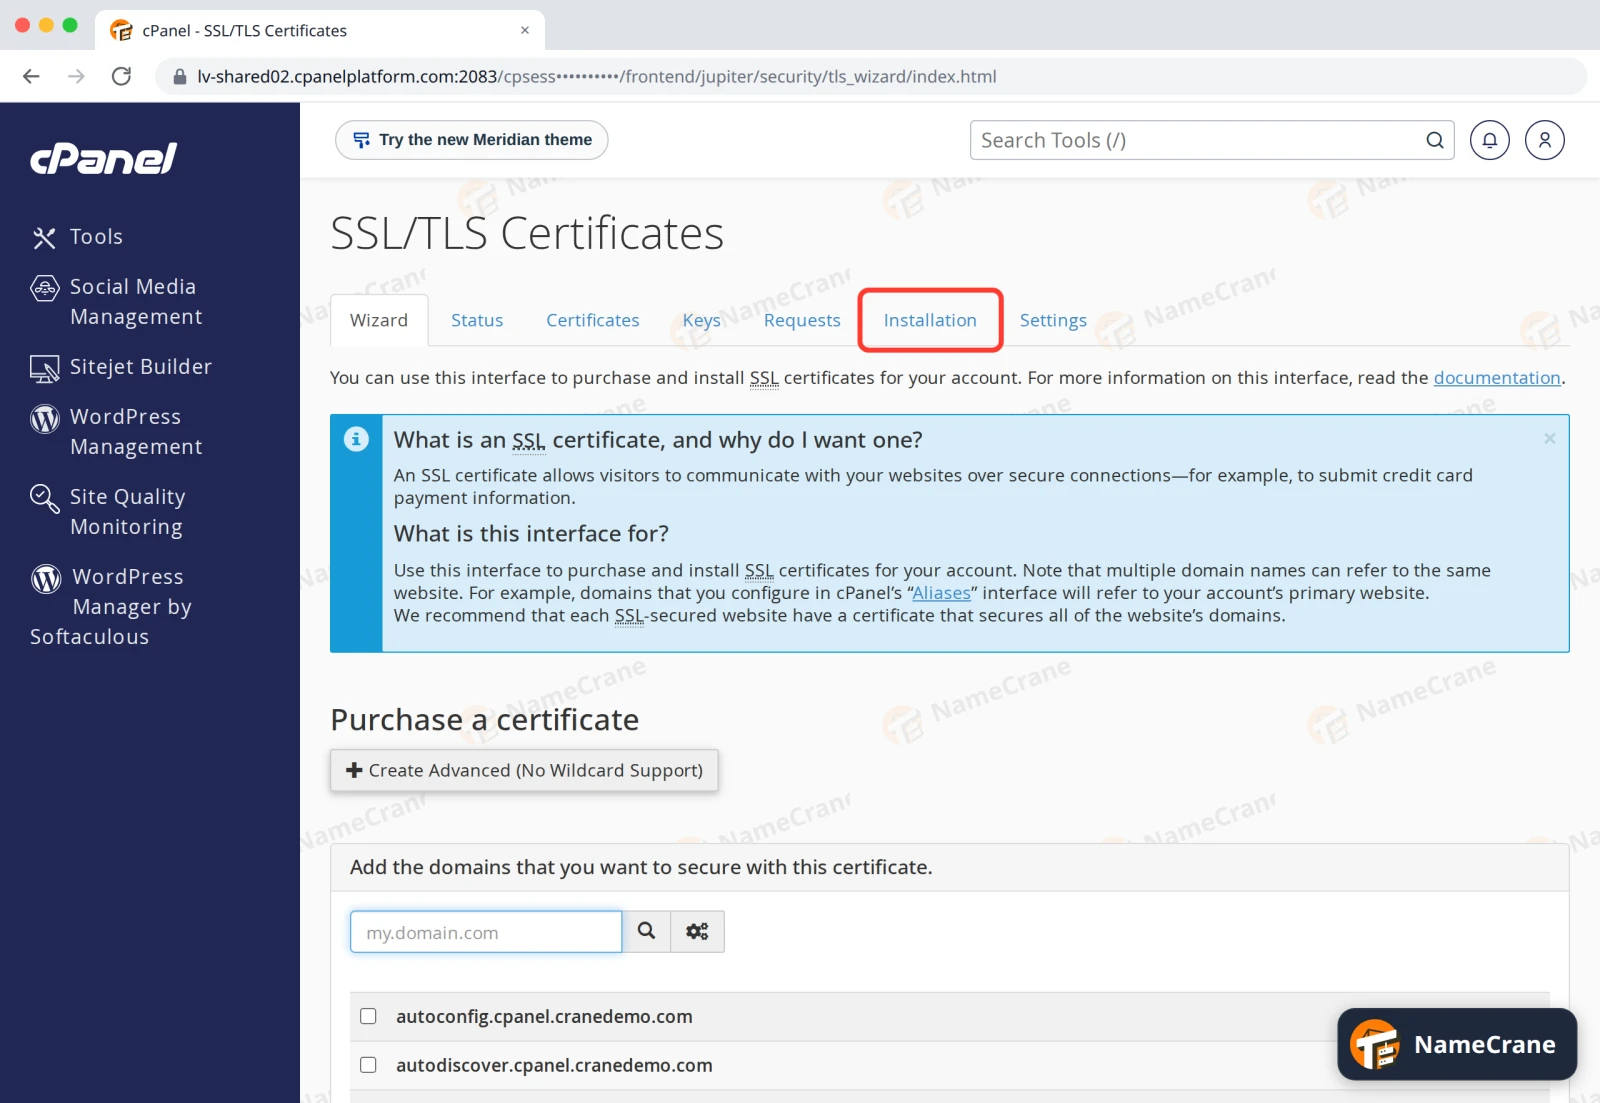
When your provider sends the certificate, open SSL/TLS Certificates again.
-
Click the Installation tab.
-
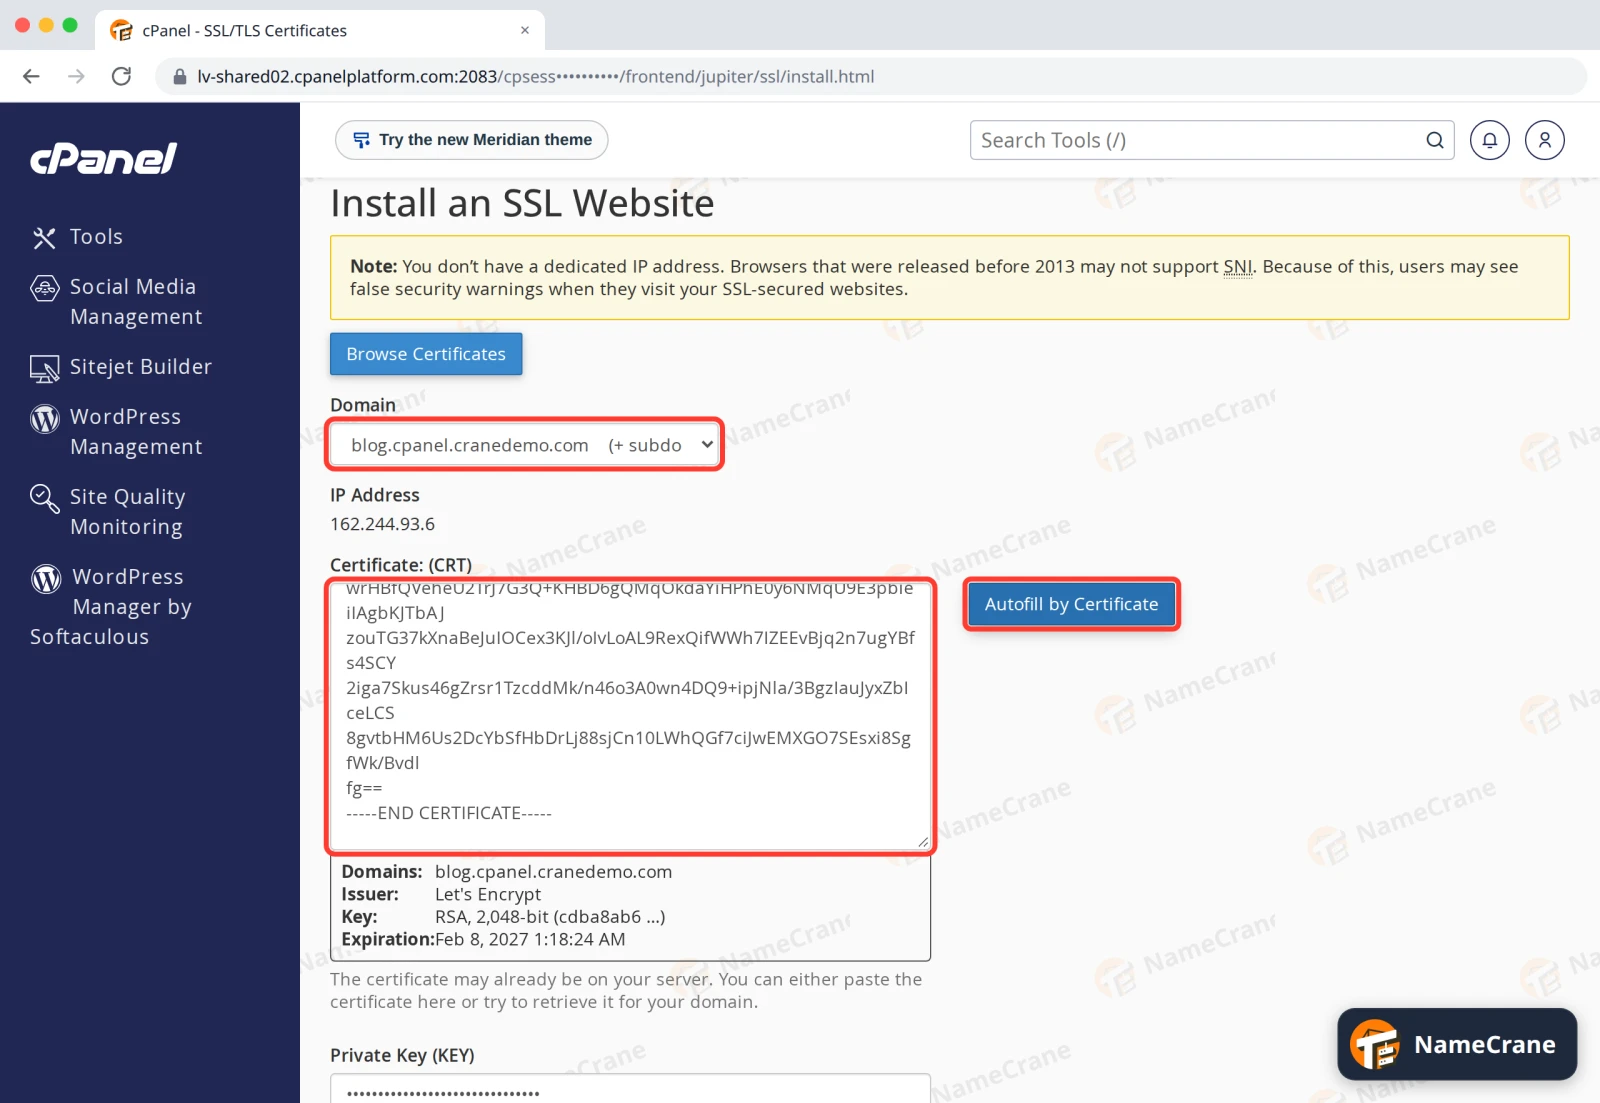
Choose your domain under Domain. Paste the certificate from your provider into Certificate: (CRT), then click Autofill by Certificate. cPanel shows who issued it and when it expires.
-
cPanel fills in the Private Key it made with your CSR, and the Certificate Authority Bundle. Click Install Certificate.
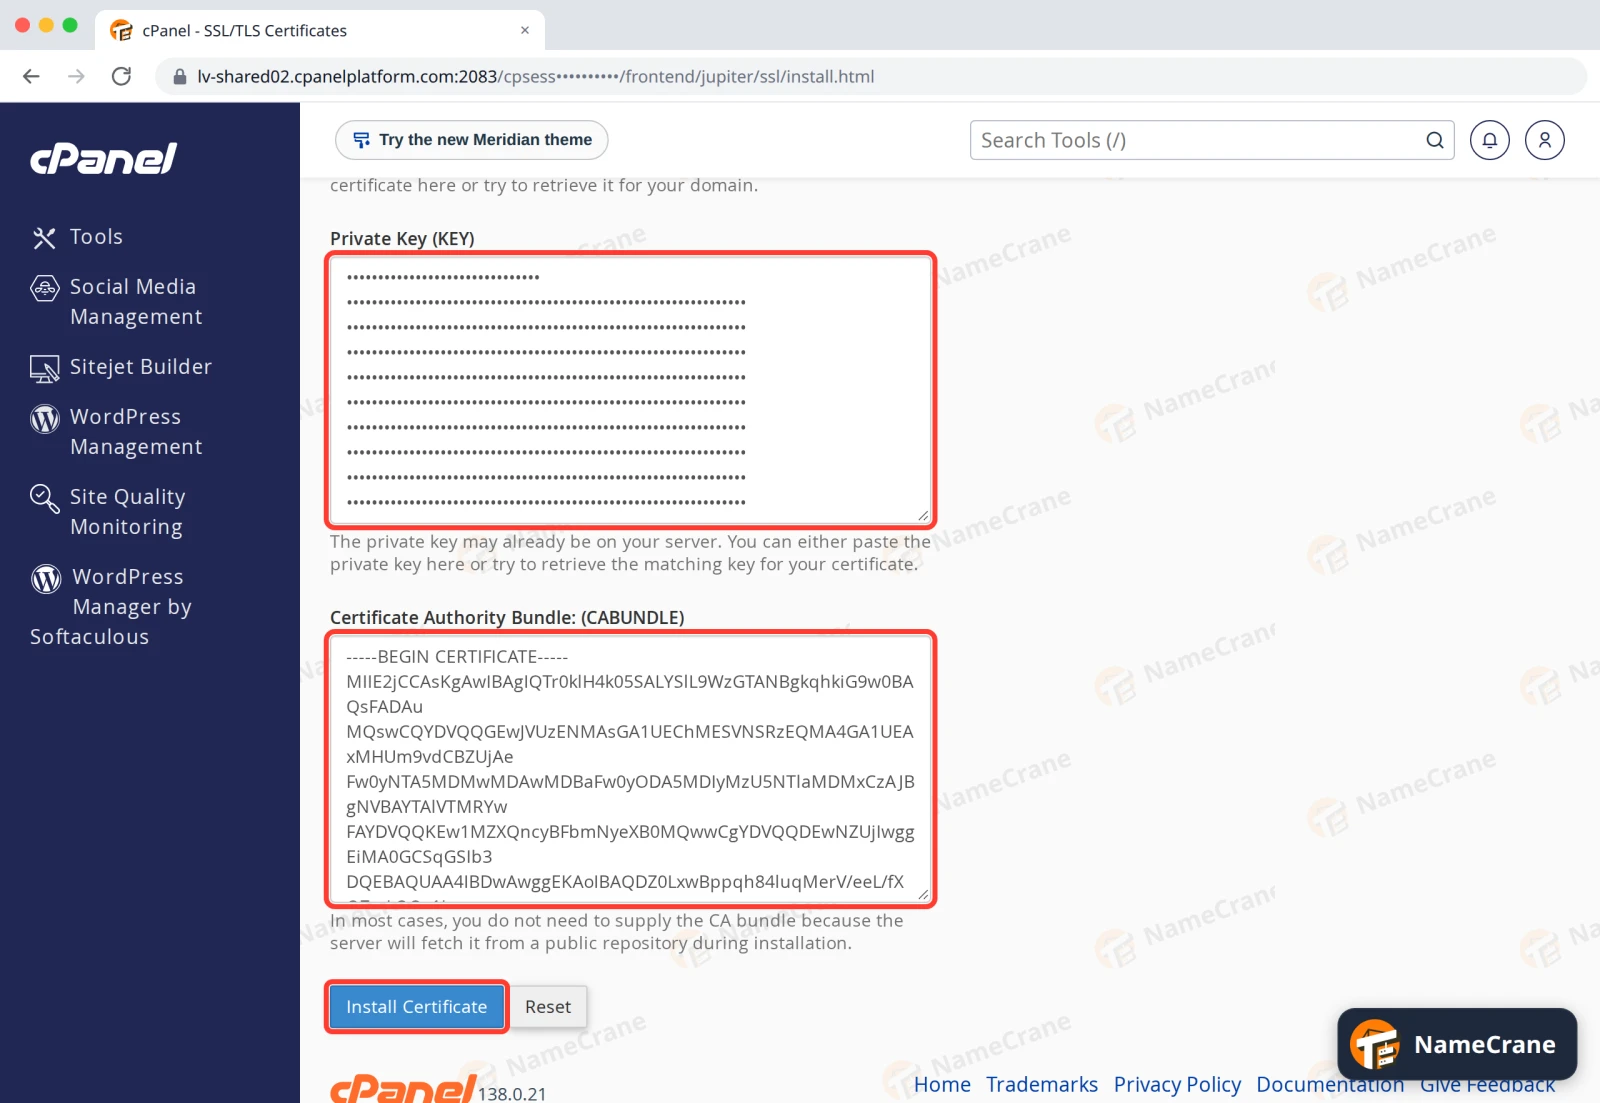
-
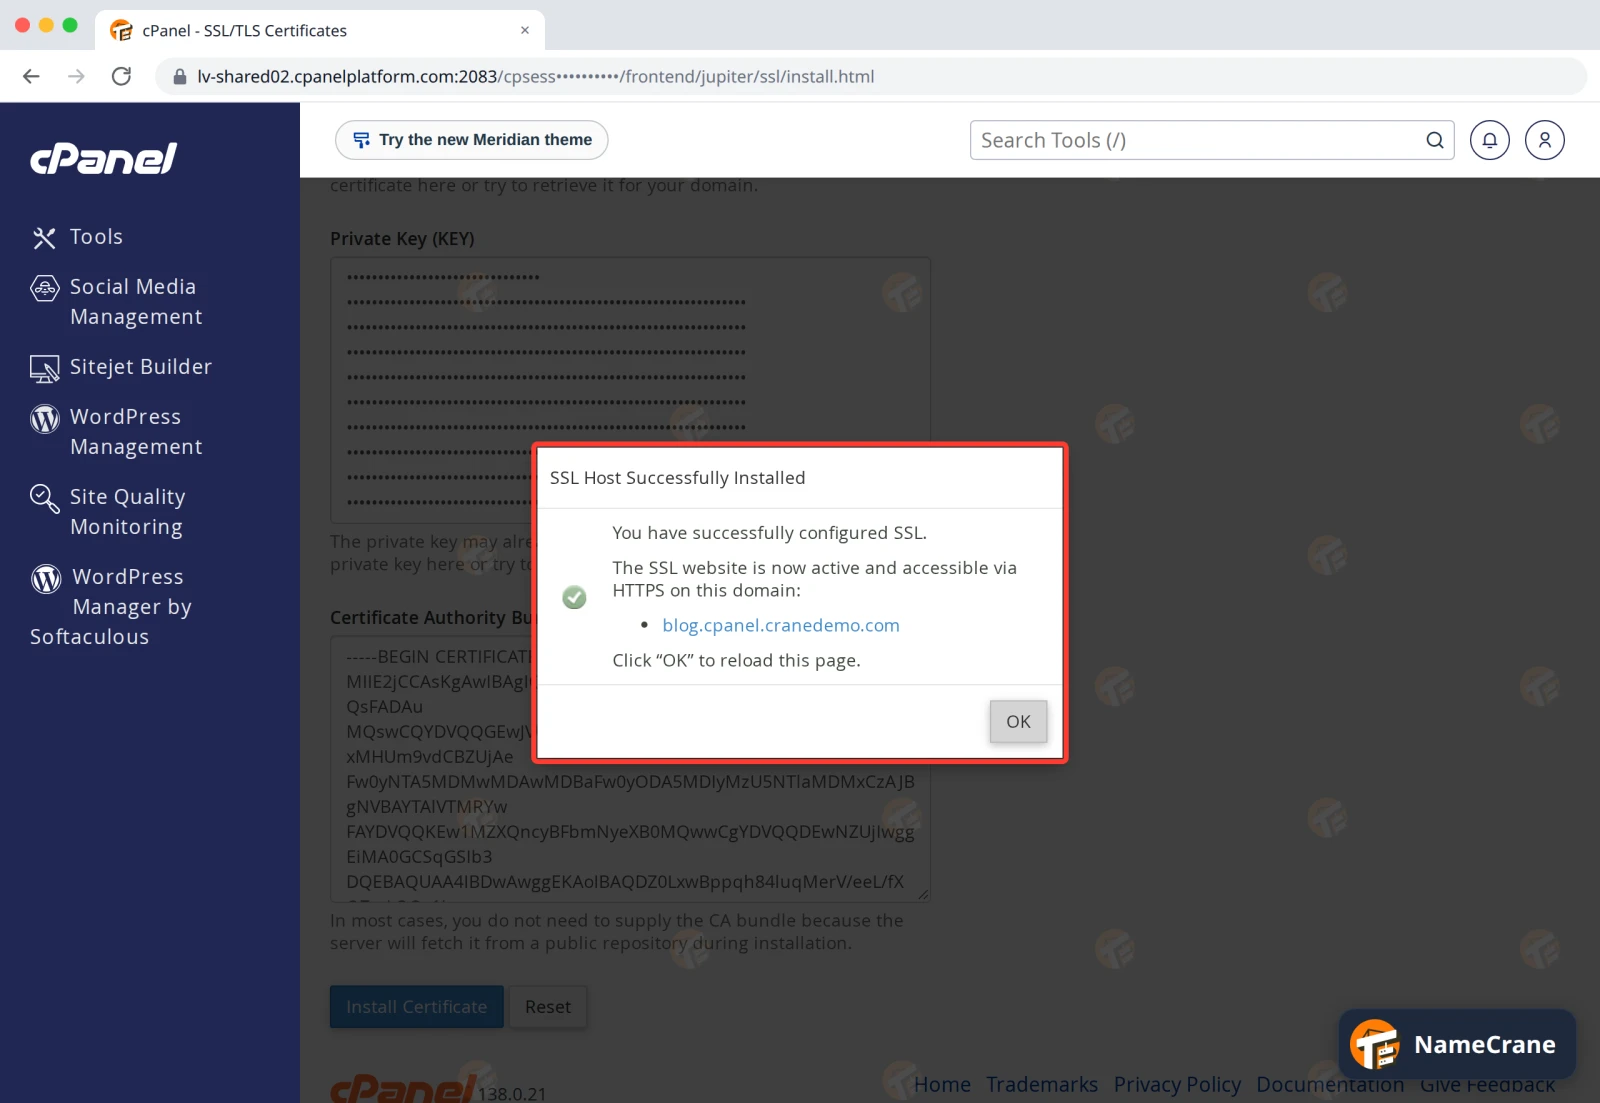
cPanel confirms with SSL Host Successfully Installed. Click OK. Your site now uses the new certificate.
Note: A certificate you bought doesn’t renew itself. Before it expires, get the renewed certificate from your provider and install it the same way, from step 7.
Want the free certificate back? On the Installation tab, click Uninstall next to your domain. AutoSSL then gives the site a free certificate again.
Troubleshooting
| Problem | What to do |
|---|---|
| Autofill by Certificate doesn’t fill in the private key | The certificate wasn’t made from a CSR created in this cPanel account. Paste the private key that you used to request it into Private Key. |
| The Certificate Authority Bundle box stays empty | Paste the CA bundle (also called intermediate certificates) that came with your certificate. |
The certificate doesn’t cover www |
It only covers the names that were in your CSR. Create a new CSR with both names, and ask your provider to reissue the certificate. |
| The browser still shows the old certificate | Clear your browser cache, or try a private window. |
| The free certificate didn’t come back after uninstalling | Contact support and we’ll run AutoSSL for you. |
Snagged on something? Contact support and we’ll get you sorted.