How to Use Your Own Nameservers as a DirectAdmin Reseller
Last updated Changelog
On this page
By default your customers point their domains to NameCrane’s nameservers, ns5.private-nameserver.net and ns6.private-nameserver.net. With your own nameservers they use names on your domain instead, such as ns1.yourbrand.com. These names point to NameCrane’s global DNS servers, so DNS works exactly the same; only the names change.
In this example our demo reseller uses its own domain, directadmin.cranedemo.com, so its nameservers are ns1.directadmin.cranedemo.com and ns2.directadmin.cranedemo.com.
Before you start
Your nameservers must point to the same addresses as ours:
| Your nameserver | Points to |
|---|---|
| ns1.yourbrand.com | 205.185.112.60 |
| ns2.yourbrand.com | 194.177.13.5 |
These are the addresses of ns5 and ns6.private-nameserver.net. To check them yourself, run dig +short ns5.private-nameserver.net and dig +short ns6.private-nameserver.net.
Warning: Don’t use CREATE NAME SERVERS on DirectAdmin’s Name Servers page. It points the names at your hosting server’s own IP address, and our hosting servers don’t answer DNS. Your domains would stop resolving.
Steps
-
Register the names at your domain registrar. Log in where your domain is registered and create each nameserver with its address from the table. Registrars call these child nameservers, glue records, host records or private nameservers. This is what lets other domains use your names as their nameservers.
-
Add the same names to your domain’s DNS. If your domain’s DNS is hosted with us, open DNS Management for your domain at the User level and add an A record for each name (
ns1→205.185.112.60,ns2→194.177.13.5). See Add or change a DNS record. If your DNS is hosted somewhere else, add the A records there.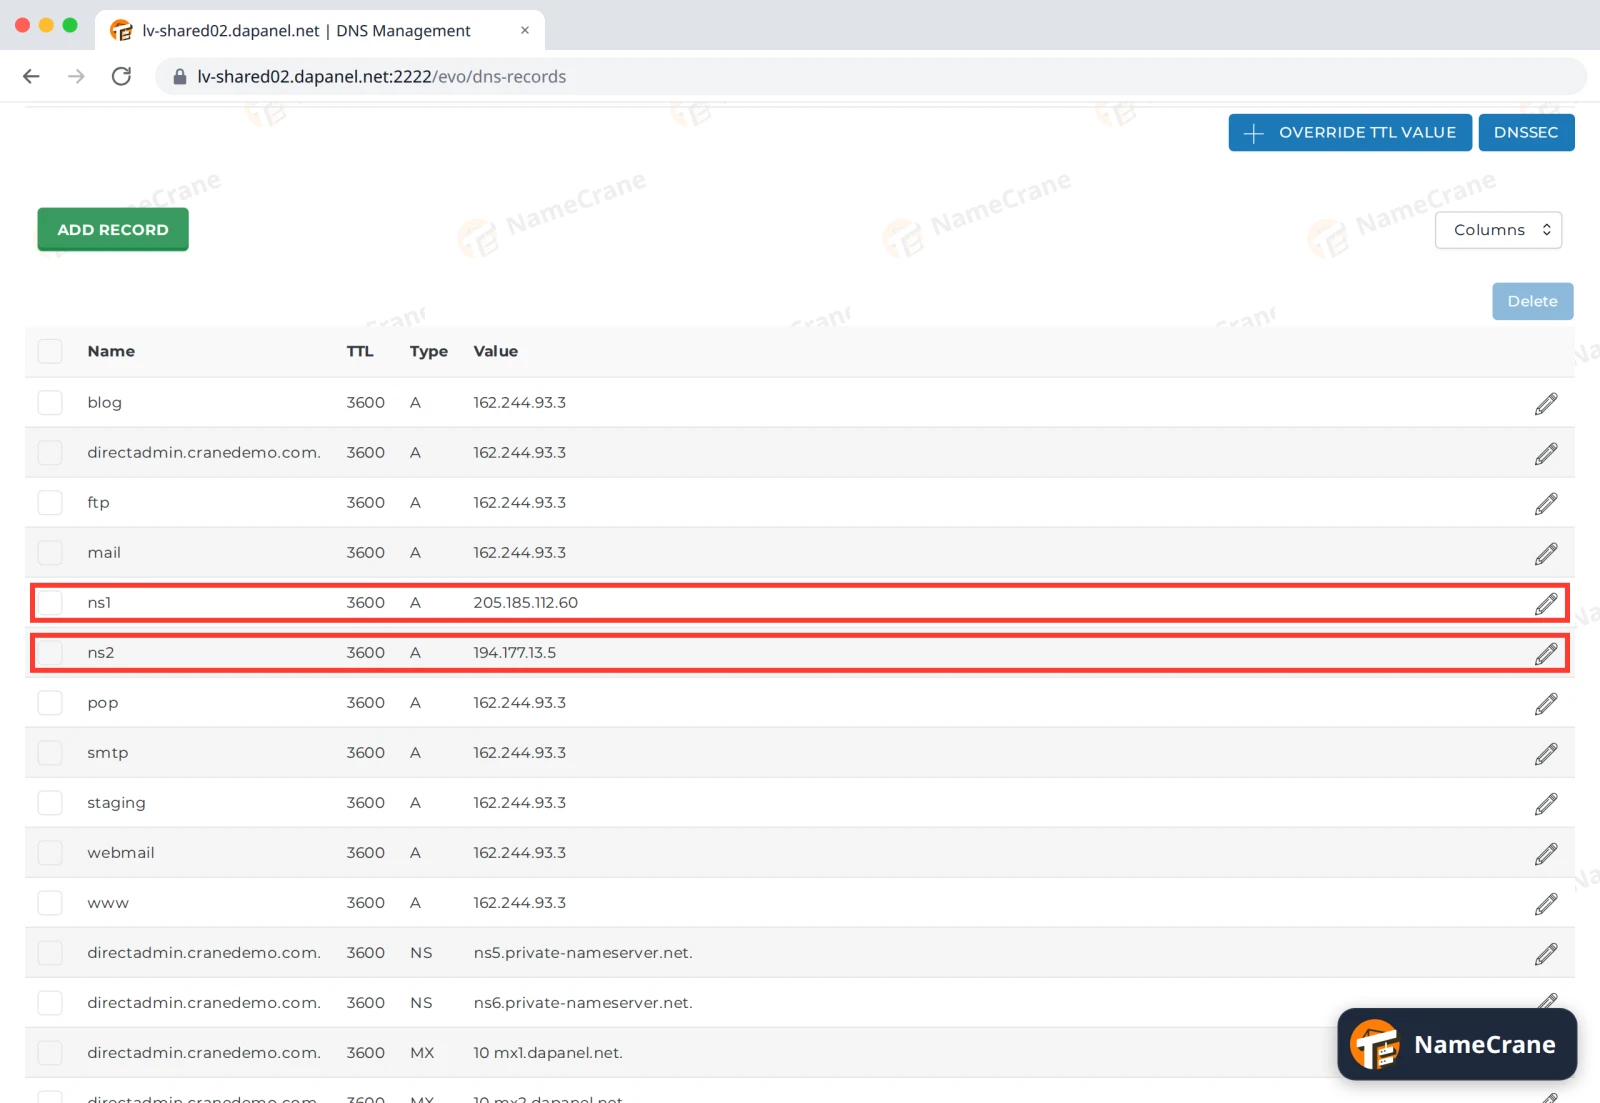
-
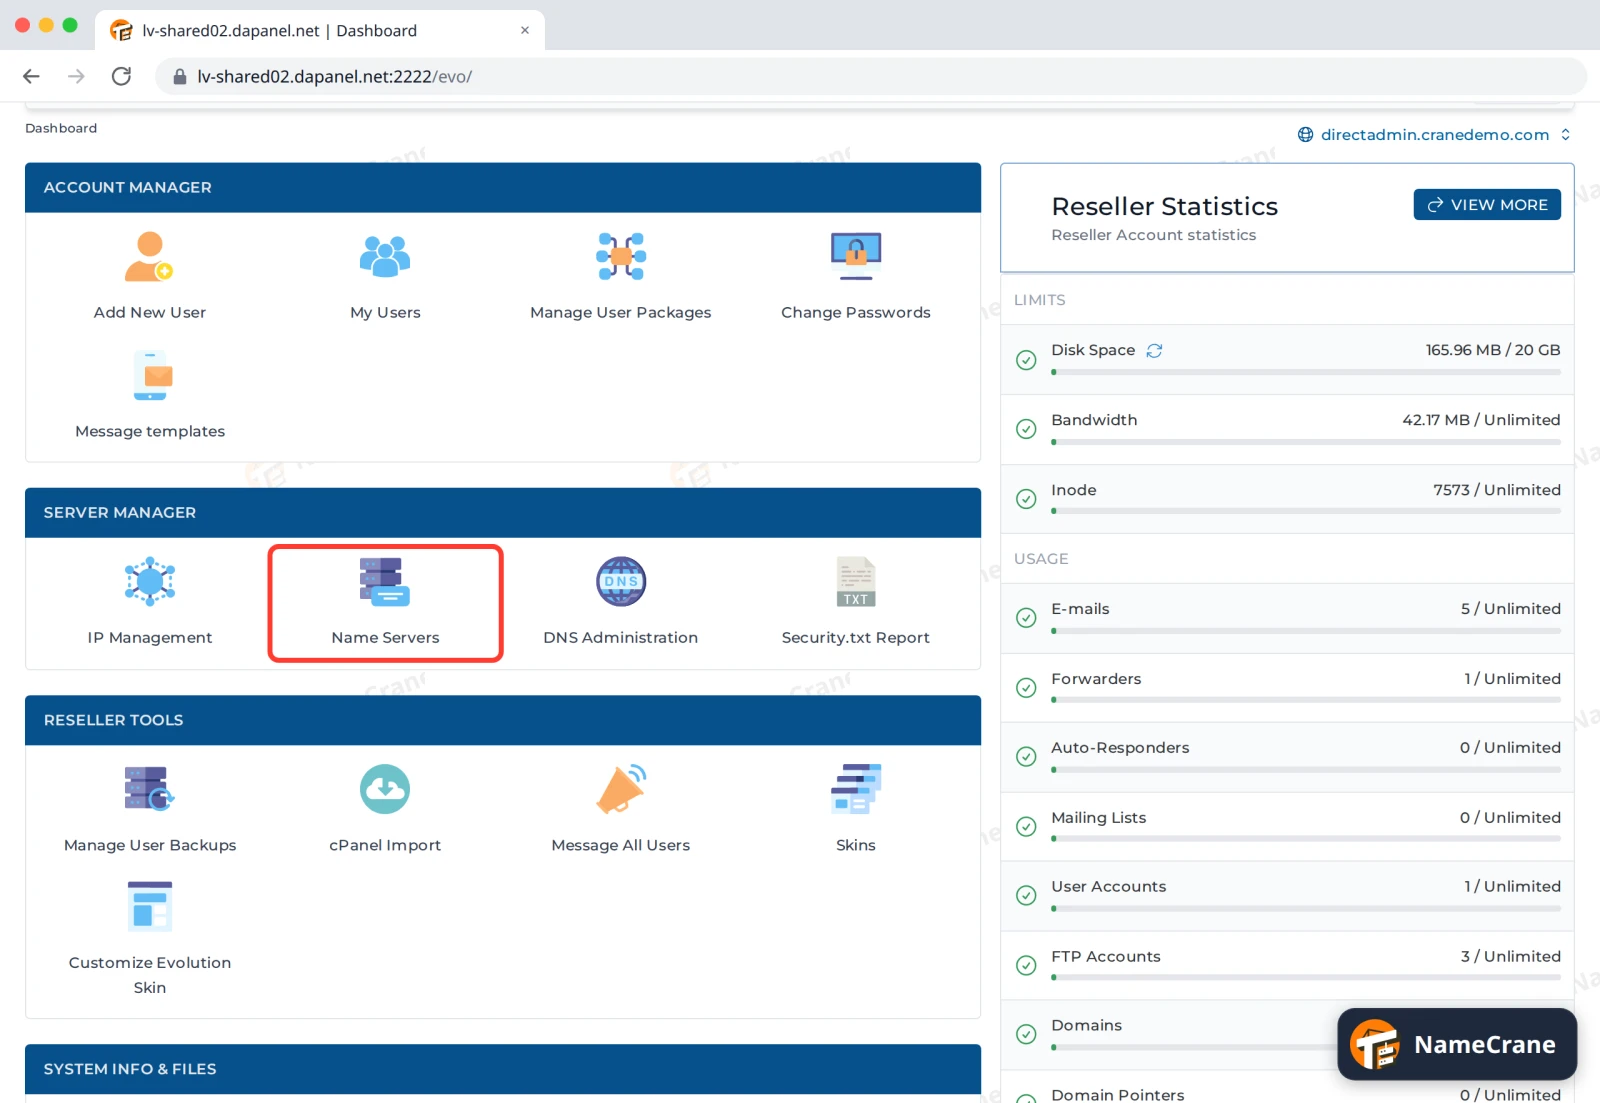
Set them for your new customers. Click Reseller in the top bar. Under Server Manager, click Name Servers.
-
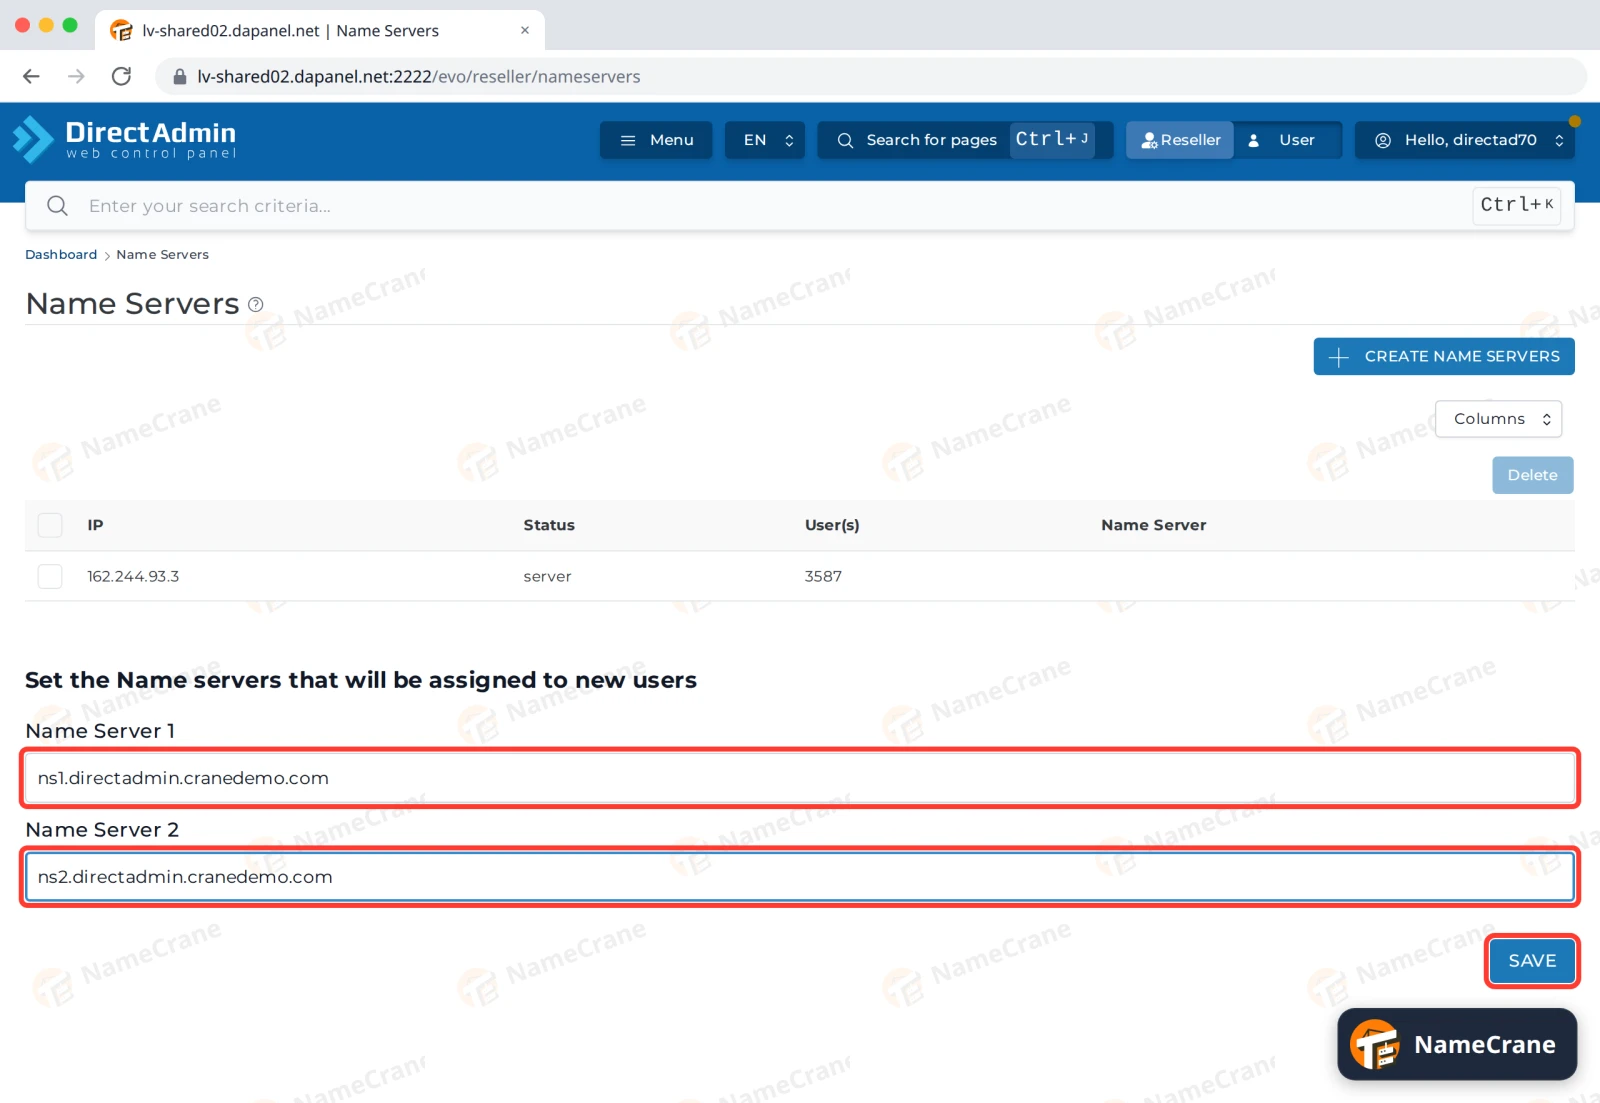
Under Set the Name servers that will be assigned to new users, fill in Name Server 1 and Name Server 2 with your names and click SAVE.
-
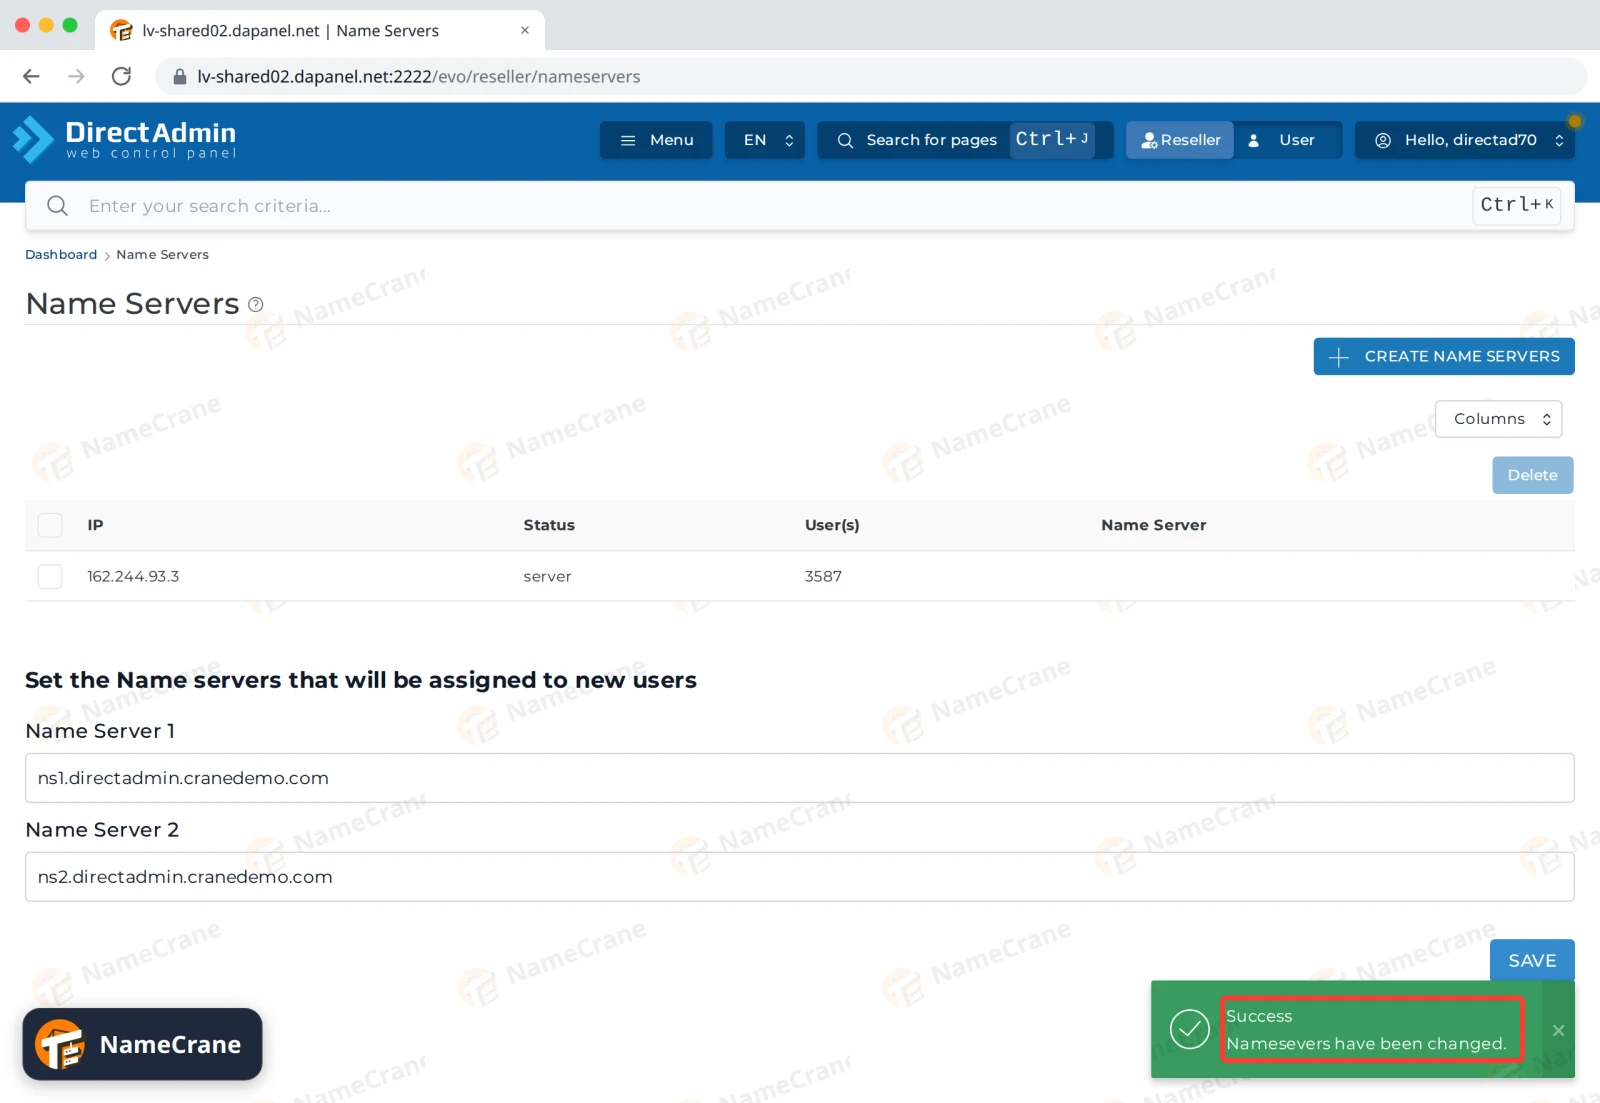
DirectAdmin confirms with Success. Every user you create from now on gets your nameservers in its DNS zone. We tested this with a new user, and its zone listed ns1 and ns2.directadmin.cranedemo.com straight away.
-
Check that your names work before you give them to customers. Run
dig +short ns1.yourbrand.comfor each name, or look them up at whatsmydns.net. Each should show its address from the table. Ours worked within minutes, but a new registration can take a few hours to show everywhere.
Now tell your customers to set their domain’s nameservers to ns1.yourbrand.com and ns2.yourbrand.com at their registrar.
Note: Users you created before the change keep their old nameserver records. That’s fine, because both sets of names point to the same servers. To go back to NameCrane’s names for new users, set the two fields back to
ns5.private-nameserver.netandns6.private-nameserver.netand save.
Troubleshooting
| Problem | What to do |
|---|---|
My registrar won’t accept ns1.yourbrand.com as a nameserver |
Register it as a child nameserver first (step 1), using the domain those names belong to. |
ns1.yourbrand.com doesn’t resolve |
Check the A records (step 2) and the child nameservers (step 1). Then give it a few hours. |
| I used CREATE NAME SERVERS by mistake | Check the ns1 and ns2 A records in DNS Management and set them back to the addresses in the table. Still stuck? Contact support. |
| New users still get the old nameservers | Check both fields on the Name Servers page and click SAVE again. The setting only affects users you create afterwards. |
Snagged on something? Contact support and we’ll get you sorted.