How to Speed Up WordPress with Redis Object Cache in DirectAdmin
Last updated Changelog
On this page
Redis keeps frequently used data in memory, so WordPress doesn’t have to ask the database for the same things on every page view. NameCrane’s DirectAdmin hosting includes your own private Redis, with a start/stop switch right in DirectAdmin. There are three parts: start Redis, switch on PHP’s redis extension, and tell WordPress to use it.
Part 1: Start Redis
-
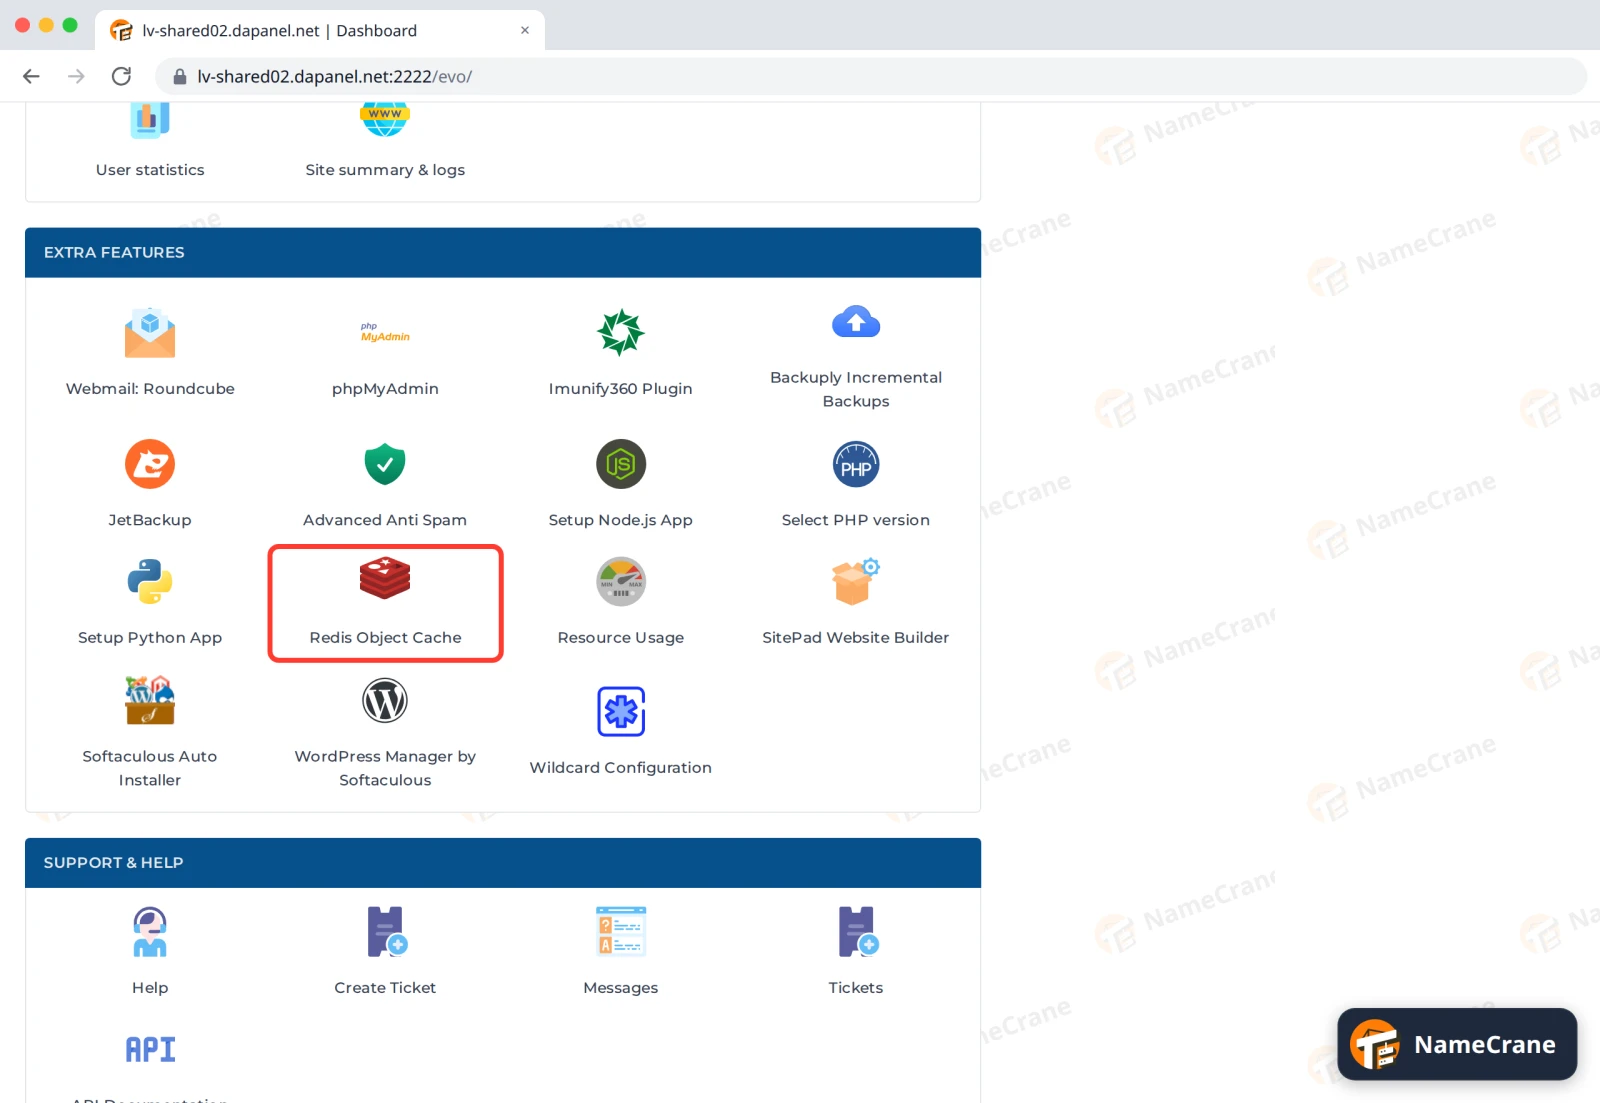
Log in to DirectAdmin. In the Extra Features section, click Redis Object Cache.
-
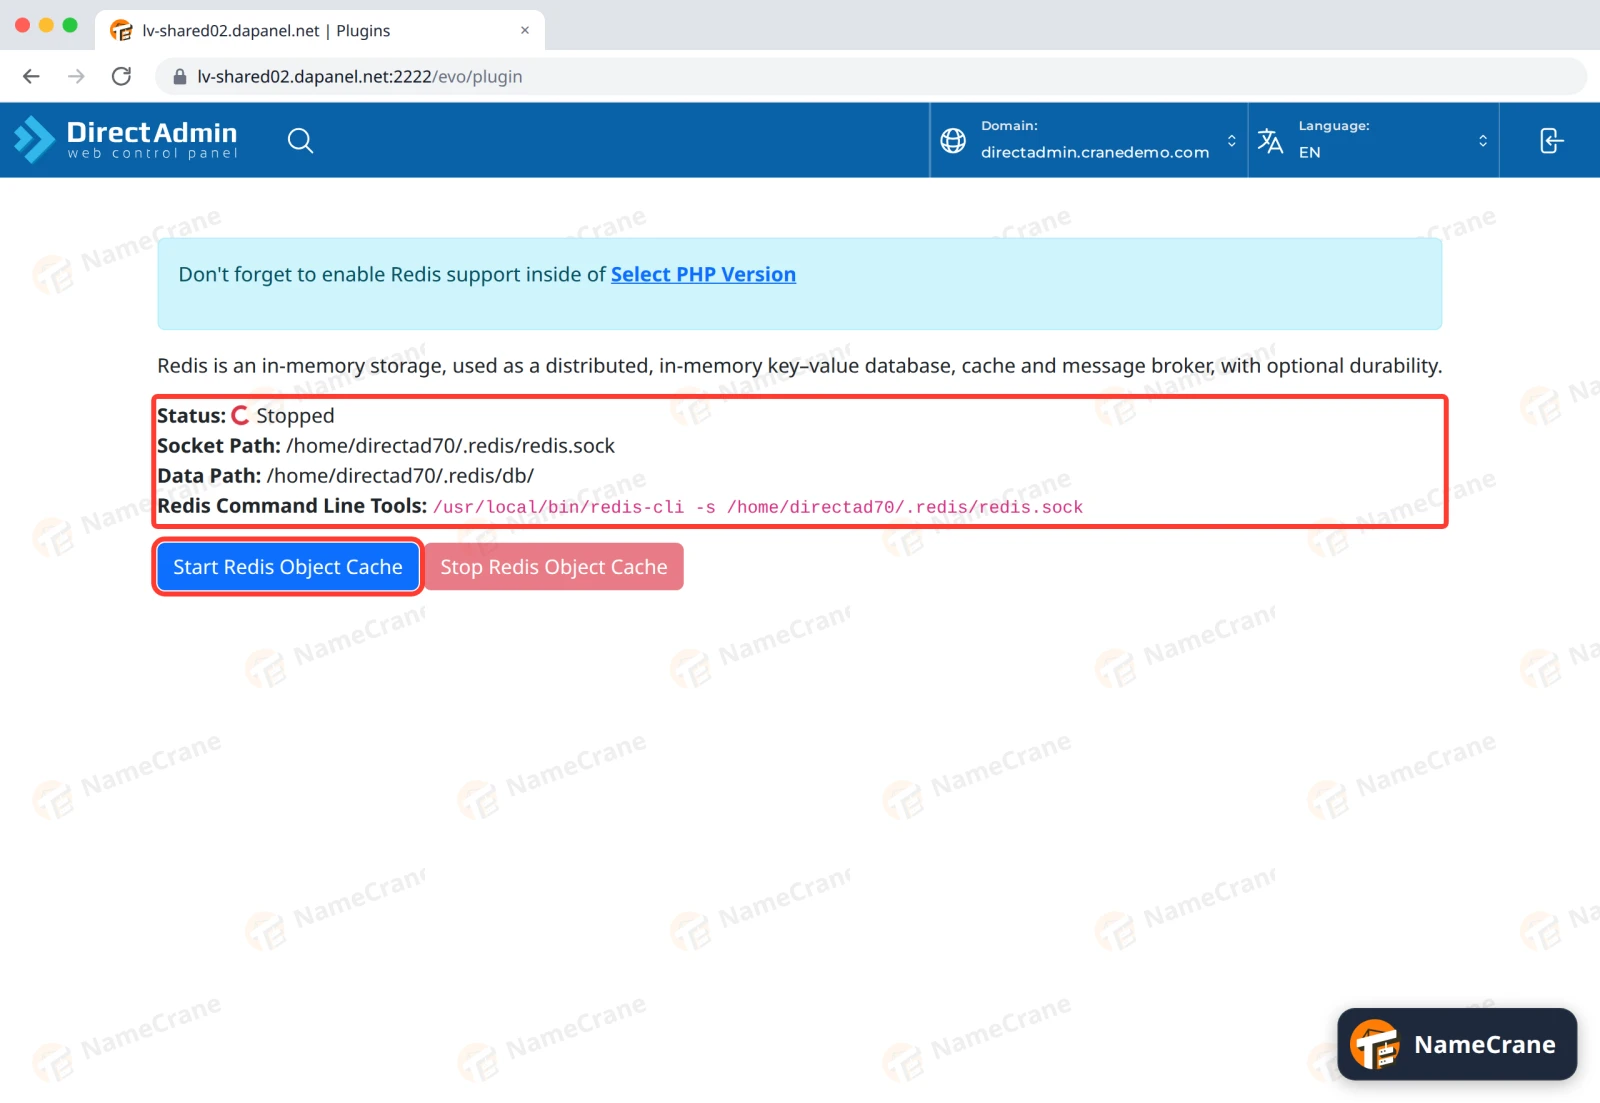
The Status shows Stopped. Click Start Redis Object Cache.
-
The status changes to Running. Note the Socket Path, which is how apps connect to your Redis. It’s
/home/yourusername/.redis/redis.sock, with your own DirectAdmin username.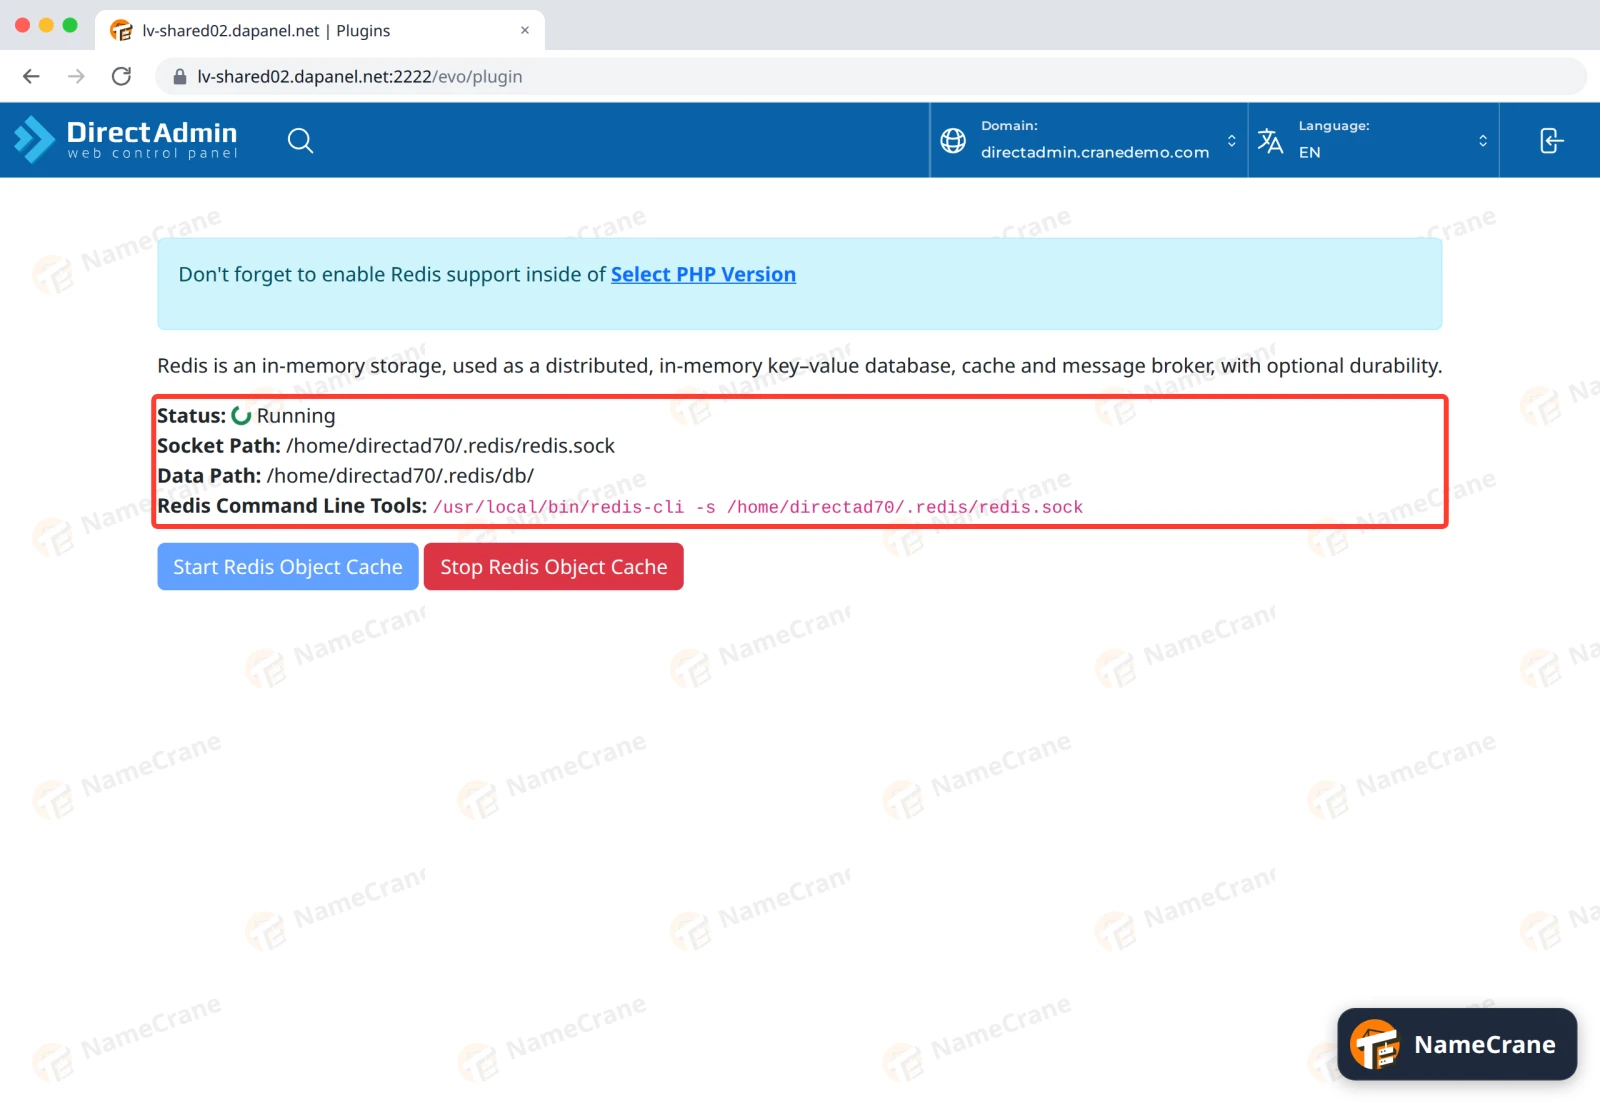
Part 2: Switch on PHP’s redis extension
-
Go back to the dashboard and open Select PHP version (in Extra Features). On the Extensions tab, tick redis. It saves straight away, and also turns on
igbinaryandmsgpack, which it needs.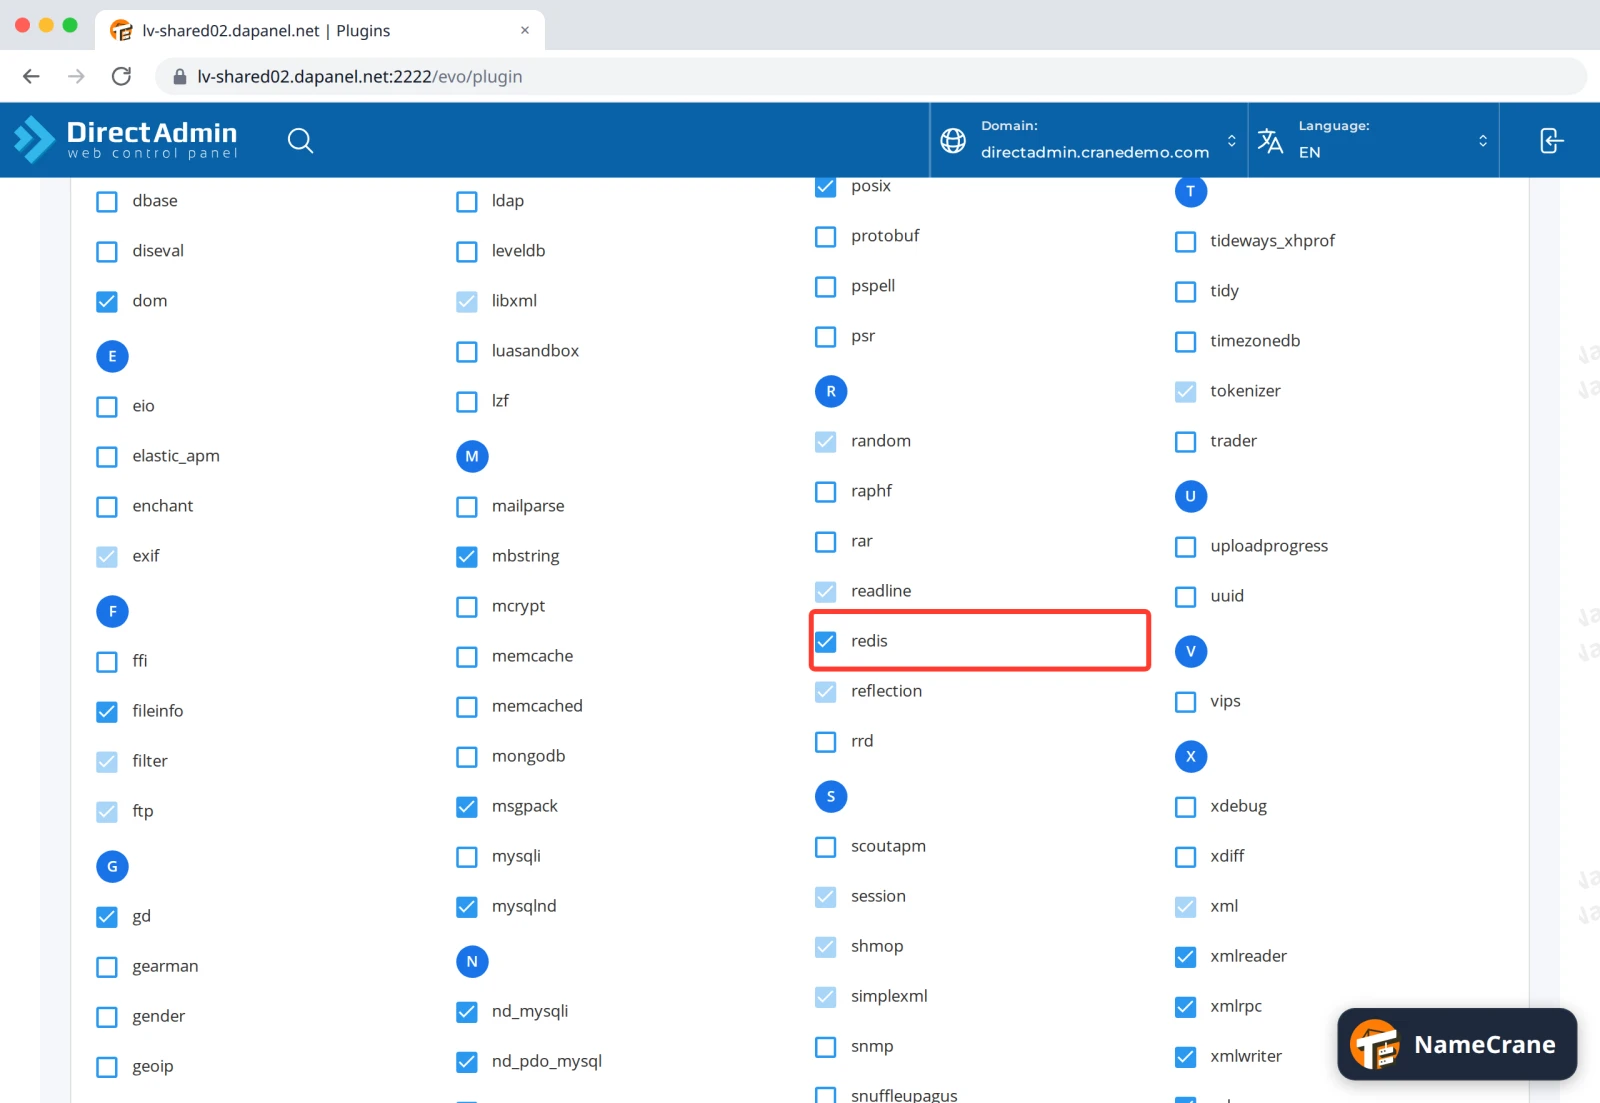
Part 3: Connect WordPress
-
Open your site’s
wp-config.phpin File Manager. For your main domain it’s indomains/yourdomain.com/public_html. Edit it, and just above the line/* That's all, stop editing! Happy publishing. */, add these two lines, using your own DirectAdmin username. Then save.phpdefine( 'WP_REDIS_SCHEME', 'unix' ); define( 'WP_REDIS_PATH', '/home/yourusername/.redis/redis.sock' );Warning:
wp-config.phpalso contains your database password. Don’t share screenshots of the whole file. -
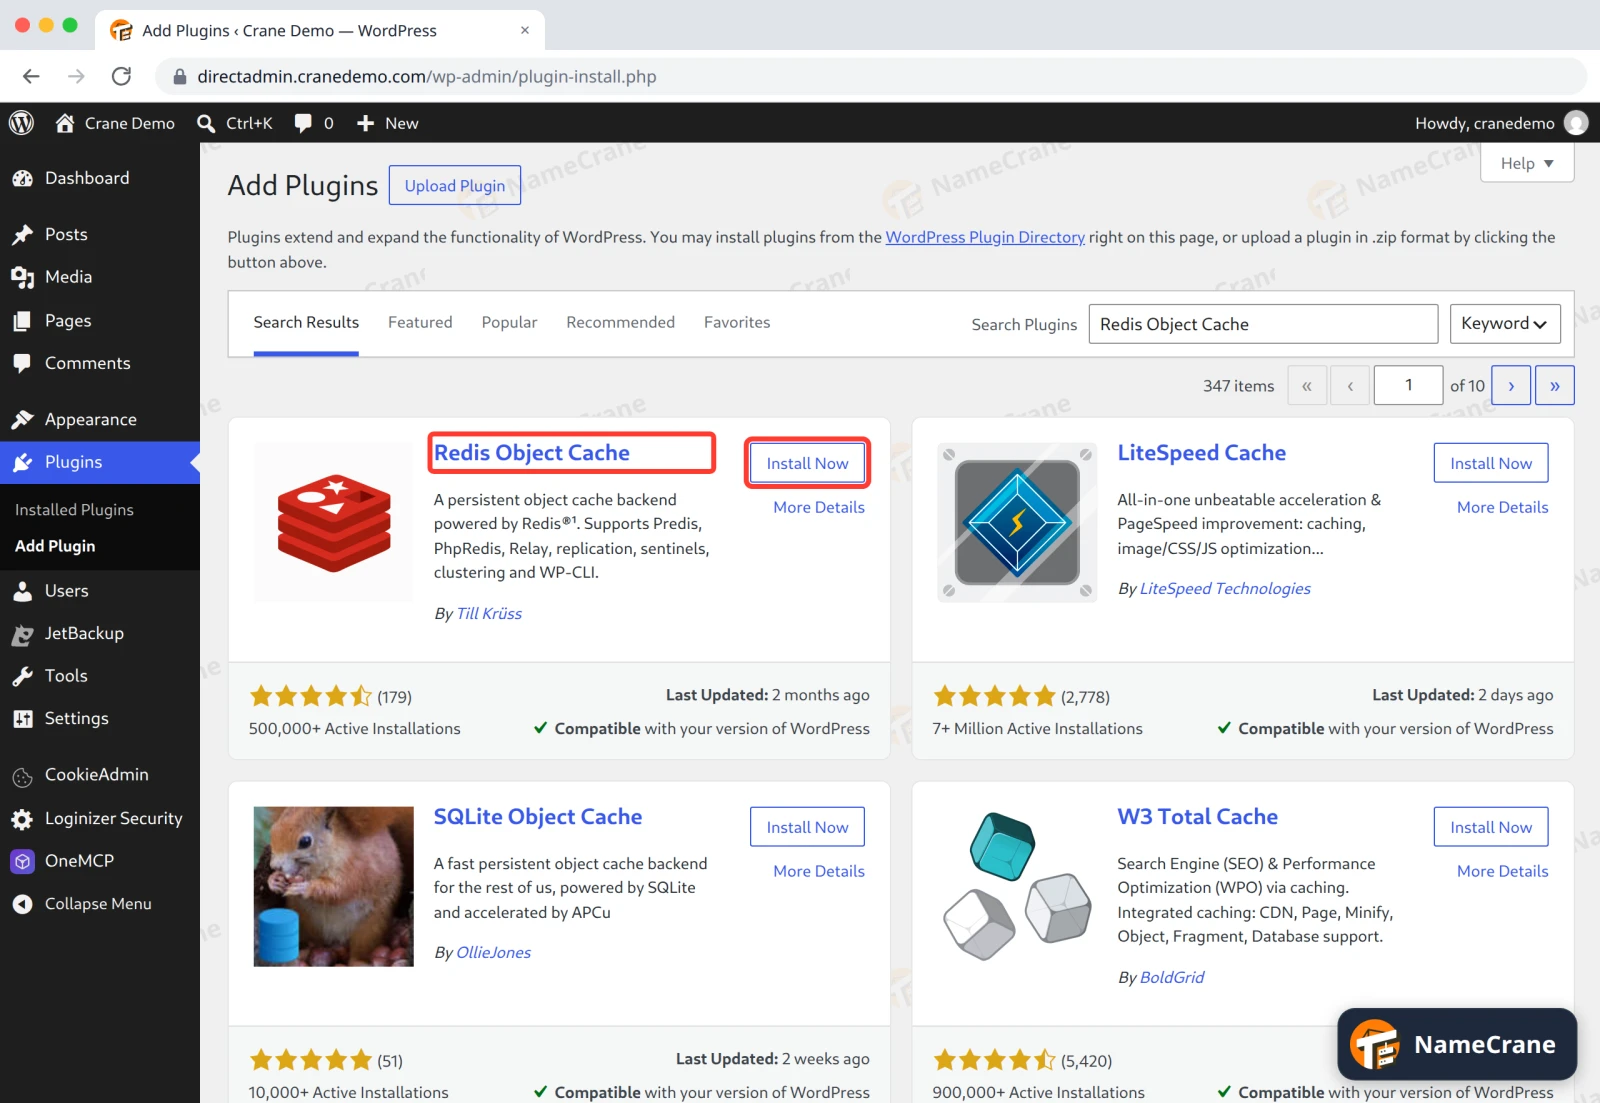
Log in to WordPress and go to Plugins › Add New Plugin. Search for Redis Object Cache (by Till Krüss) and click Install Now.
-
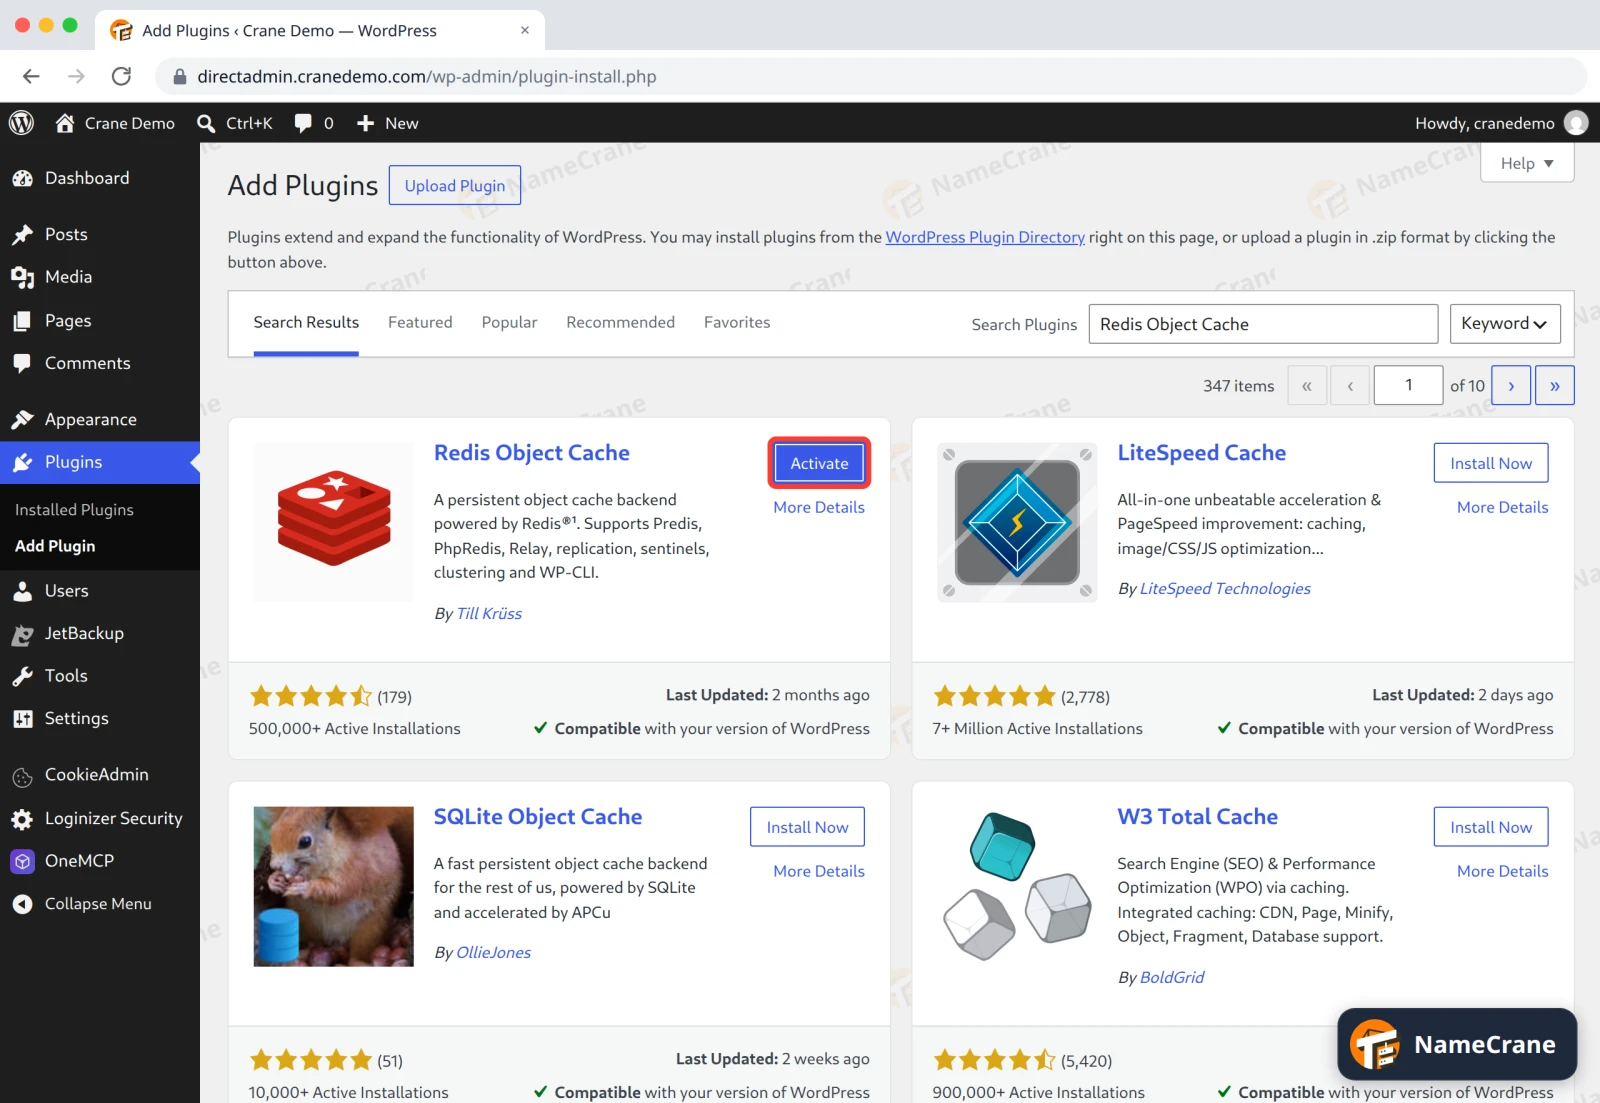
Click Activate.
-
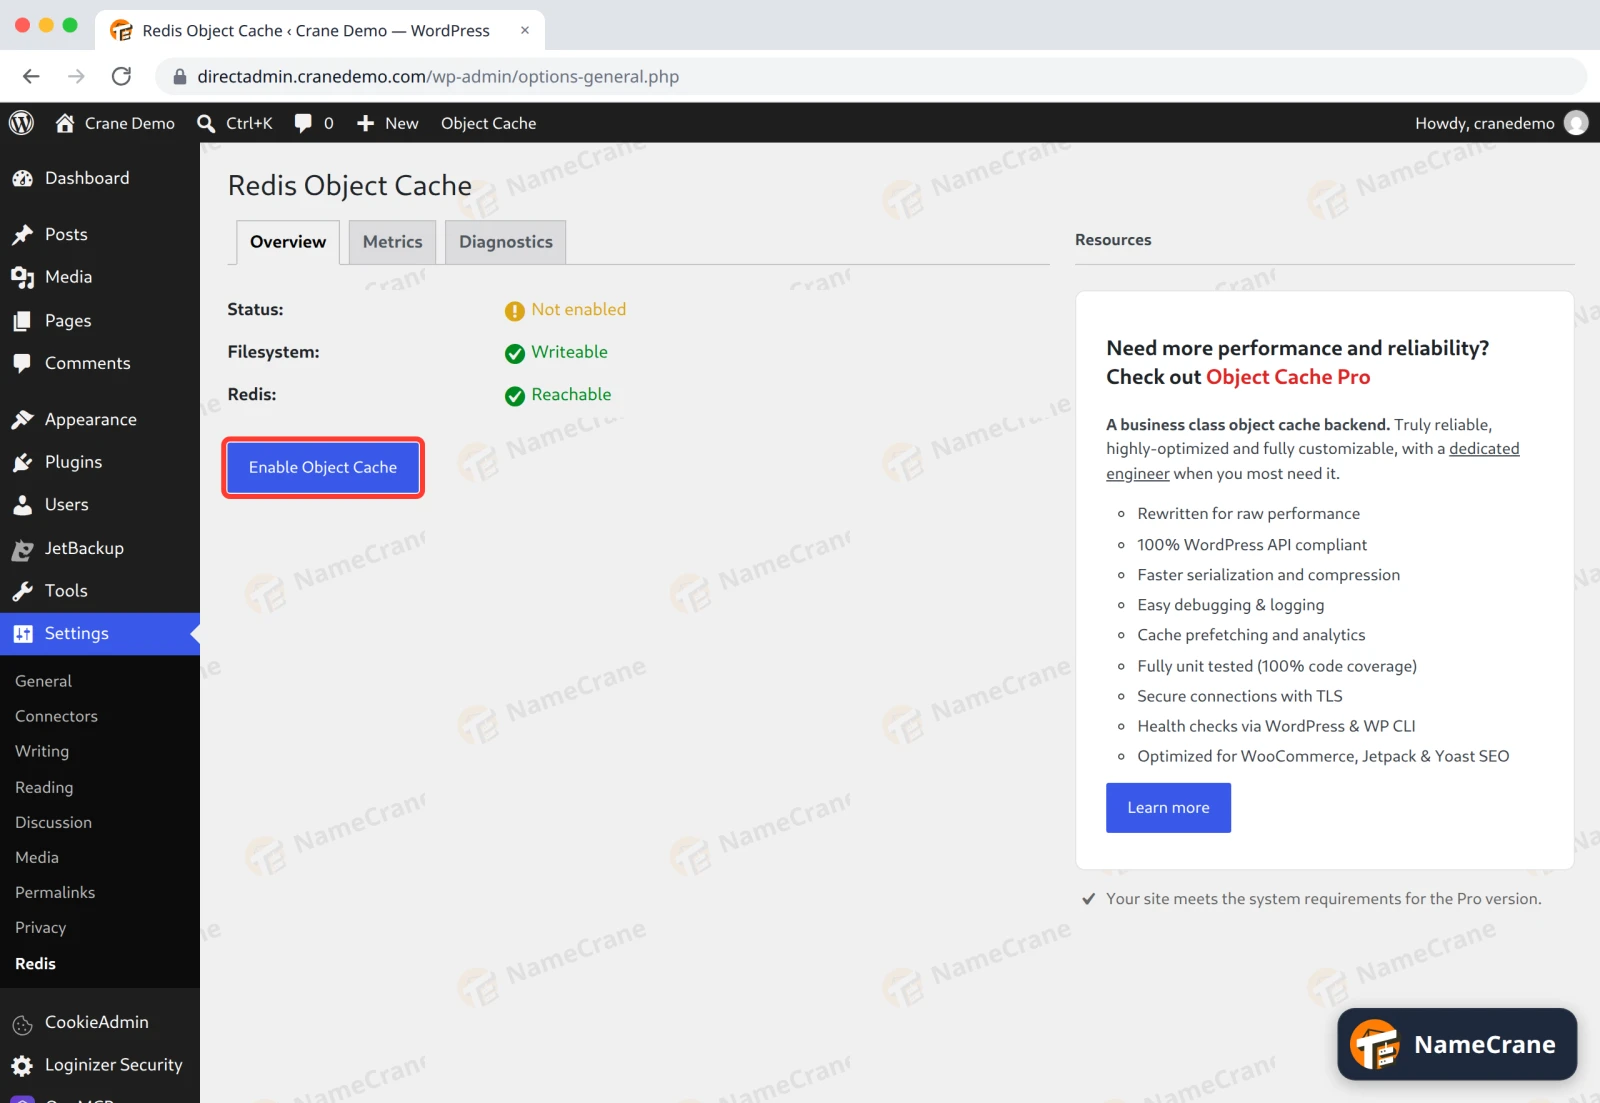
Go to Settings › Redis and click Enable Object Cache.
-
The Status now shows Connected, and Client shows PhpRedis. Your site is now using Redis.
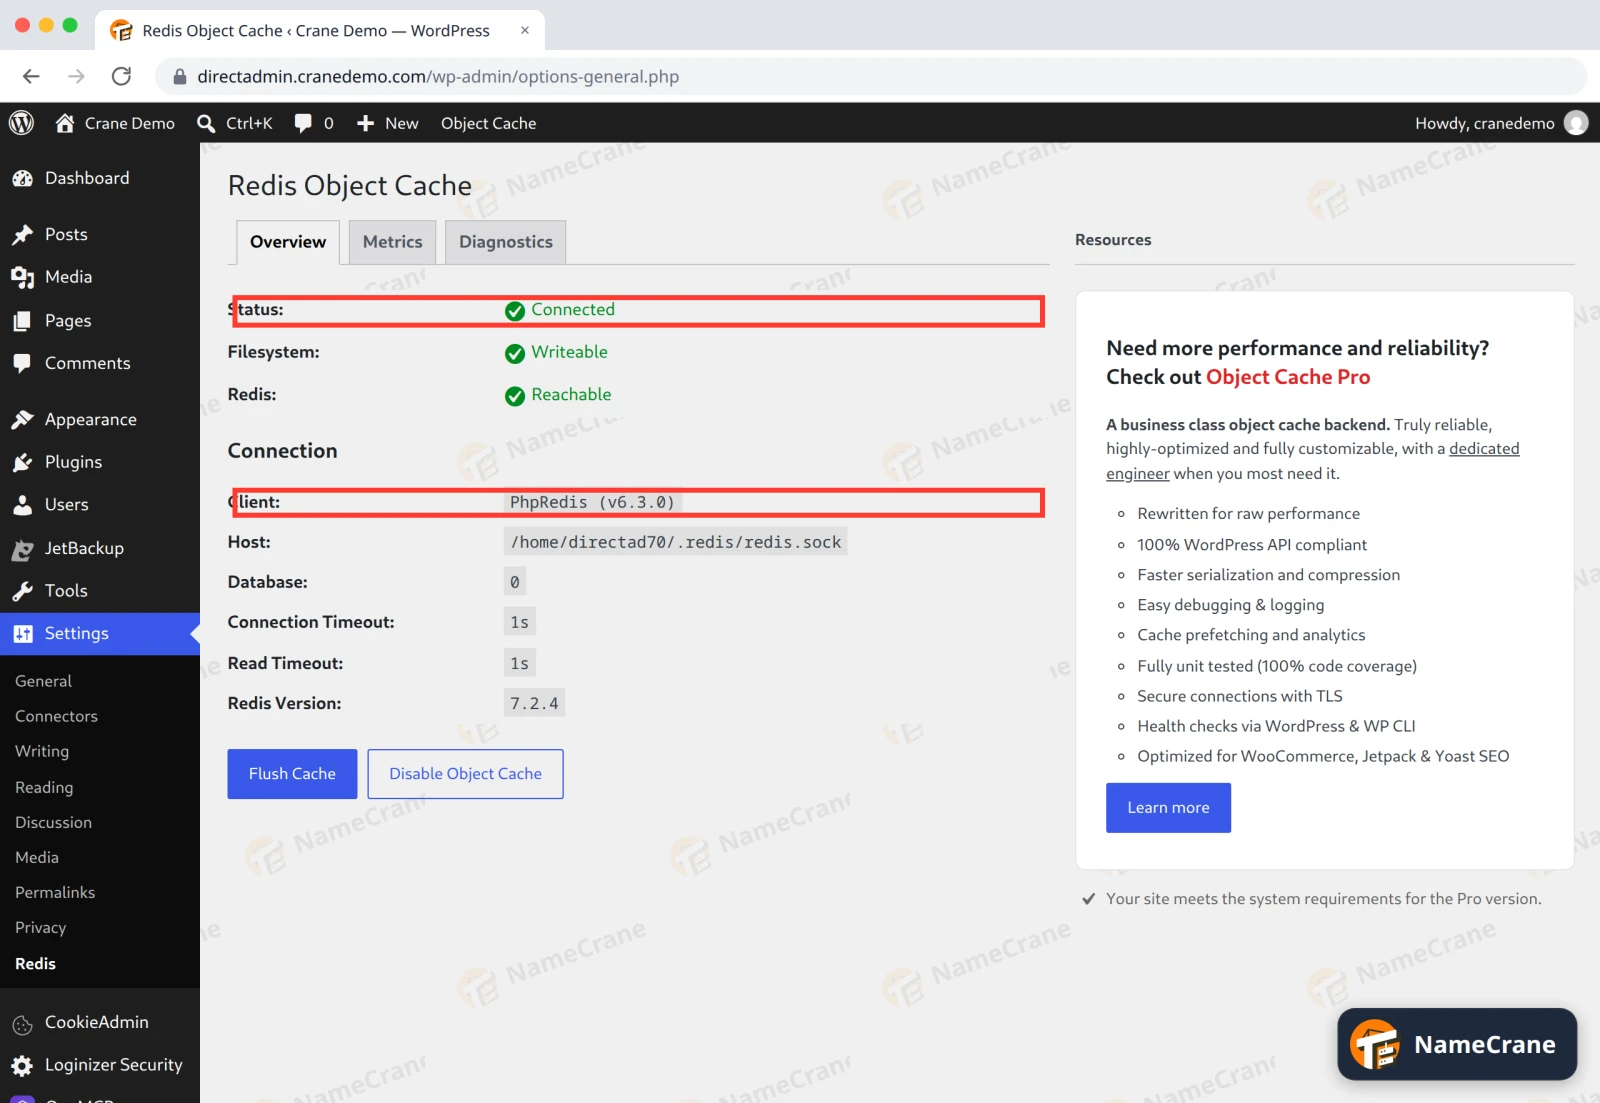
Tip: If you change plugins or content and something looks out of date, click Flush Cache on the same page.
Troubleshooting
| Problem | What to do |
|---|---|
| The plugin says Not connected | Check Redis shows Running in DirectAdmin, and that WP_REDIS_PATH matches your Socket Path exactly, including your username. |
| Client shows Predis instead of PhpRedis | It still works, just a little slower. Tick redis under Select PHP version › Extensions for the faster client. |
My site shows an error after editing wp-config.php |
Check you copied both lines exactly, including the quotes and semicolons, and that they’re above the “stop editing” line. |
| Redis stopped | Click Start Redis Object Cache again. You can also stop it there if you no longer need it. |
Snagged on something? Contact support and we’ll get you sorted.