How to Use Google Workspace or Microsoft 365 Email With Your cPanel Domain
Last updated Changelog
You can host your website with us and use Google Workspace or Microsoft 365 for your email. You need to change a few DNS records in Zone Editor, then tell cPanel that your email is handled elsewhere. In this example we switch blog.cpanel.cranedemo.com to Google Workspace.
Warning: After the switch, new email for the domain goes to Google or Microsoft, not to the mailboxes on your NameCrane hosting. Copy anything you need from those mailboxes first. MXFilter no longer filters this domain’s incoming mail either; Google and Microsoft use their own spam filtering.
The records you need
| Google Workspace | Microsoft 365 | |
|---|---|---|
| Verify the domain | TXT google-site-verification=… (Google gives you the exact value) |
TXT MS=ms… (Microsoft gives you the exact value) |
| MX record | Priority 1, destination smtp.google.com |
Priority 0, destination yourdomain-com.mail.protection.outlook.com (Microsoft shows the exact name) |
| Add to SPF | include:_spf.google.com |
include:spf.protection.outlook.com |
| Also | CNAME autodiscover → autodiscover.outlook.com |
Steps
-
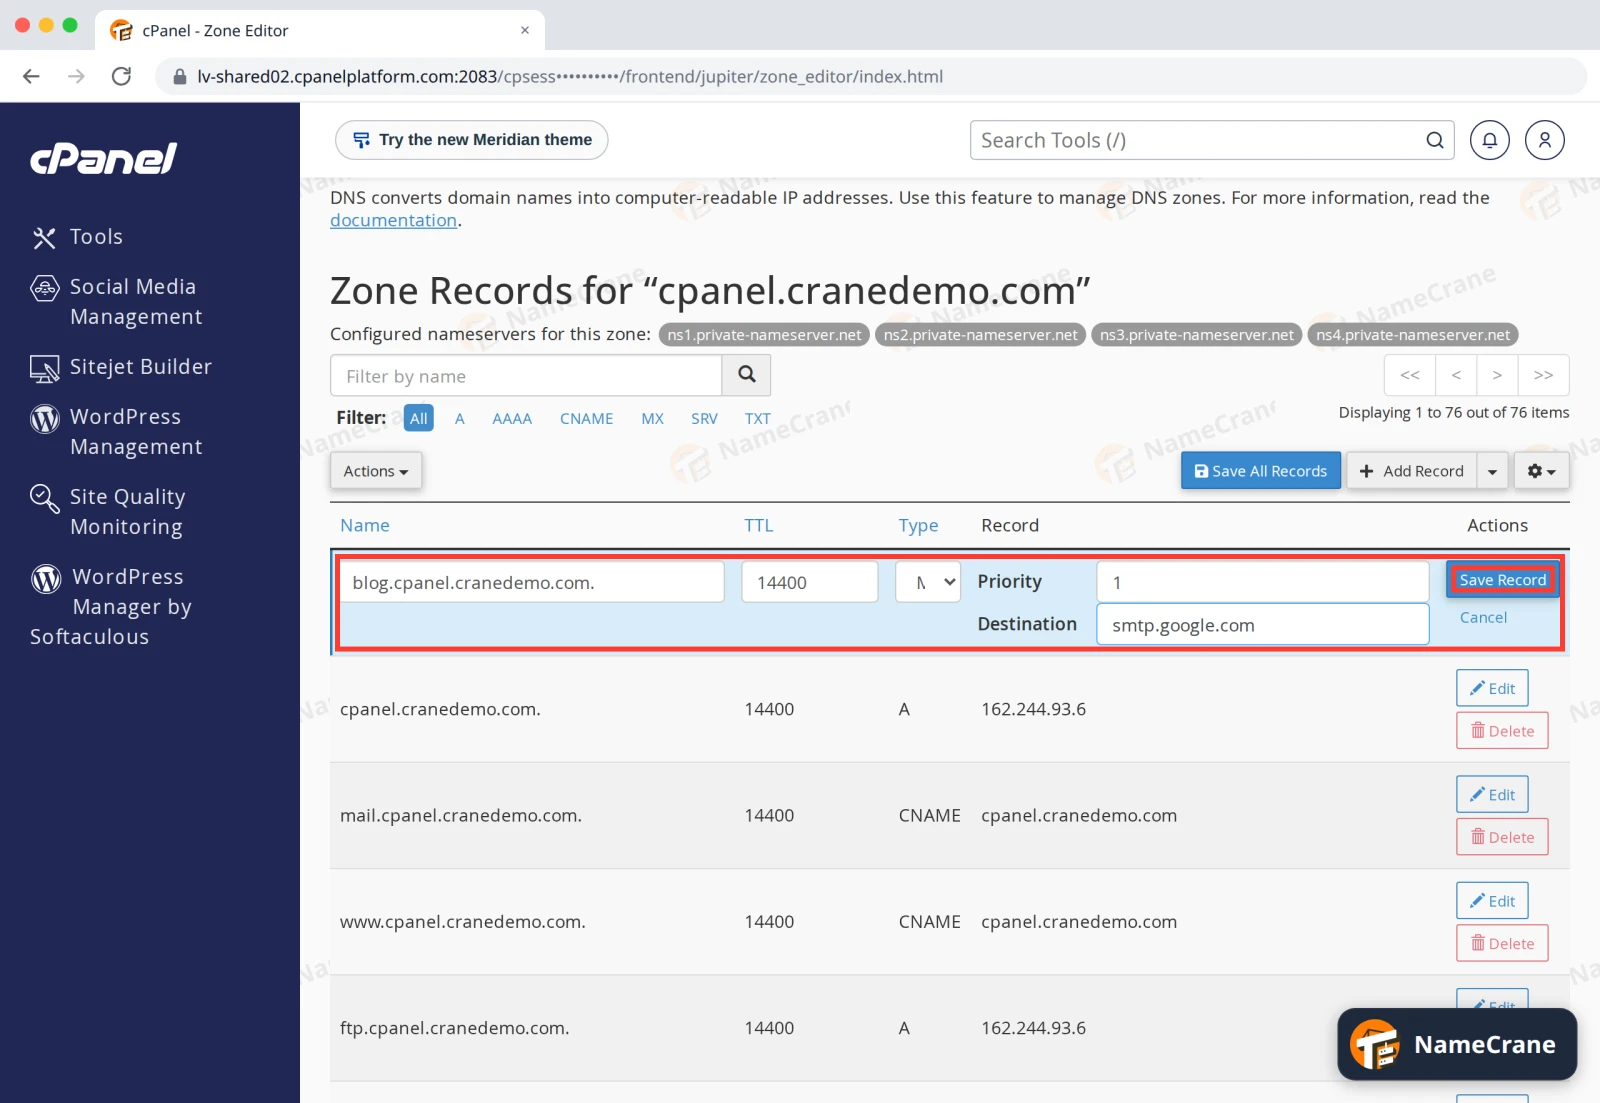
Log in to cPanel, open Zone Editor and click Manage next to your domain. Click Add Record, choose MX, and fill in your domain as the name, the Priority and the Destination from the table. Click Save Record.
-
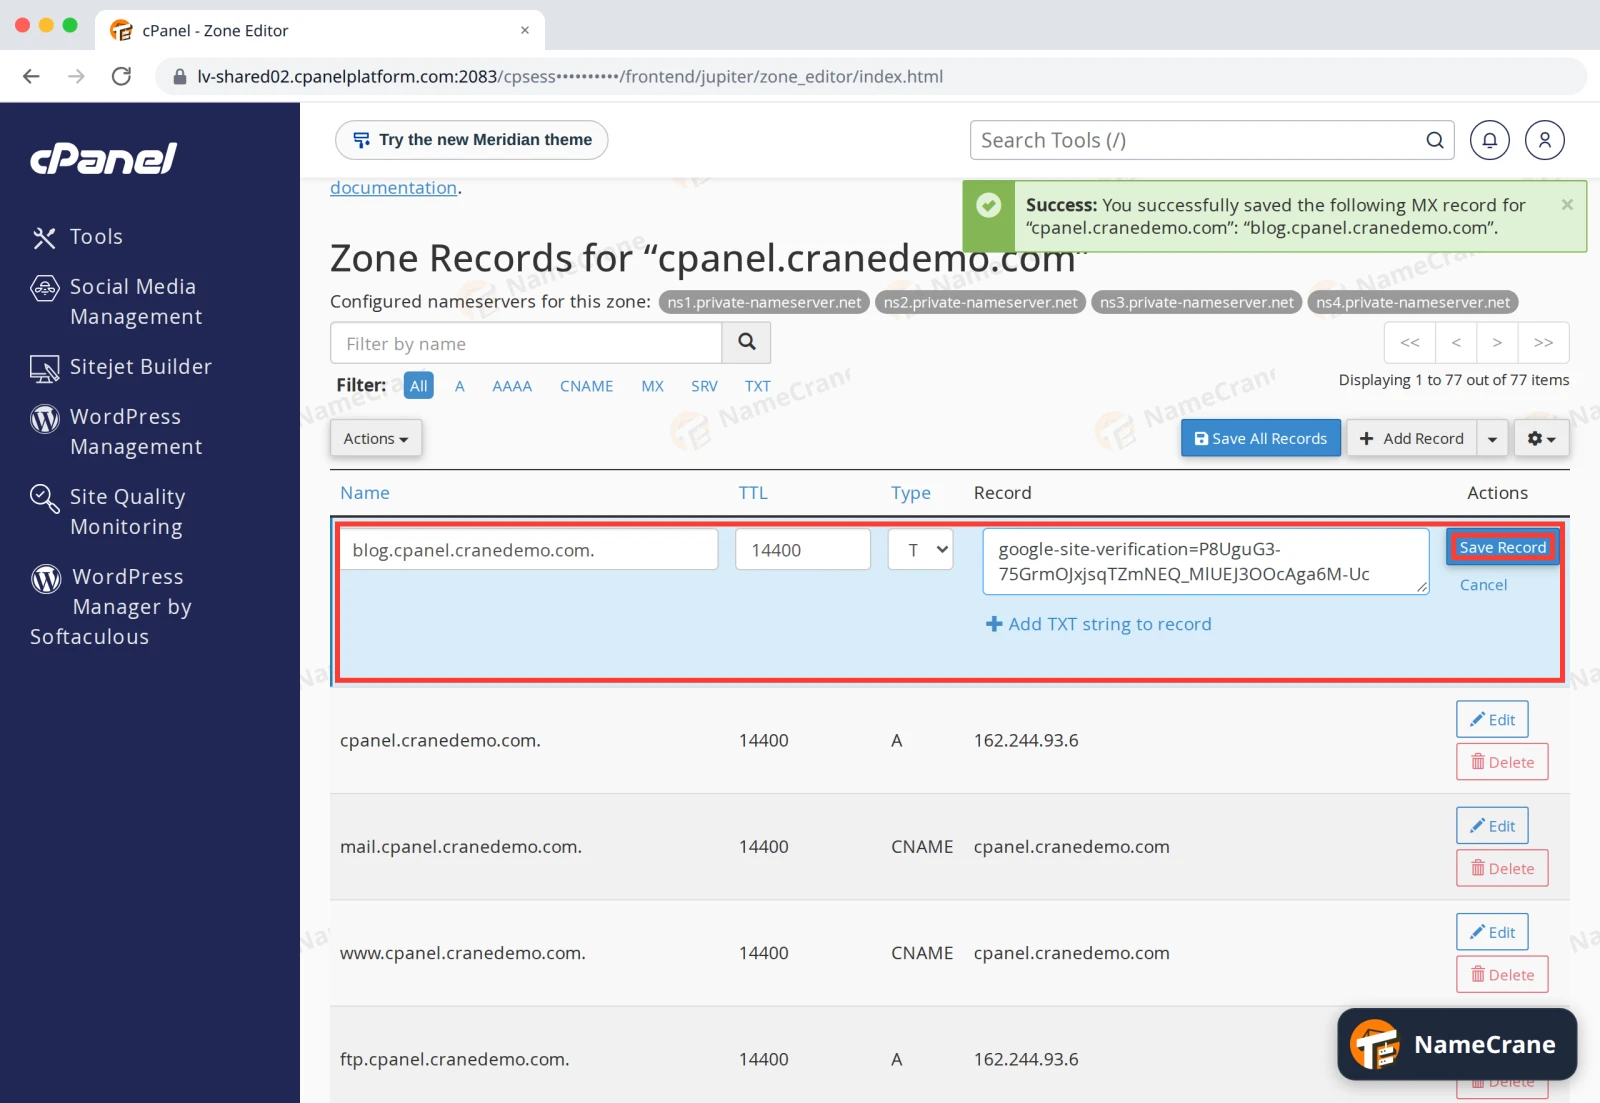
Click Add Record again, choose TXT, and paste in the verification value from Google or Microsoft. Click Save Record.
-
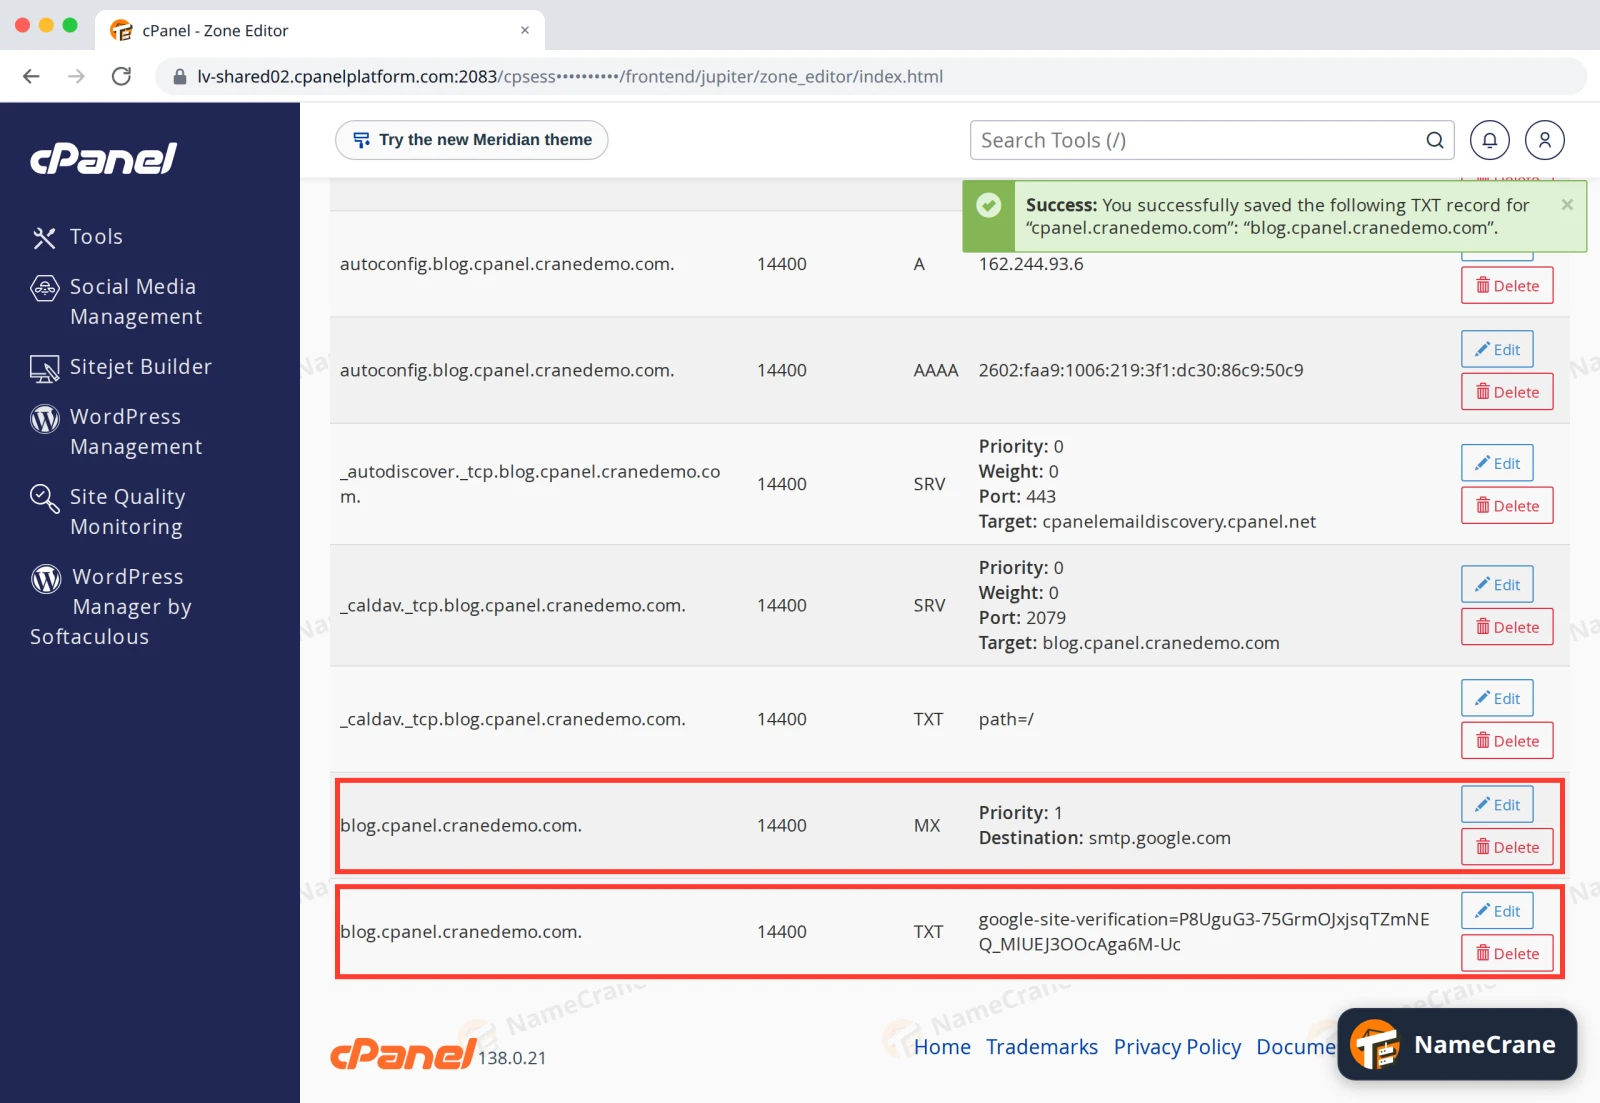
Both records are now listed. Delete any other MX records for the domain, so all email goes to your new provider.
-
Edit your SPF record (the TXT record starting
v=spf1) and add the include from the table just before~all. For Google that gives, for example,v=spf1 +a +mx include:_spf.google.com ~all. See Set up SPF, DKIM and DMARC. -
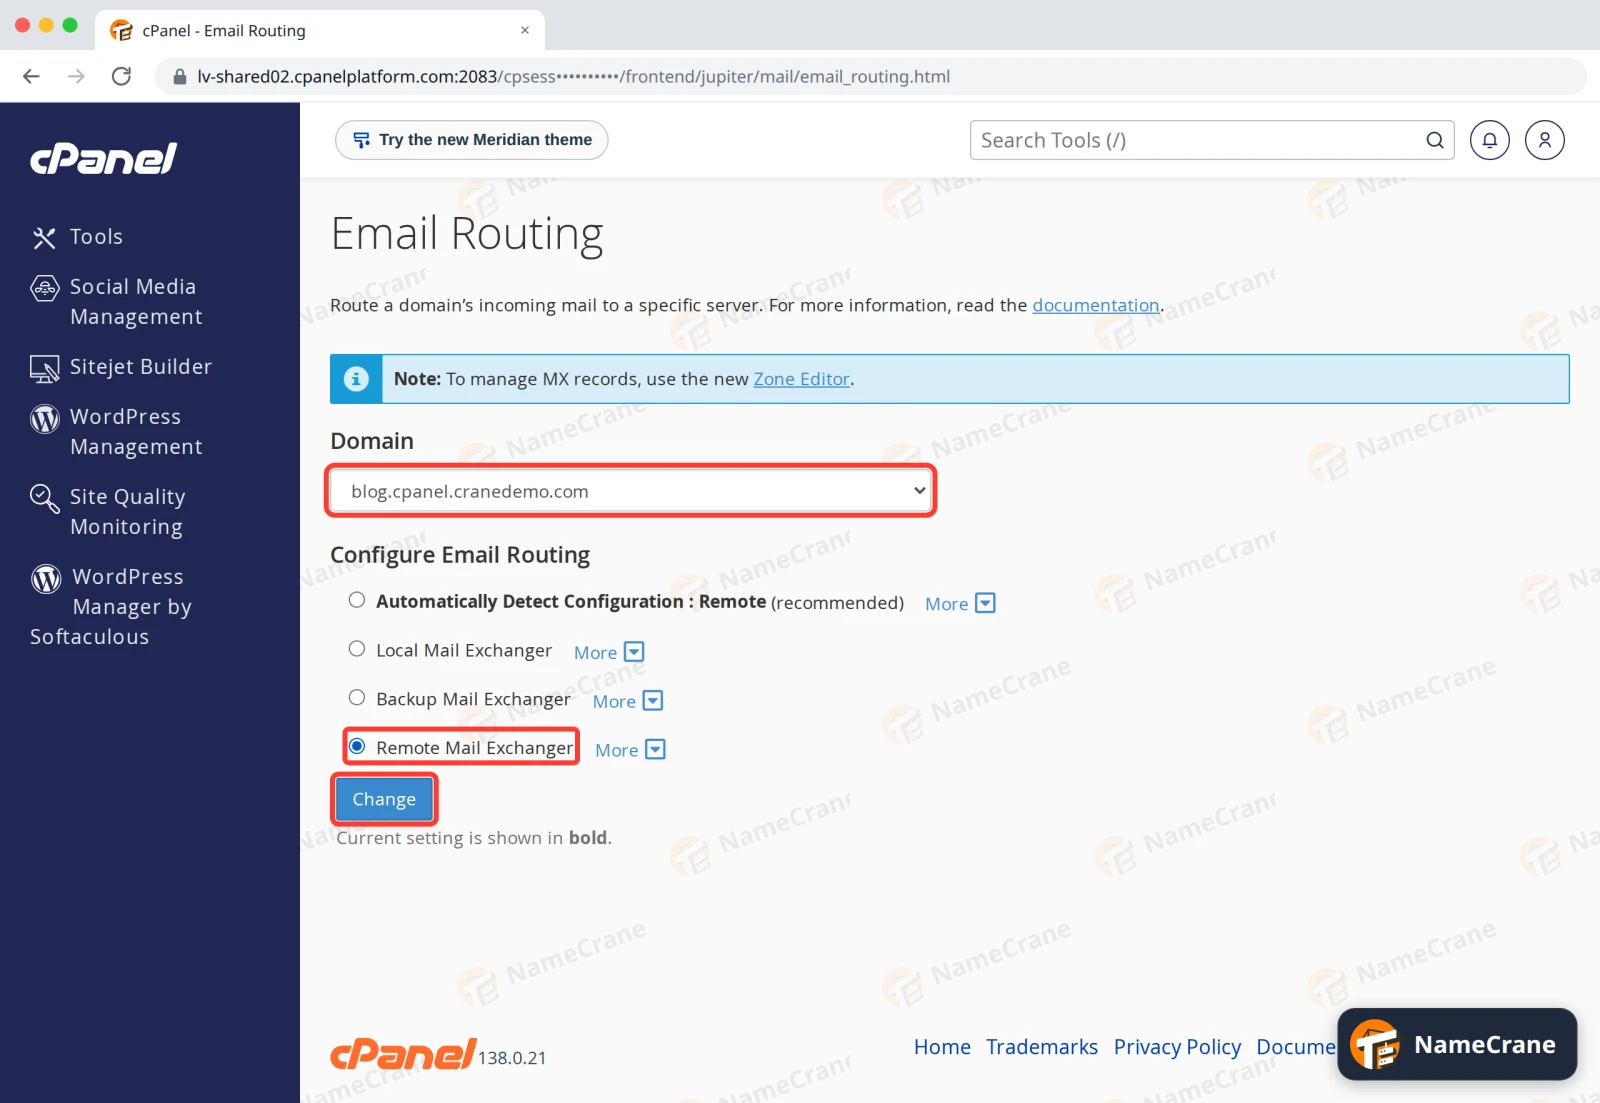
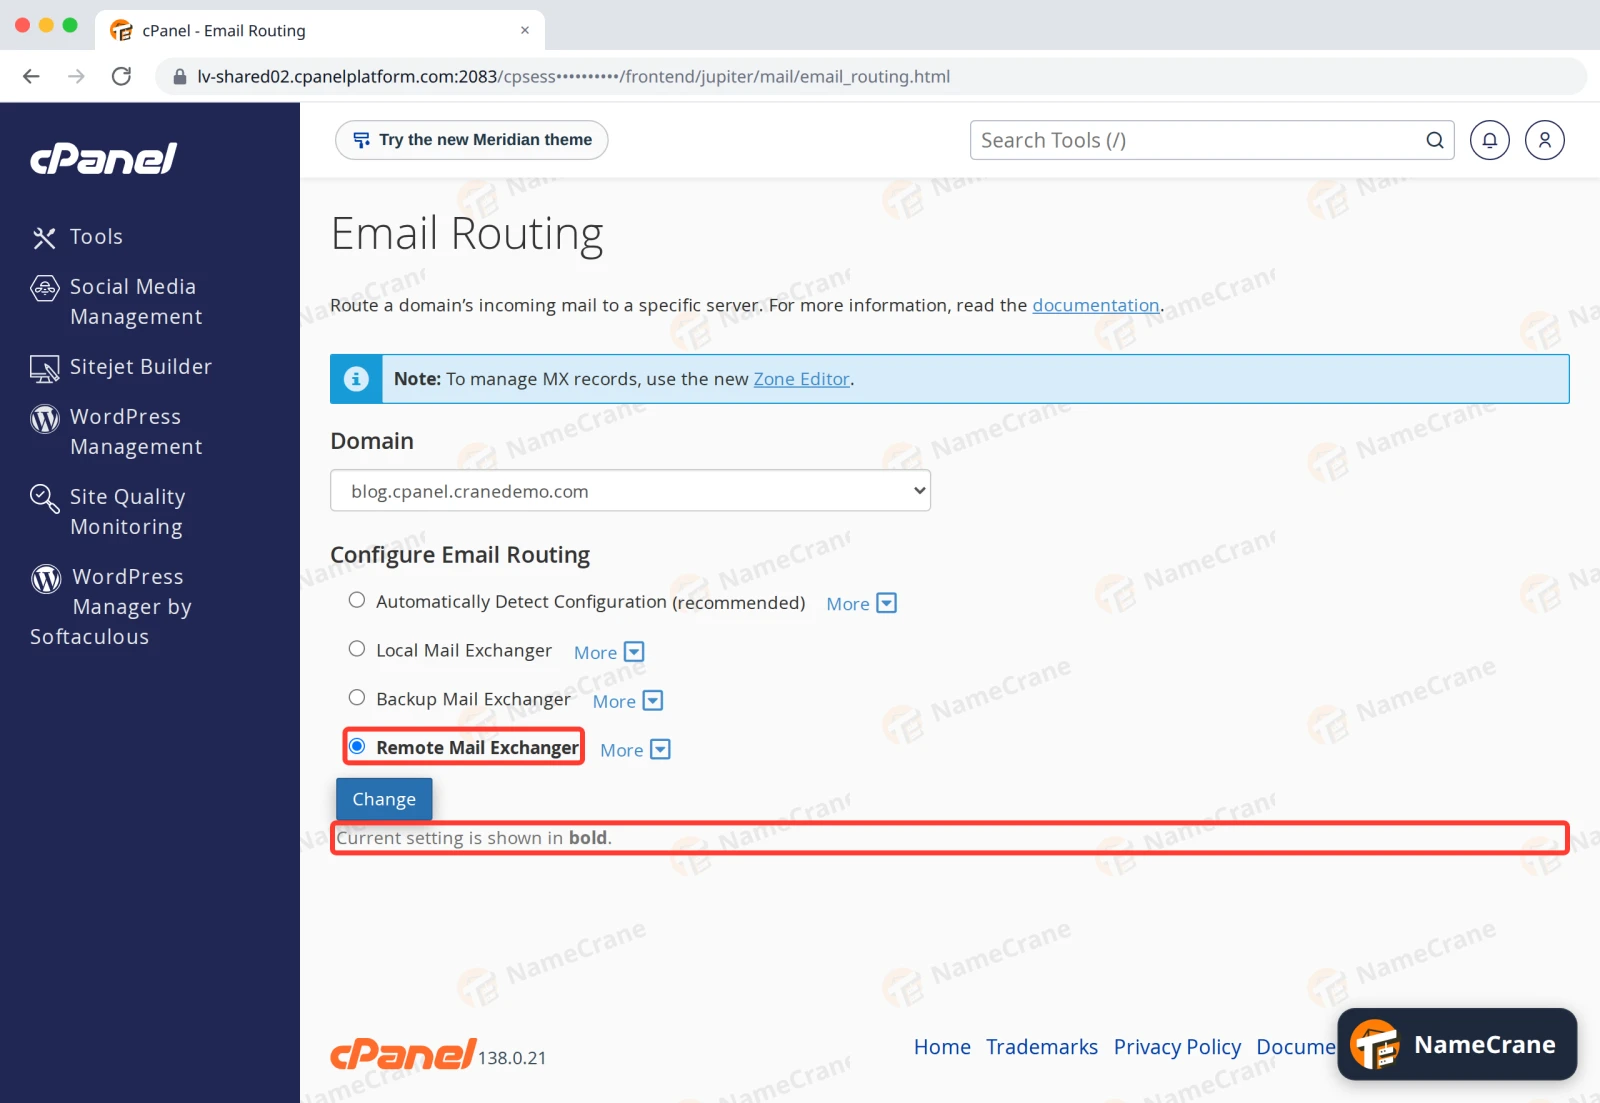
Open Email Routing (in the Email section), choose your domain, select Remote Mail Exchanger and click Change.
-
Remote Mail Exchanger is now shown in bold, as the current setting. Email from other sites on our servers will now go to your new provider too.
-
Go back to Google or Microsoft and click Verify. Once DNS has updated, usually within an hour, your email arrives there. To check, run
dig +short MX yourdomain.com. Ours showed1 smtp.google.com.straight away.
Note: With the new MX record in place, Automatically Detect Configuration already chose Remote in our test. Picking Remote Mail Exchanger yourself makes sure it stays that way.
Switch back to NameCrane email
Delete the Google or Microsoft MX record in Zone Editor, put back the MX records you deleted, and set Email Routing to Automatically Detect Configuration. Not sure what the old records were? Contact support and we’ll restore them.
Troubleshooting
| Problem | What to do |
|---|---|
| Google or Microsoft says it can’t verify the domain | Check the TXT record is on the right domain and copied exactly. DNS can take up to an hour to update. |
| Email from my own website (contact forms) never arrives | Set Email Routing to Remote Mail Exchanger. |
| My email is marked as spam | Check your SPF record includes your new provider, and set up DKIM in Google or Microsoft. |
| I still get some email on NameCrane | Senders may still have your old MX records saved. It stops within a day. |
Snagged on something? Contact support and we’ll get you sorted.