How to Create an Email Account in cPanel
Last updated Changelog
On this page
Every NameCrane hosting plan lets you create email addresses on your own domain, such as hello@yourdomain.com. Each one gets its own mailbox, password and storage, and you can read it in webmail or any email app.
Steps
-
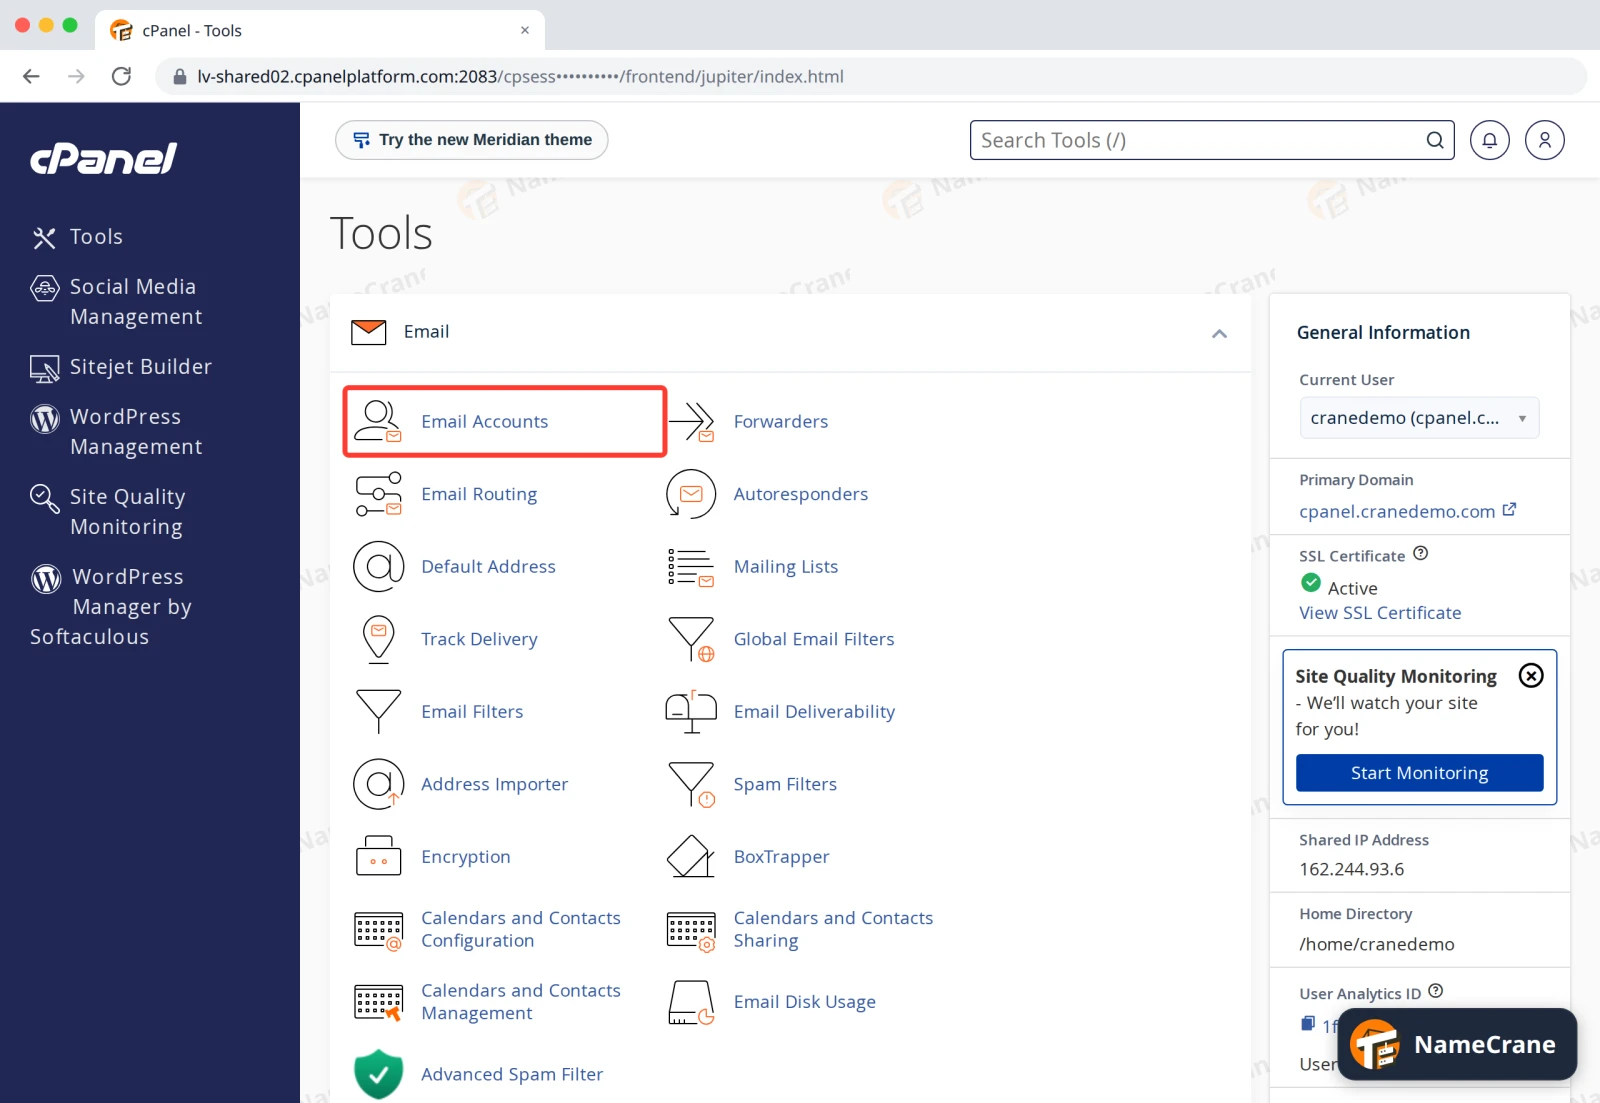
Log in to cPanel. In the Email section, click Email Accounts.
-
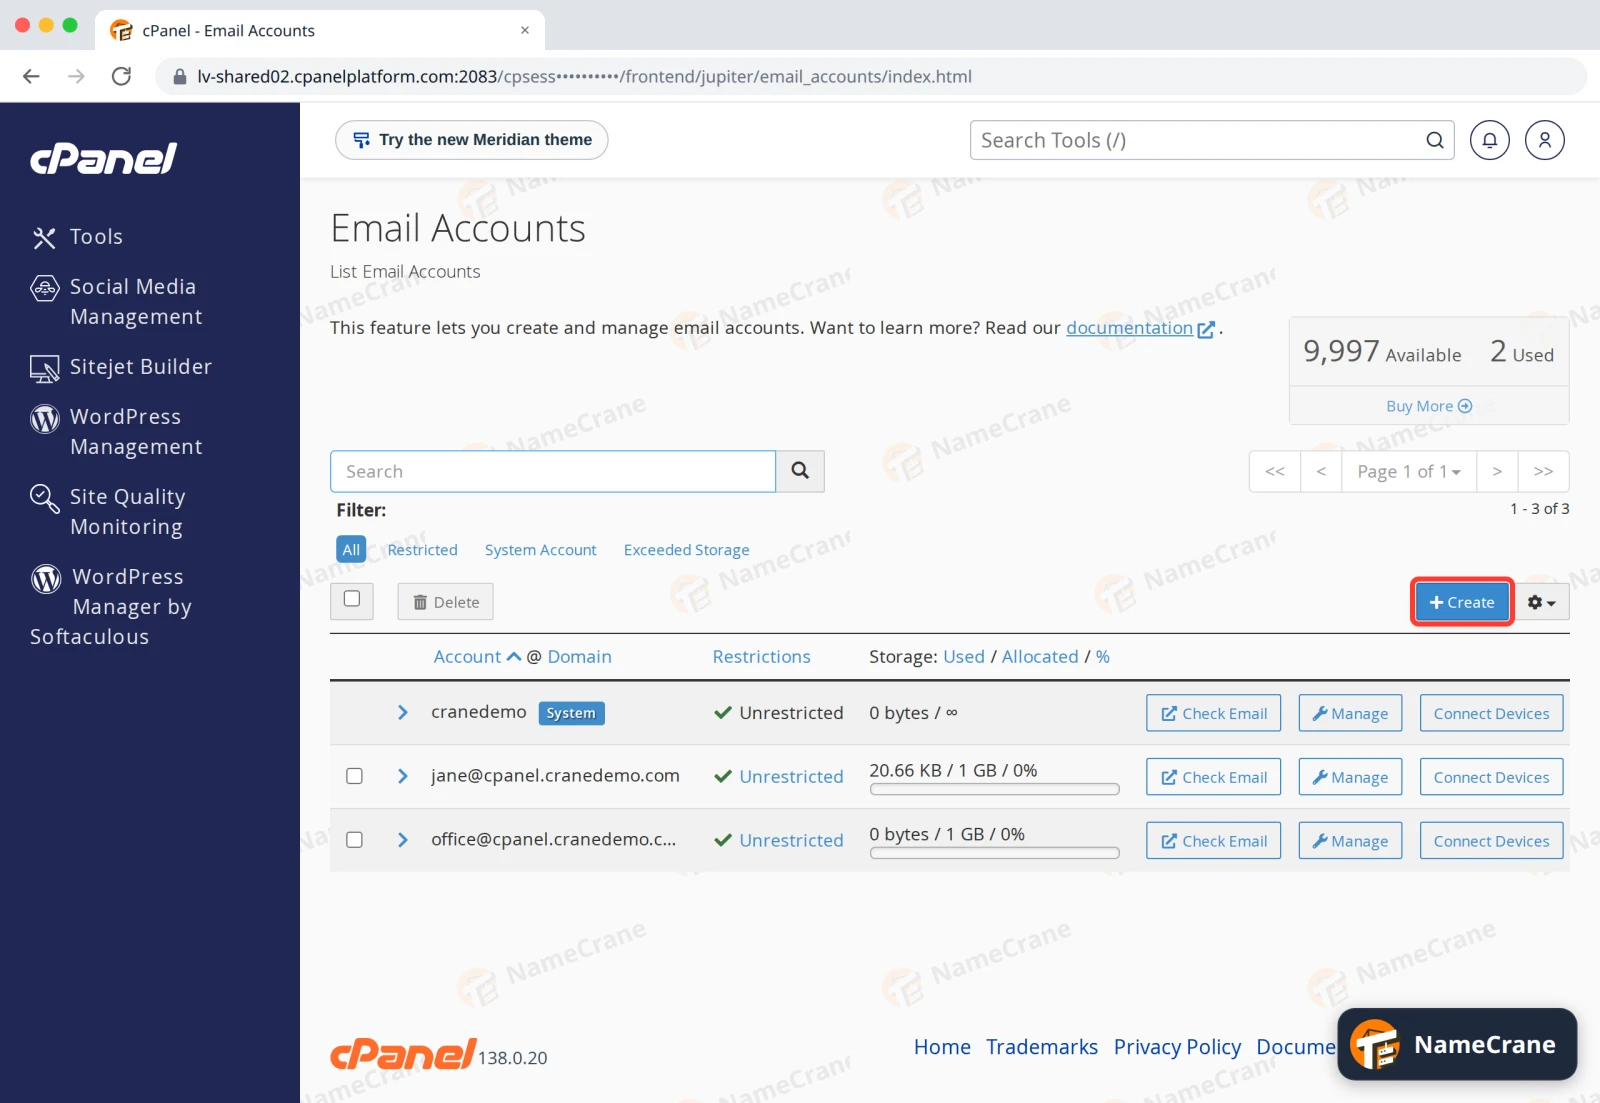
Click + Create.
-
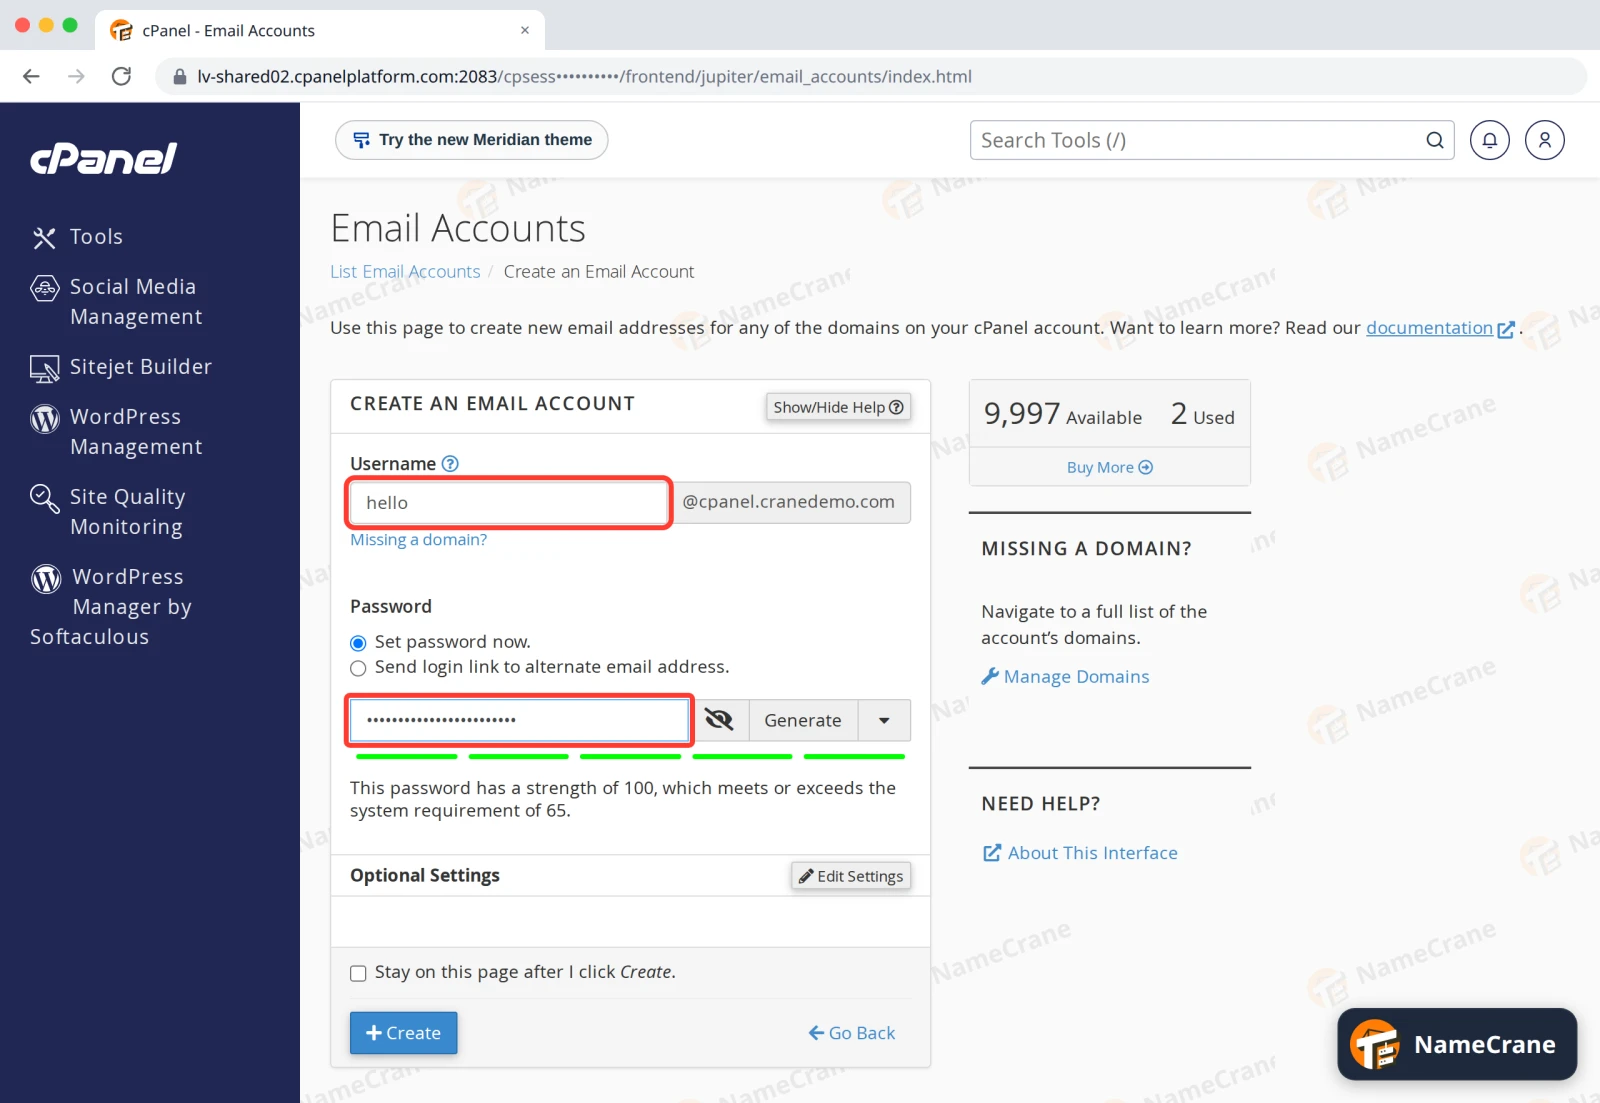
Fill in the details:
- Username: the part before the @, such as
hello. If you have more than one domain, choose the right one from the menu next to it. - Password: choose Set password now and type a strong password, or click Generate to make one. The bar underneath must reach the minimum strength.
- Prefer to let the person choose their own? Pick Send login link to alternate email address instead.
- Username: the part before the @, such as
-
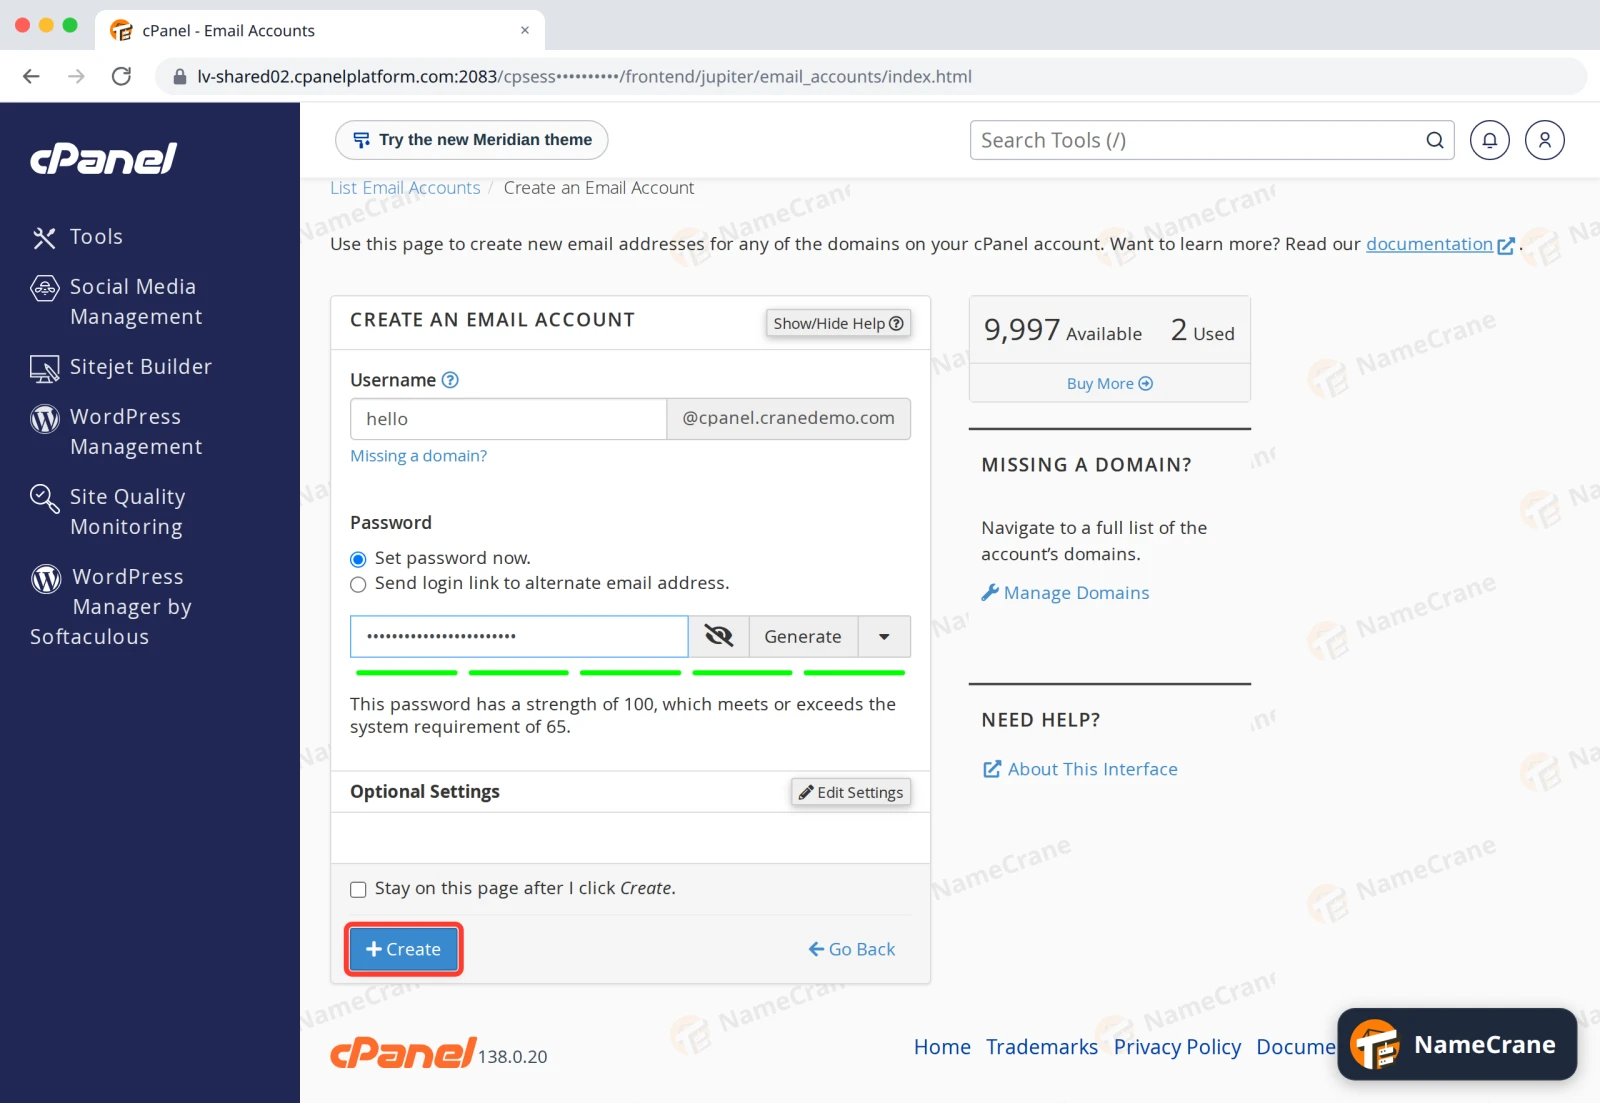
Optionally click Edit Settings to change the mailbox’s storage space (1 GB by default). Then click + Create.
-
You’ll see Success: You created “hello@yourdomain.com” and the new mailbox appears in the list.
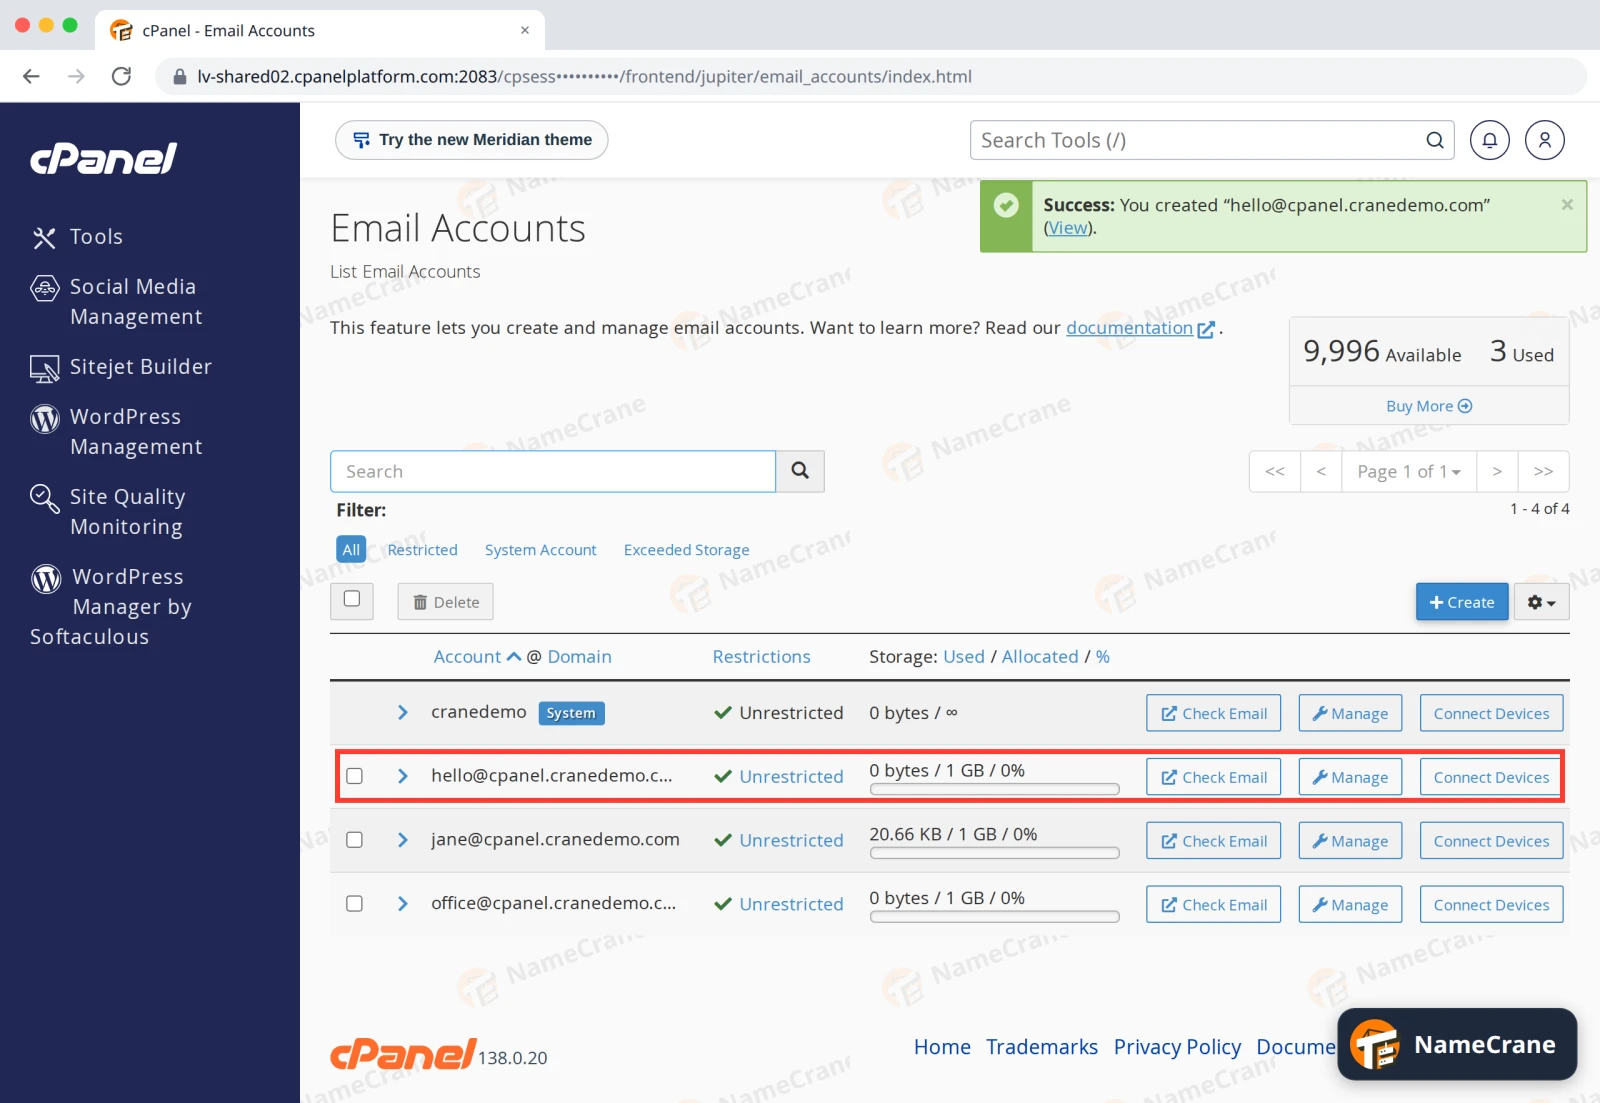
Tip: Click Connect Devices next to the new account for the exact settings to use in your email app. Or follow our guide to setting up email on your phone or computer.
Troubleshooting
| Problem | What to do |
|---|---|
| “The password does not meet the minimum strength” | Make it longer and mix in capitals, numbers and symbols, or click Generate. |
| The address already exists | Each address can only be created once. Look for it in the list and use Manage to change its password instead. |
| My domain isn’t in the list | Add it to your account first under Domains. |
| The mailbox is full | Click Manage next to it and increase its storage, or delete old email. |
Snagged on something? Contact support and we’ll get you sorted.