How to Upgrade or Downgrade a Customer's Package in WHM
Last updated Changelog
On this page
When a customer needs more room, or moves to a cheaper plan, change their package. Their disk space, bandwidth and other limits switch to the new package’s straight away, and nothing in their account is deleted. In this example we move clientcranedemo from cranedemo_Starter to cranedemo_Business.
You’ll need the new package to exist first. See Create a hosting package.
Steps
-
Log in to WHM. Type
downgradein the search box at the top left, then click Upgrade/Downgrade an Account under Account Functions.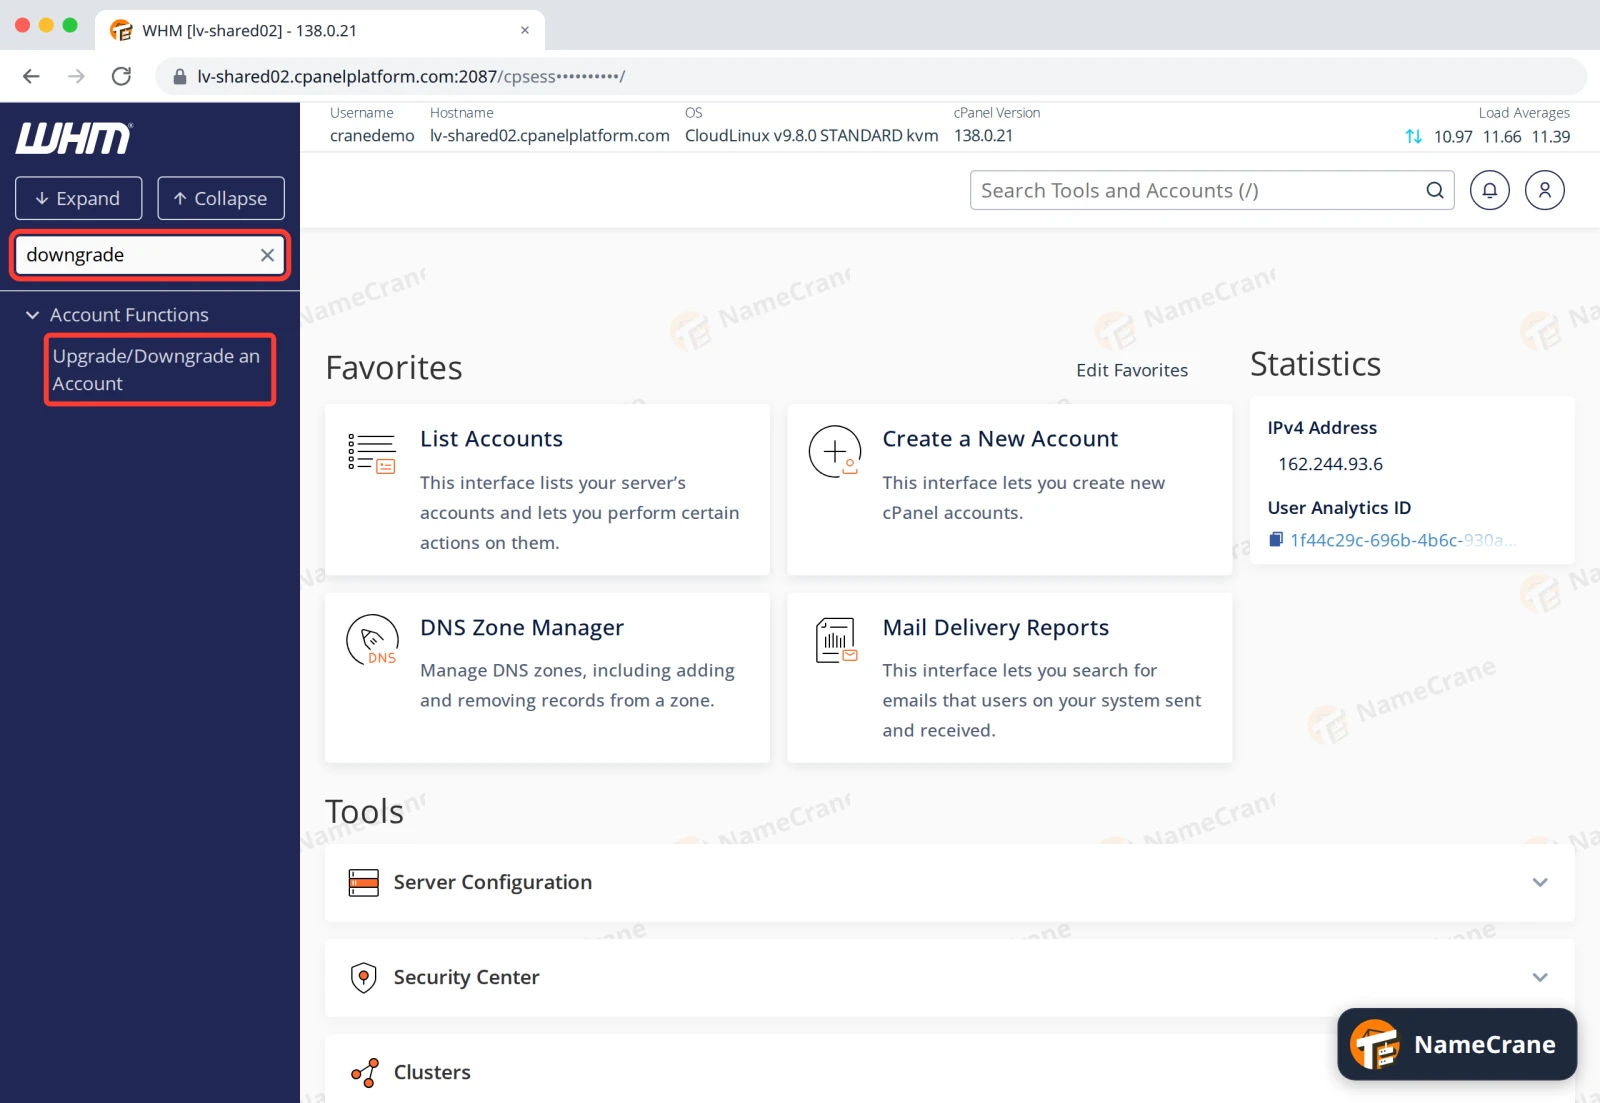
-
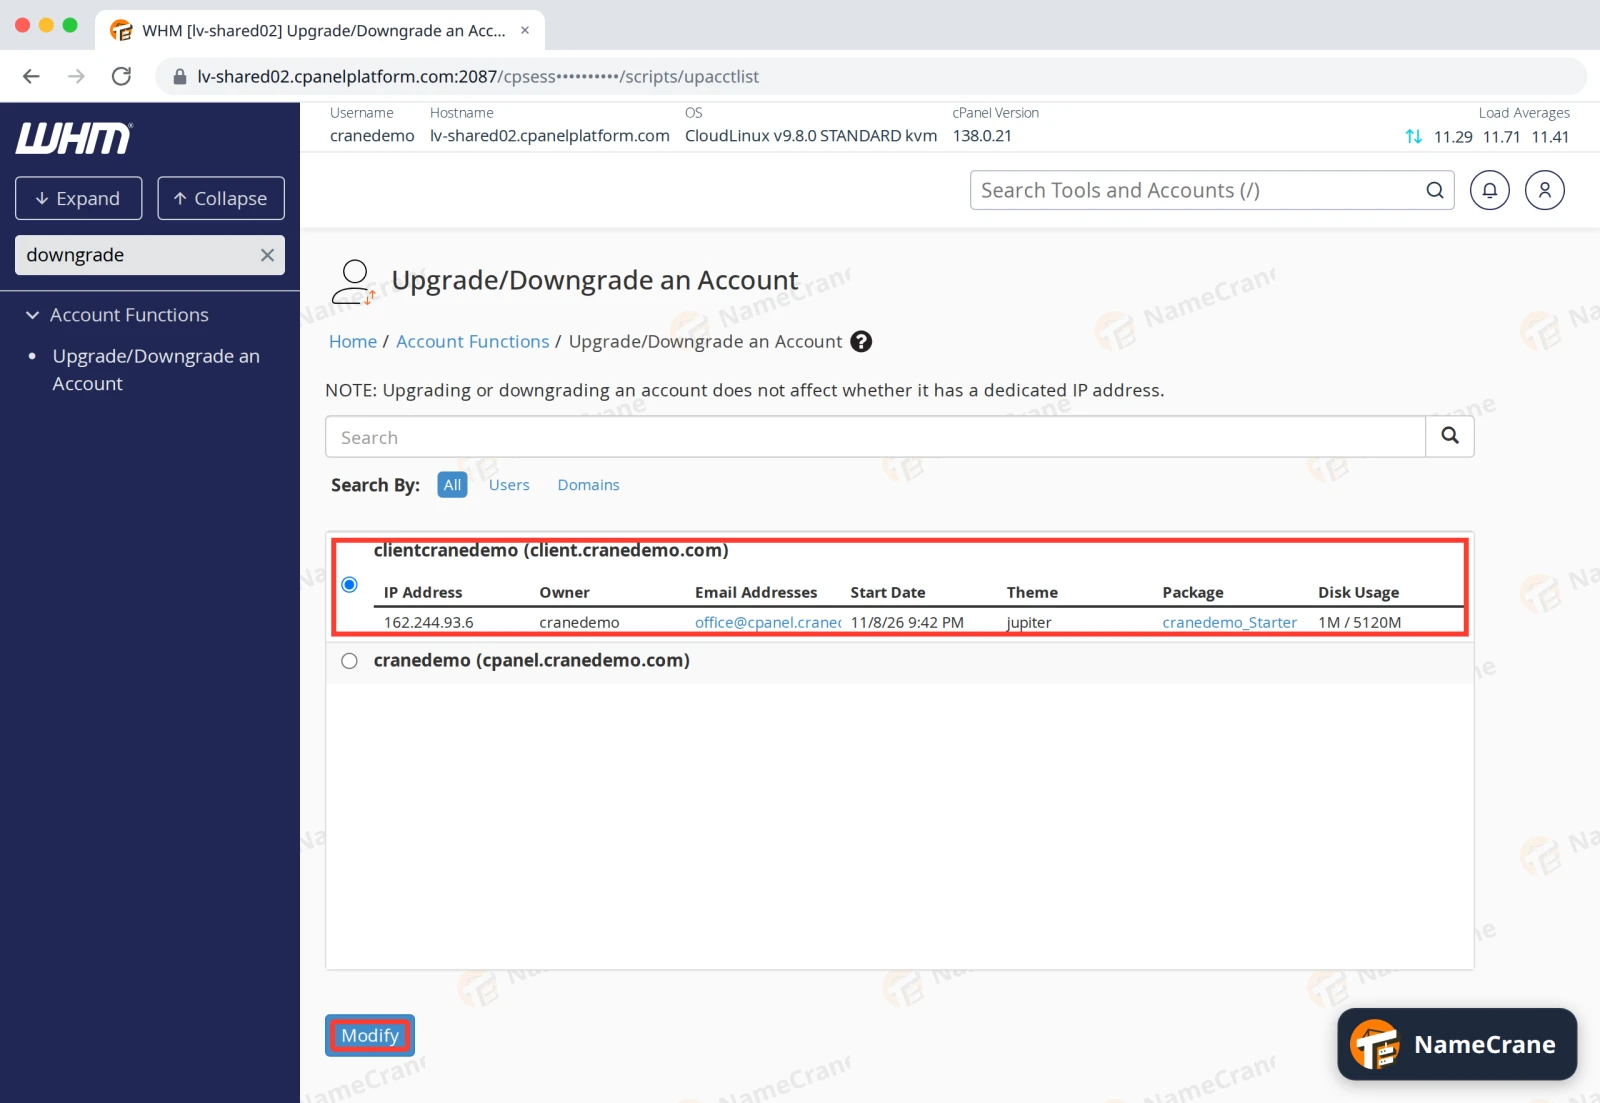
Choose the customer’s account and click Modify.
-
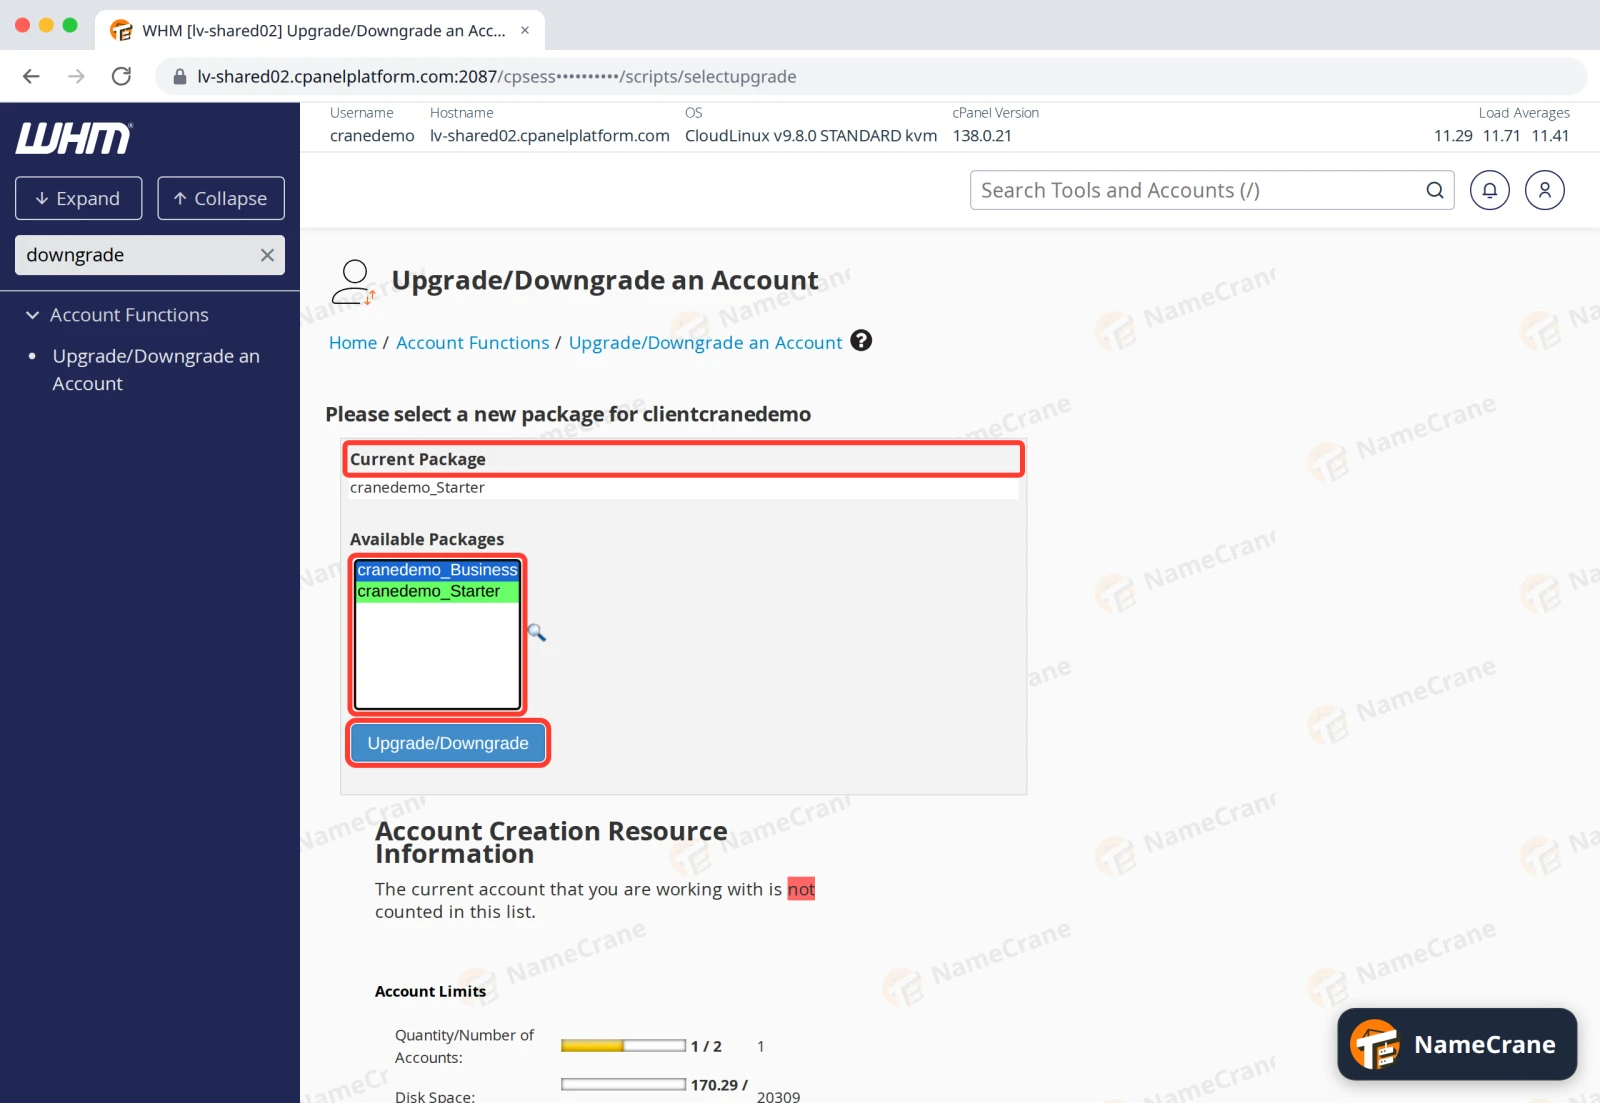
Current Package shows the package they’re on now. Click the new one under Available Packages, then click Upgrade/Downgrade.
-
WHM shows Account Upgrade/Downgrade Complete, with a line for each limit it changed. In our test, the new disk space applied straight away.
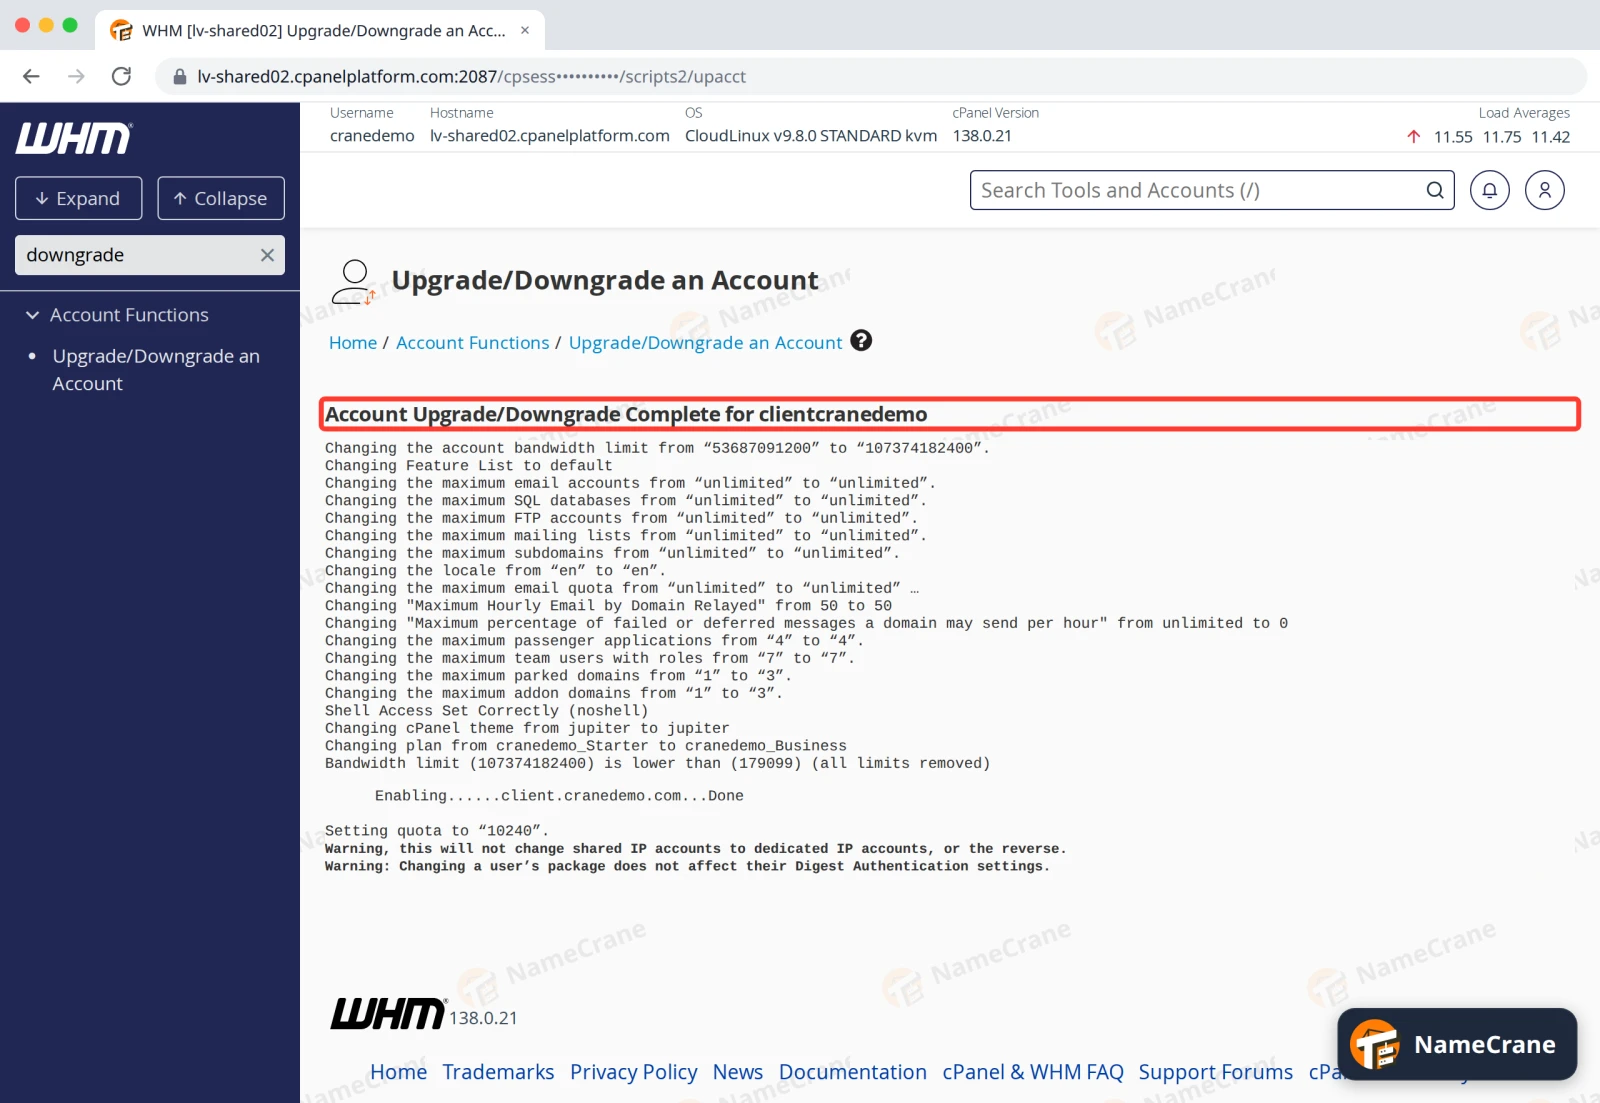
Note: Changing the package doesn’t change the account’s IP address. Its domain, files, email and databases stay as they are.
Before you downgrade
Check how much the customer uses in List Accounts (the Disk Used column). If they use more disk space than the smaller package allows, they can’t save new files or receive new email until they free up space.
Troubleshooting
| Problem | What to do |
|---|---|
| The package I want isn’t in the list | Create it first. See Create a hosting package. |
| The customer is over their new disk space | Ask them to delete old files or email, or move them back to a bigger package. |
Snagged on something? Contact support and we’ll get you sorted.